Whenever you’re at home feeling bored but in the mood to do something fun and interesting…. go craft something. DIY crafts are always fun and rewarding and there’s a ton of cool ideas to choose from.

There are so many you’ll probably spend time choosing the perfect one. Let’s narrow it down a little. Below you can find our favorite DIY crafts and projects we think you should try.
How to Make DIY Crafts at Home
DIY crafts are a great way to spend the afternoon and can be used to build a side income. But how can you be sure that you aren’t going to cause damage to your home in the process? Below are a few tips to help you make DIY crafts at home.

Tip 1: Cover All Surfaces to Prepare for DIY Crafts
Whether or not your craft is described as messy in the directions, you should take the time to cover all surfaces of your home that you will be working on. This can be as simple as putting paper down on your table, or you may need to pick up a tarp to cover the furniture for larger projects.
Tip 2: Follow the Directions for DIY Crafts
Although you may be tempted to start experimenting with DIY crafts, it’s best to follow the instructions until you are sure you know how to make a specific project. That way you will know that the product you are making works and lessen your chances of injury or damage to your home.
Tip 3: Test Any Load Bearing Crafts
Making a stool? Or maybe a DIY fireplace mantle? Before you stack your important and breakable things on these DIY crafts, take a minute to test them out. Put a little weight on them (maybe some rocks or books that won’t get damaged). One the DIY craft item proves it can hold the weight you want to place on it, then start putting your valuables on your DIY craft.
Tip 4: Check That You Have all Supplies Before You Begin DIY Crafts
There is nothing more inconvenient than starting a DIY craft project and then realizing you skipped something on the supplies list. You could also jeopardize your project when you do this. Avoid the problem and double check your supply list before you begin.
How to Make Money with DIY Crafts
Looking to make DIY crafts so you can amass a little extra cash? It is definitely possible. You’ll want to follow a few steps to get started.
[TAG2]
Step 1: Master One or a Few of the Many DIY Crafts
Before you can sell something, you need to master making it. Otherwise, you won’t be able to fill the orders when they begin to flood in. Therefore you should spend plenty of time perfecting your craft before moving on to step 2.
Step 2: Find a Platform to Sell Your DIY Crafts On
Next, you will want to find a place to sell your crafts. There are many websites that offer these services. You will want to compare a few of them to find out which is the best deal for sellers and which you would feel the most comfortable building a business relationship with.
Changing platforms later is very annoying. It is better to take your time now and ensure the platform you choose is right for you.
Step 3: Have Your DIY Crafts Products Ready to Go
You may think that it is easier to make crafts as people order them, but there is a chance you could receive more orders than you can handle at once. For this reason, you should have at least some products in stock before you open your shop.
Step 4: Pricing Your DIY Crafts
Remember, you are doing this to be profitable. While you are making this stock, write down everything you spend to make your products. Then, calculate how much it costs to make a single product. You’ll want to take shipping into account as well, ensuring that your items are priced high enough to still leave you with a profit at the end of the day.
Sound like a good idea? All you have to do now is find a craft you can master and sell. Scroll down to check out or list of 50 DIY crafts that could be made and sold for a profit.
What DIY Crafts Can You Make Out of Paper?
[TAG3]
Many people don’t think they can do DIY crafts because they don’t have the funds to get started. What you may not know, is that there is a whole host of DIY projects that can be made from paper, which costs almost nothing. Some of these DIY crafts are even nice enough to sell.
DIY Paper Crafts:
- Flowers(Can be made large and used as wall décor)
- Butterflies
- Paper orbs
- Bowls (can be used for storing and organizing)
- Accordion paper wreath
- 3D paper wall stars
- Paper chain snake
- Baskets
- Hanging décor
- Photo box
- Bracelets
As you can see, you don’t need a lot of money to get started with DIY crafts, just some paper and your imagination will do.
What Homemade DIY Crafts are High in Demand?
The specific homemade crafts that are high in demand will change frequently depending on the market, as well as the tastes of consumers. Therefore, it can be difficult to pin point exactly what craft to make that will fly off the shelves.
Currently, these are the types of DIY crafts that are high in demand:
- Items that are laser printed
- Crocheted pieces
- Items that can be personalized
- Pet stuff (homemade treats and outfits)
- Custom made jewelry
- Wooden furniture pieces
If you don’t see your favorite craft on this list, don’t despair, as your DIY craft could be the next big thing. Remember that you never know until you try.
What DIY Crafts Can You Do When You Are Bored?
For those feeling a bit bored, DIY crafts are the perfect way to fill your time. You not only will have something to do to cure your boredom, but you will also be creating a project that you can probably use around your home.
These are the best DIY crafts to do when you are bored:
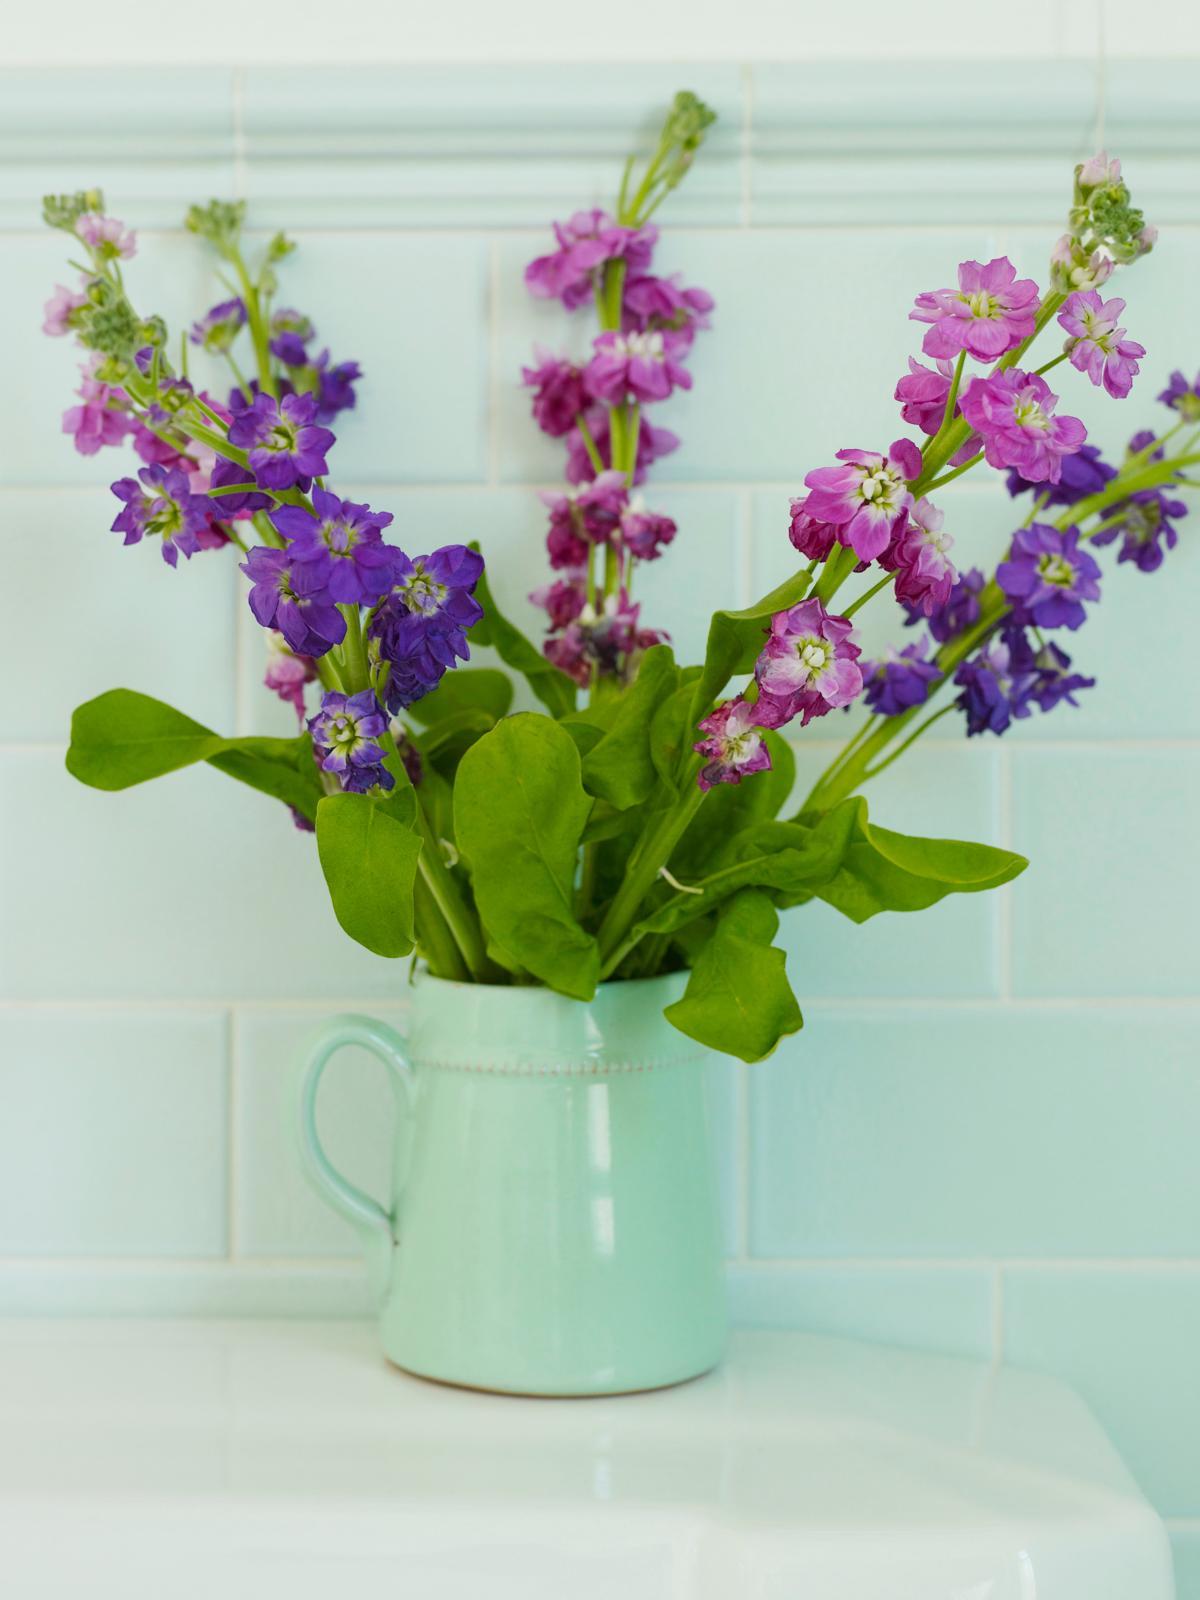
- Decorate a vase
- Create your own coasters
- Fashion paper flowers
- Paint artwork for the walls
- Make your own spice containers
- Decorate a boring picture frame
- Tie dye a white shirt
- Make organizers for your desk and other drawers
- Learn to crochet items
- Make planters for your garden (or an indoor terrarium)
Easy DIY Crafts for Every Room in Your Home
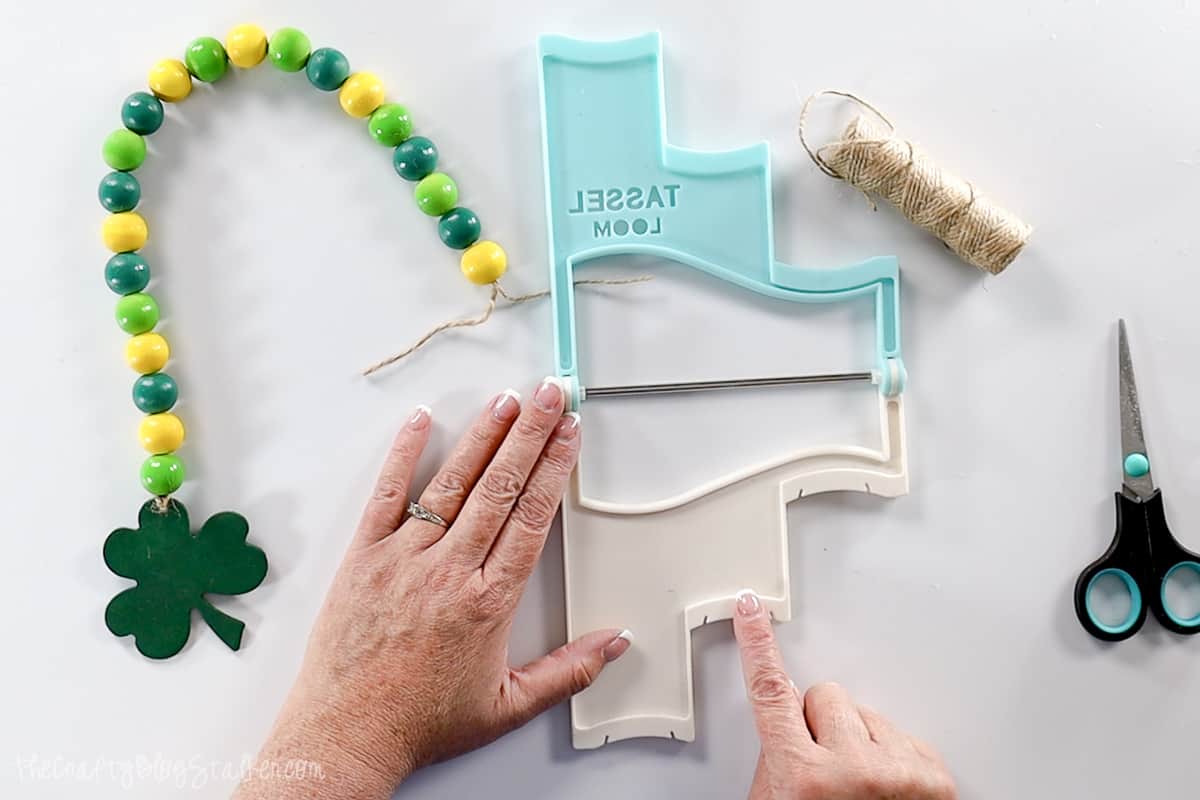
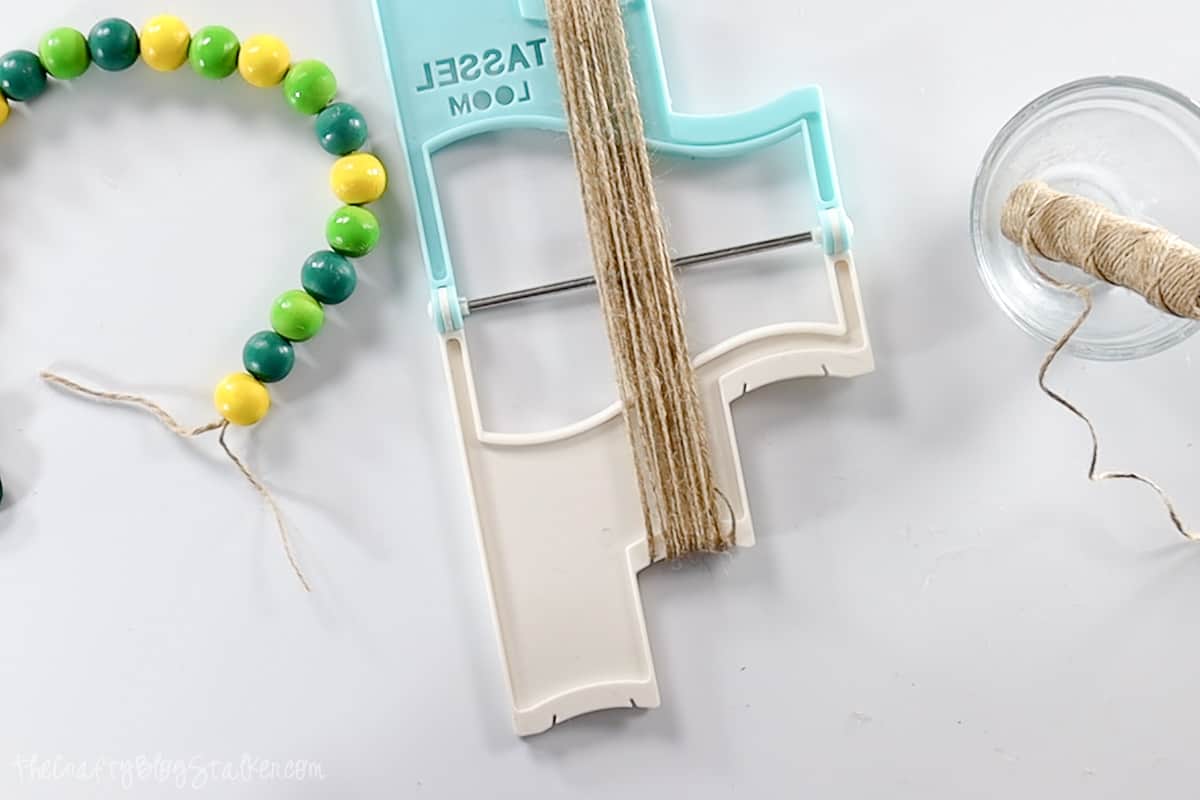
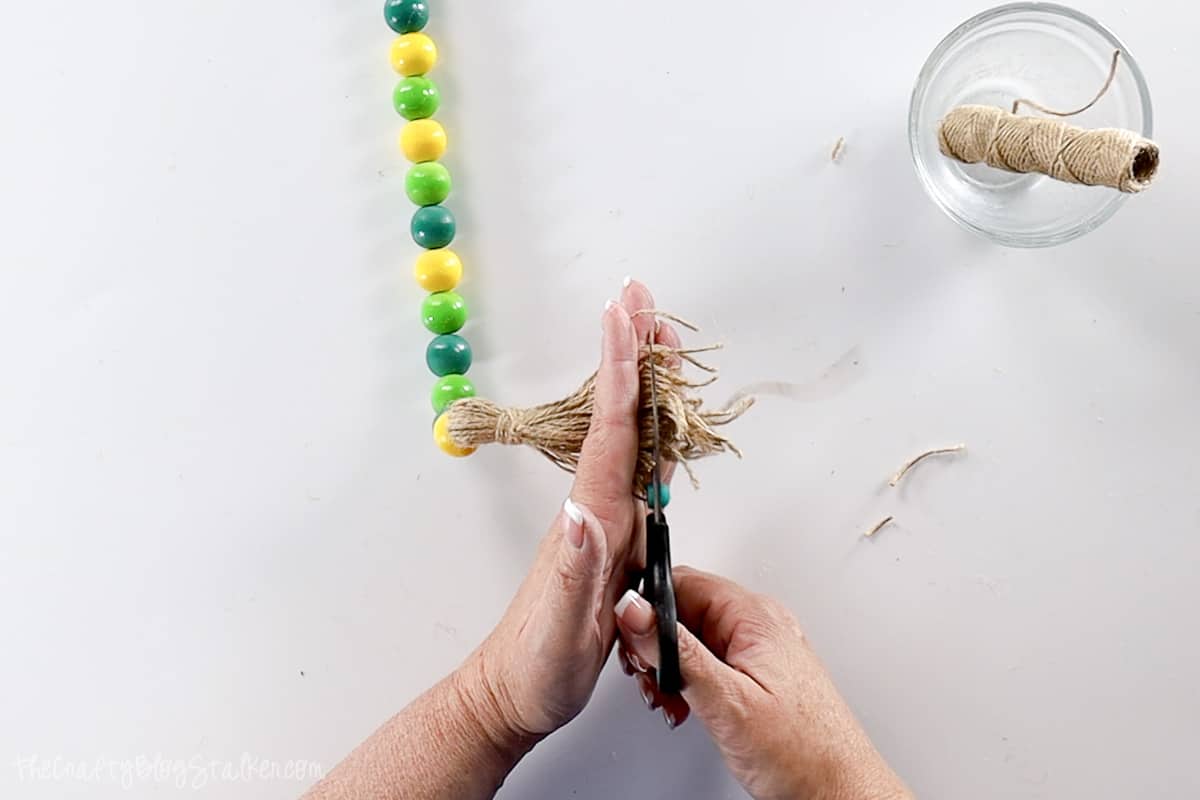
1. Yarn Billy Ball Bouquet Craft
[TAG4]
Want to add some color to your home? Flowers are always a nice idea. The real ones can be a handful and don’t really last long so if you want something long-term then craft some faux flowers. This yarn billy ball bouquet looks super cute and you’ll be pleasantly surprised to find out it’s really easy to make as well.
2. Fabric Flower Pillow Decor
[TAG5]
Accent pillows are great for making a room look and feel extra warm and cozy but they’re not really of much help if they blend in too much. Luckily, there’s an easy way to fix that by decorating the pillows with fabric flower embellishments. All you need is some fabric scraps, scissors, a needle, and some thread and surely you must be able to gather these things with ease.
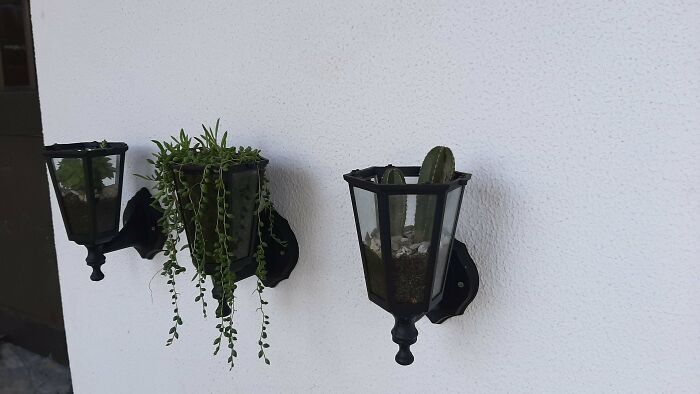
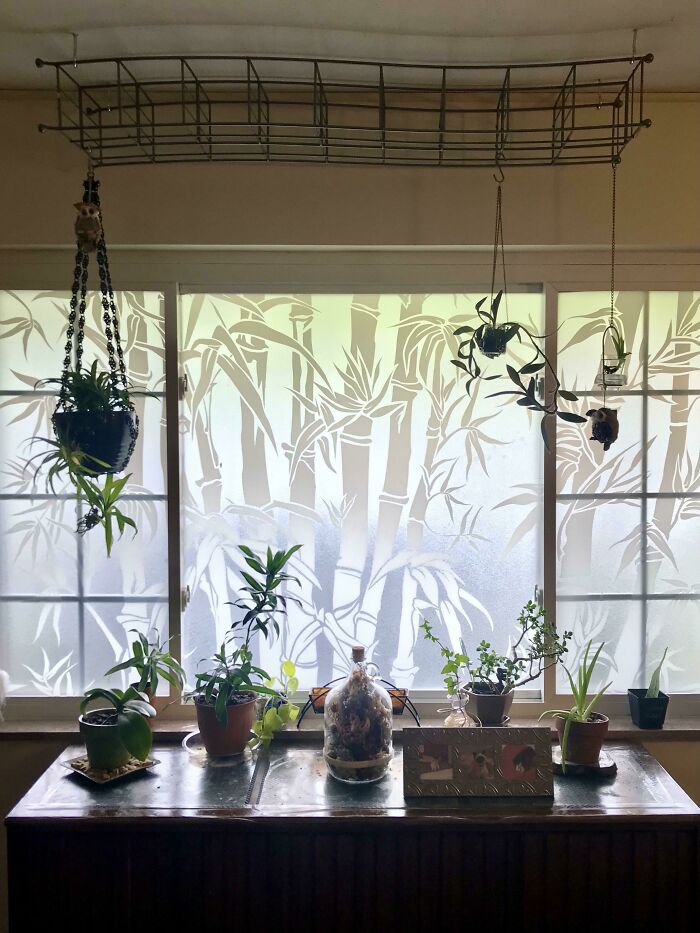
3. Test Tube Flower Display
[TAG6]
This is a really cool way of using test tubes. The project is simple, unusual, and quirky, exactly the kind that stands out and sticks in your brain. You can make this test tube vase even more interesting by using a piece of driftwood or reclaimed wood for the base.
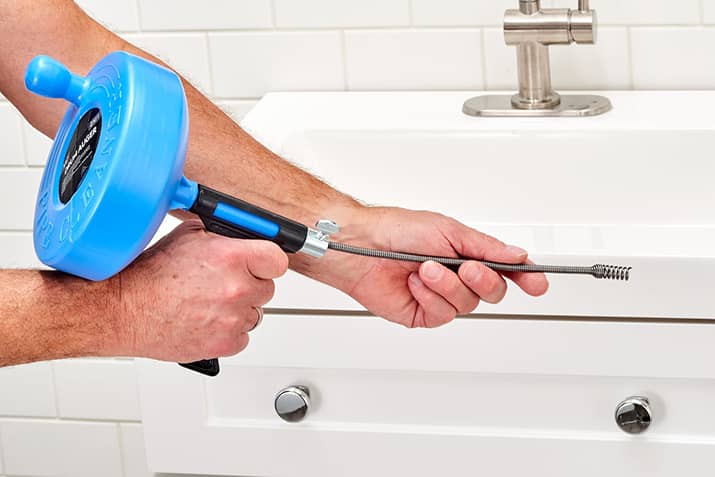
4. Mason Jar Soap Dispenser
[TAG7]
A nice-looking soap dispenser can really brighten up the bathroom even though it may not seem like much. It’s the details that give a space charm and make it special.
With that in mind, we thought you’d enjoy the look of this Mason jar soap dispenser which is really easy to do. The only thing that takes a bit of time is waiting for the paint to dry so once that’s out of the way it’s all pretty much done.
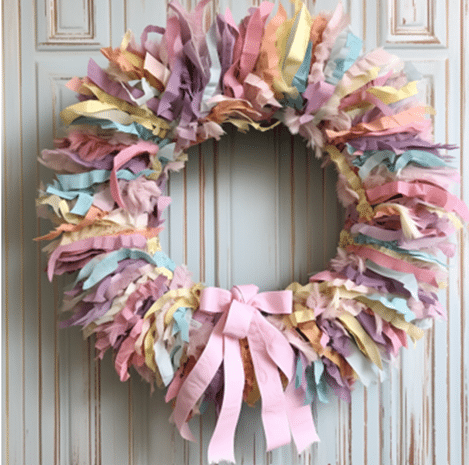
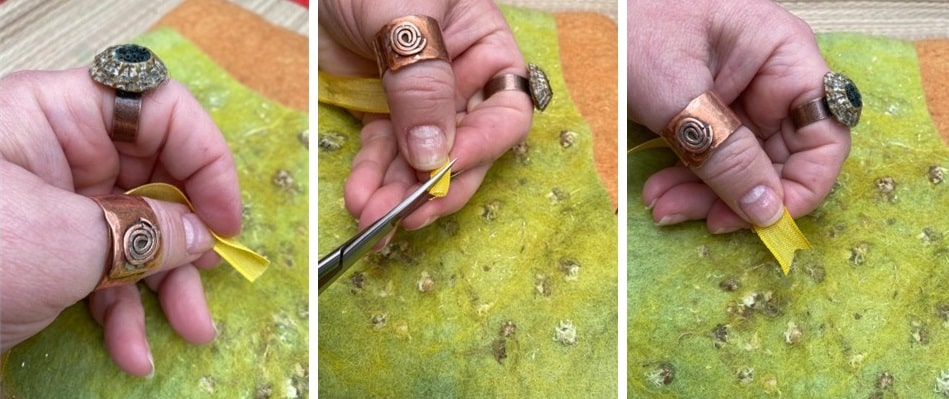
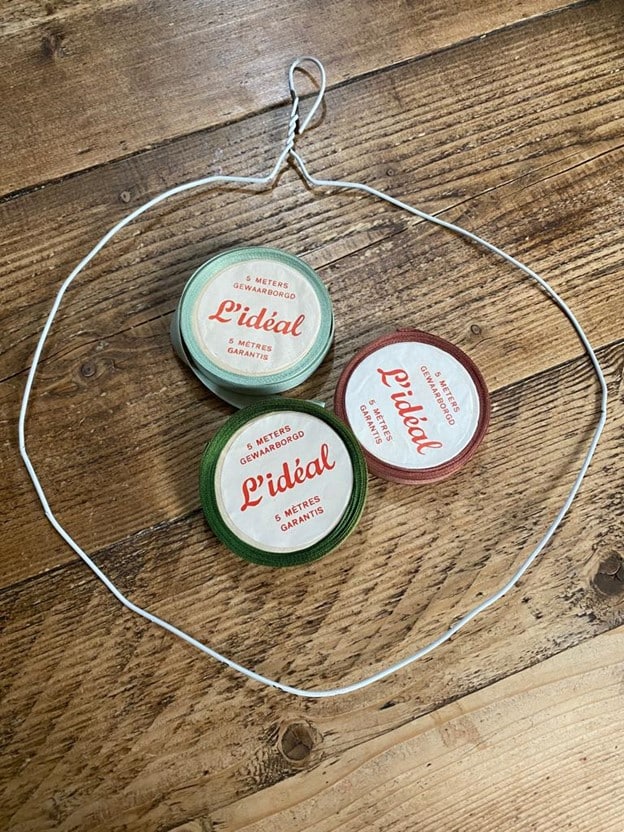
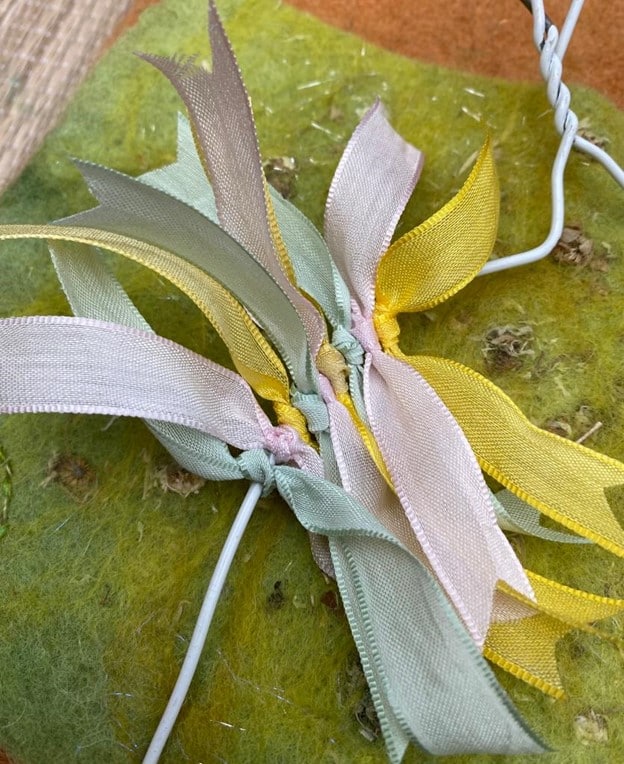
5. DIY Spring Napkin Rings
[TAG8]
These floral napkin rings look absolutely adorable and they’re made with succulent clippings and flowers. They capture the fresh beauty of spring with their design and they’re perfect for any special occasion. You can potentially also use faux flowers if you want to preserve the rings for longer.
6. Hexagon Terrarium Base
[TAG9]
Terrariums are great decorations and perfect for preserving little mementos such as seashells, tiny pinecones, and other things. If you have one, perhaps you’d like to make a stylish base for it so it stands out a bit more.
This geometric terrarium base is a nice and fairly simple craft project and you can have it customized however you want, even give it a different shape.
7. Concrete Succulent Planter
[TAG10]
If you’ve never used concrete in any of your DIY projects, now would be a good time to start. This concrete succulent planter is super easy to make and there are lots of different ways in which you can customize it.
Its size and shape are dictated by the container that you choose to use as a mold. To get this look you can use a baking tray.
8. Minimalist Air Plant Stand
[TAG11]
Air plants, as you probably know, are super low maintenance and don’t require soil which means you can display them in all sorts of cool and interesting ways. If you want something simple and small to keep on your desk or to place on a shelf, this air plant stand should work really well. Its base is just a wood block cube with a floral wire sticking out.
9. Paper Star Accent Light
[TAG12]
If you think one of the areas in your home could use a bit of accent lighting in it, this is a really nice to do that. What you see here is a paper star lantern and to make it you need a sheet of poster board, a cord light set, a low temperature light bulb, and some tools. The actual star template that you use can be something you’ve designed yourself.
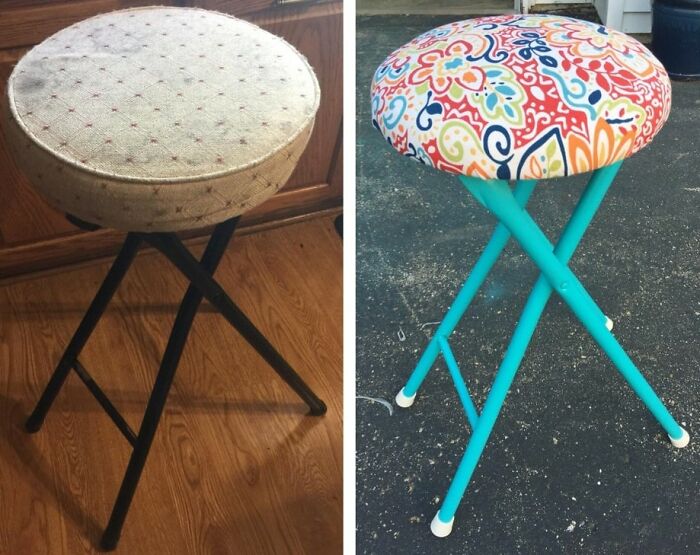
10. Comfy Little Stool
[TAG13]
You might be thinking that making your own furniture from scratch is way too difficult and out of your comfort zone but not all projects are complex or difficult. Some are actually super simple, like this upholstered footstool for example. Anyone can make one of these and it’s a lot of fun to come up with a color scheme and a design for it.
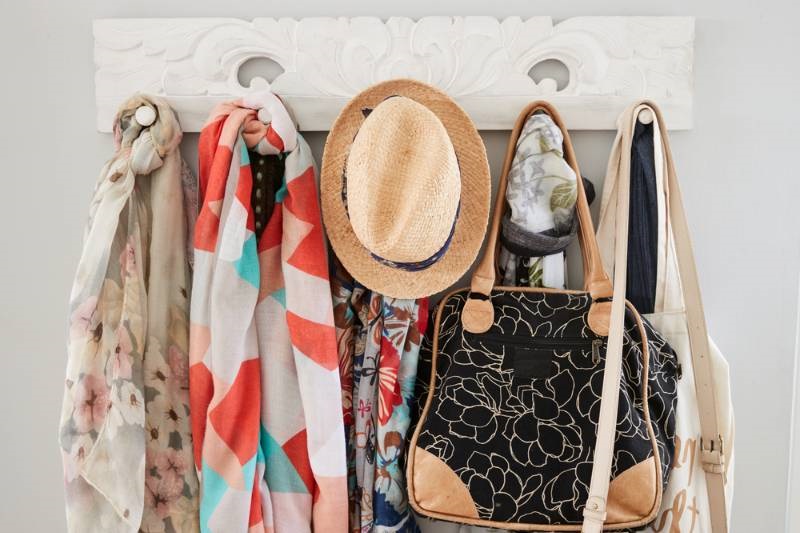
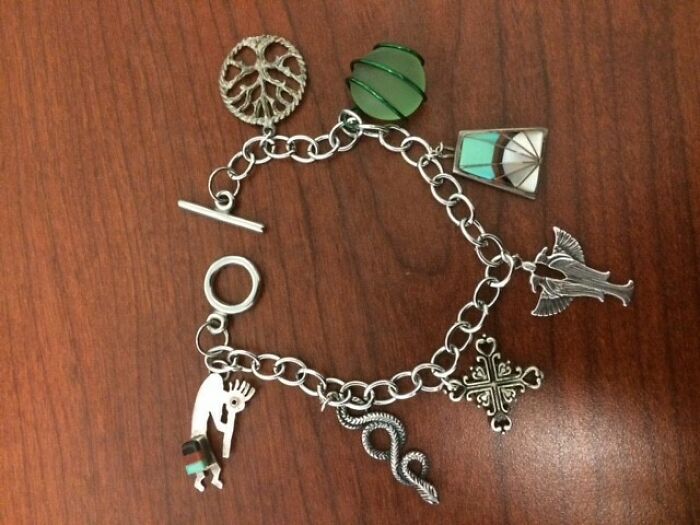
11. Wall Jewelry Holder
[TAG14]
Perhaps your next project can be something useful, something to help you organize your things better. A jewelry holder could be a nice idea.
This one is easy to make and can be customized in lots of ways. You can install it on a wall or any vertical flat surface and it will keep all your necklaces and bracelets organized and accessible plus it will look nice as a decoration.
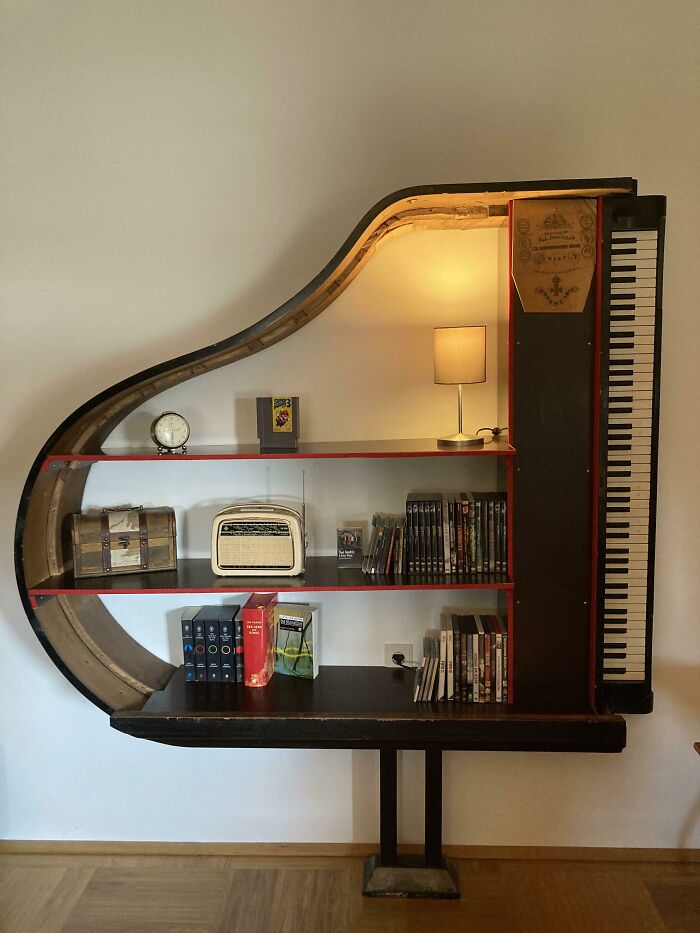
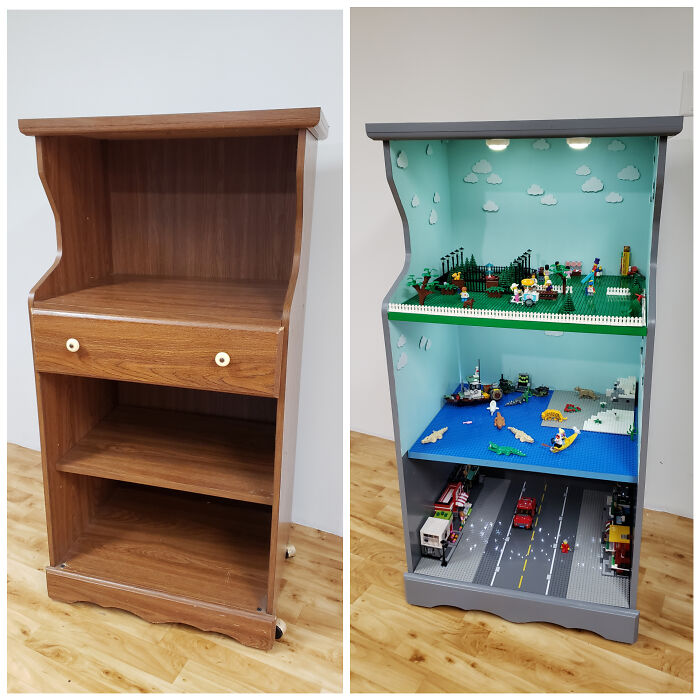
12. Secret Bookcase Hideaway
[TAG15]
You know those secret bookcase entrances and contraptions we sometimes see in movies? They’re pretty cool so how about you make something like that for yourself?
It doesn’t have to be an entire room hidden behind a bookcase but you can surely make a book box hiding spot, like a little secret space where you can hide things and disguise the whole thing as a set of books.
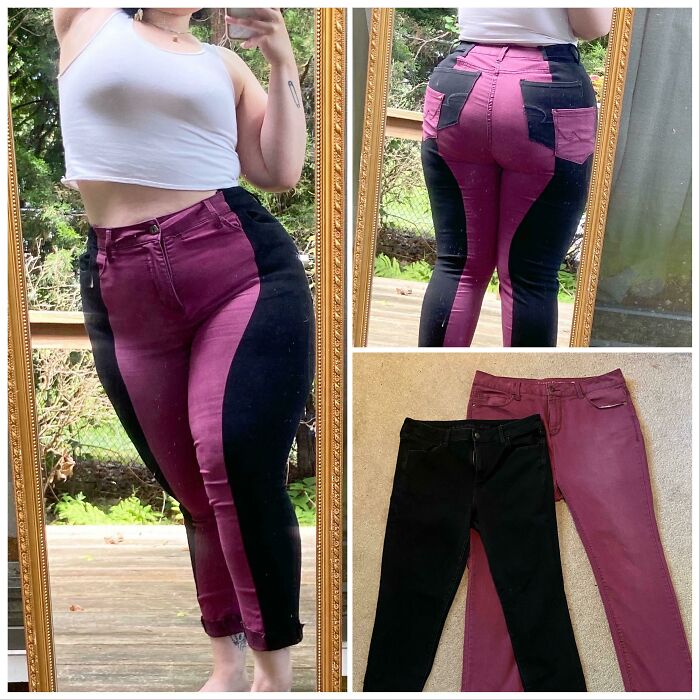
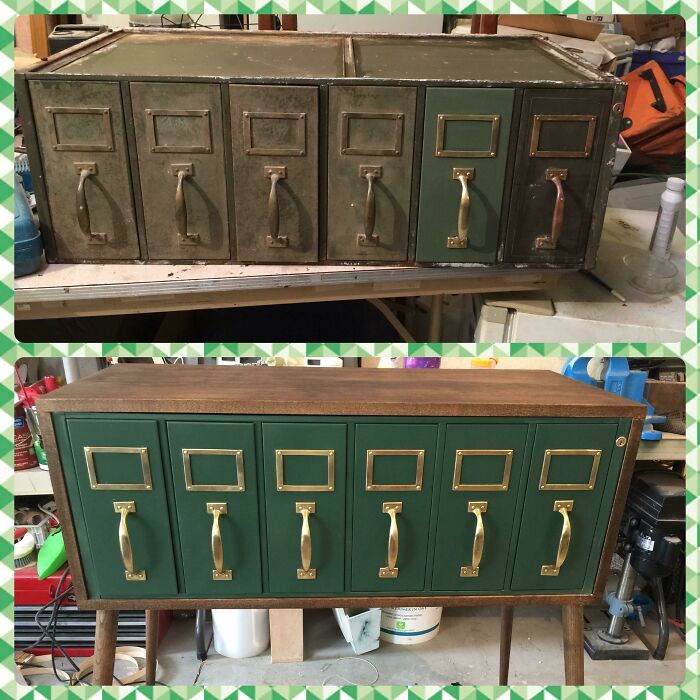
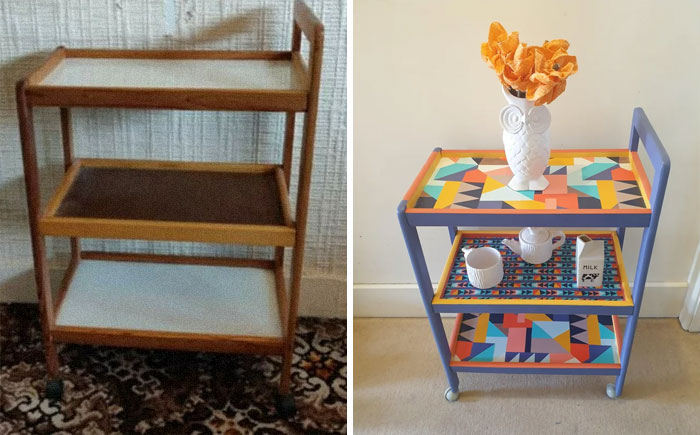
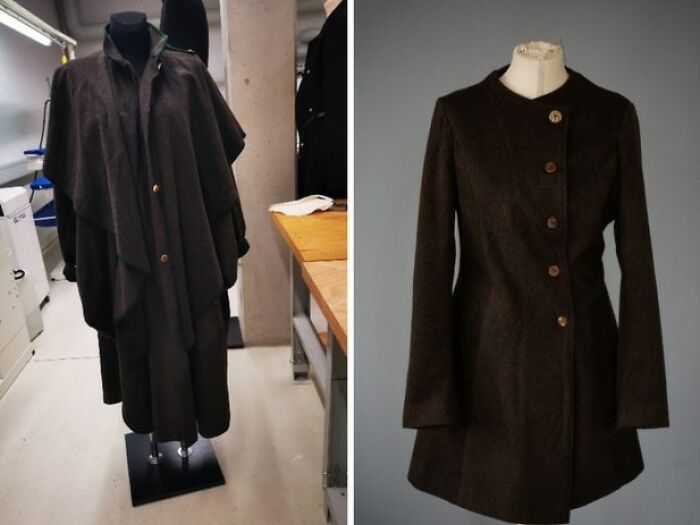
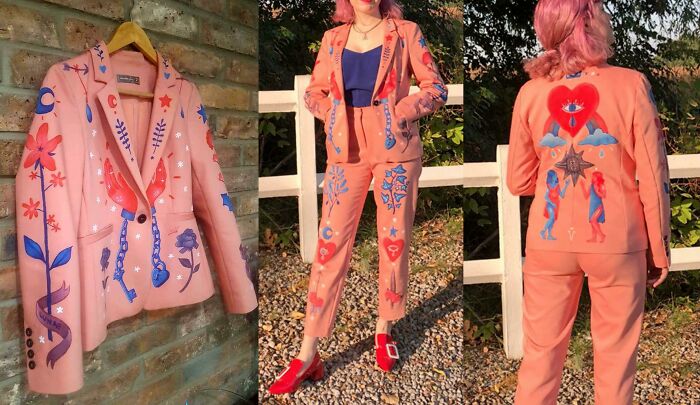
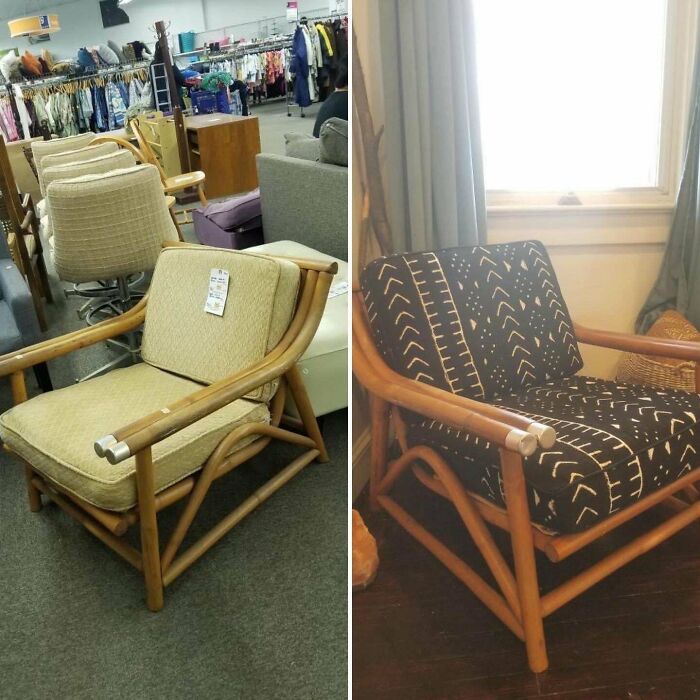
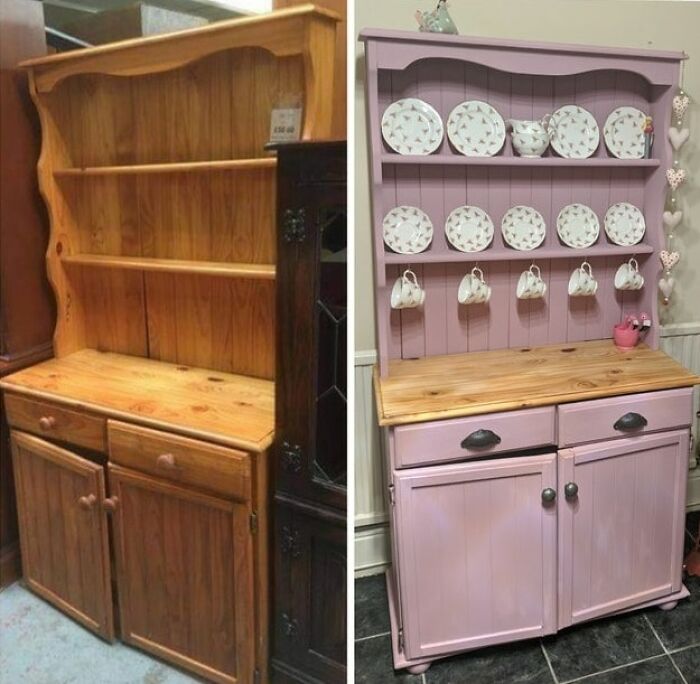
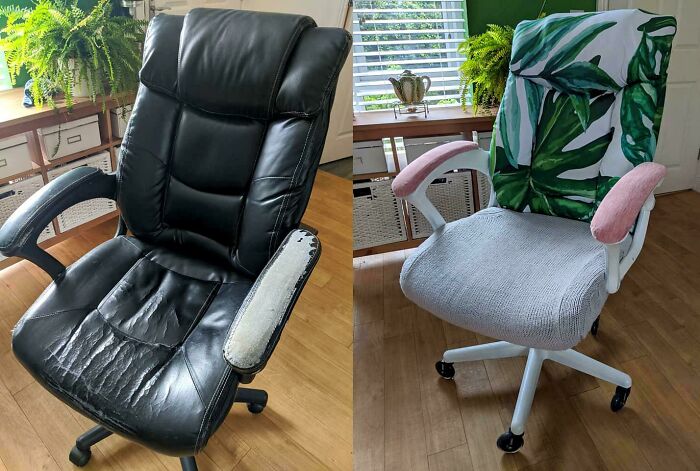
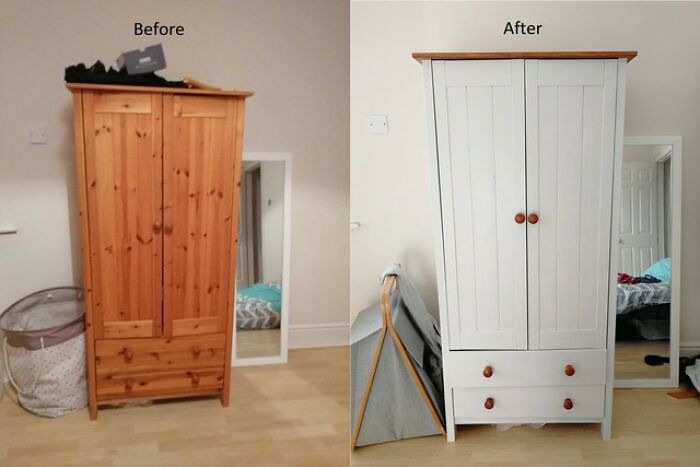
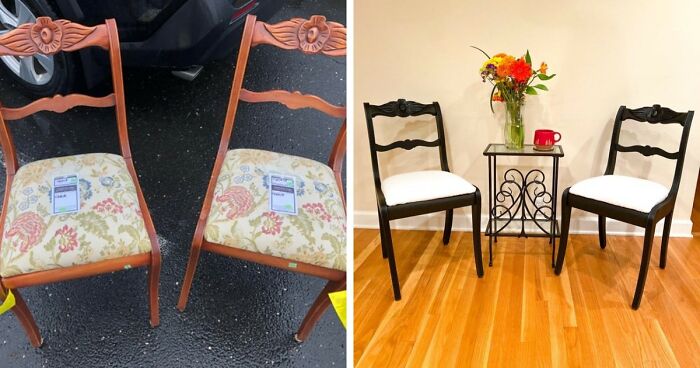
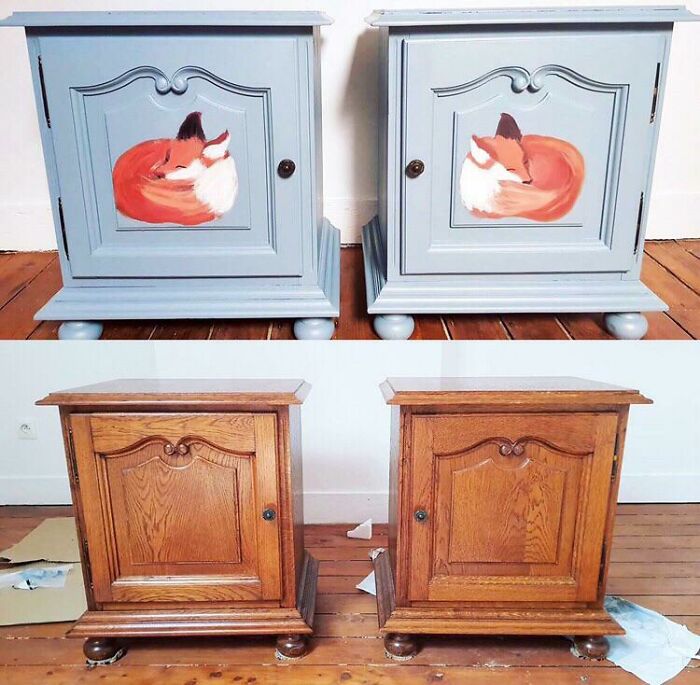
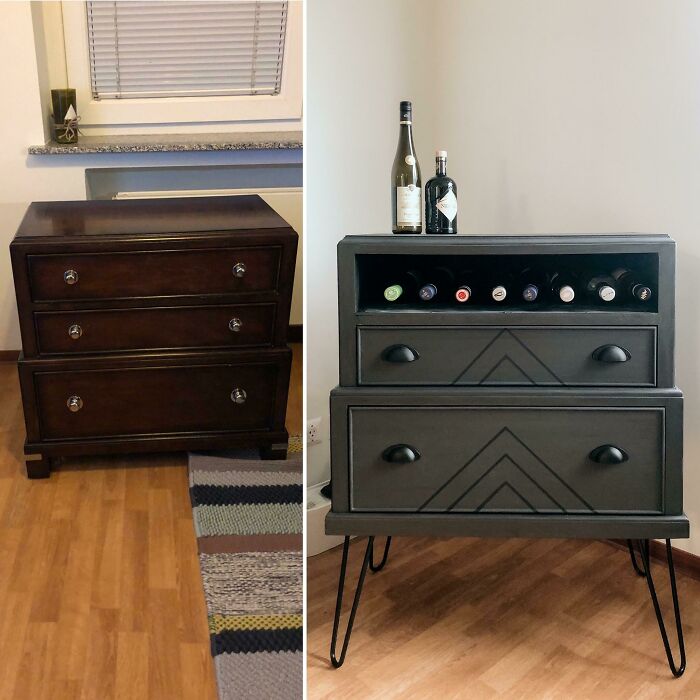
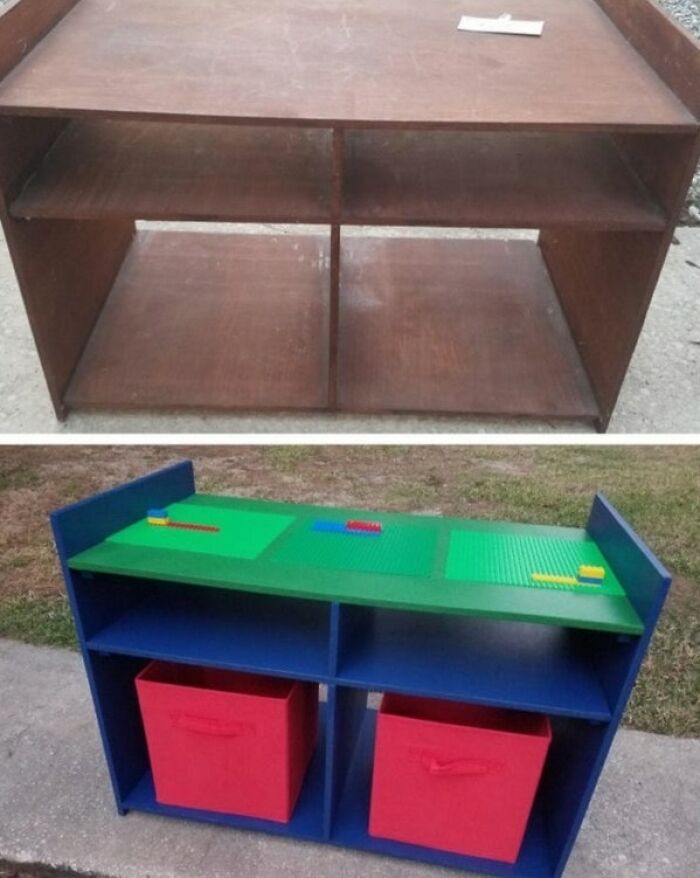
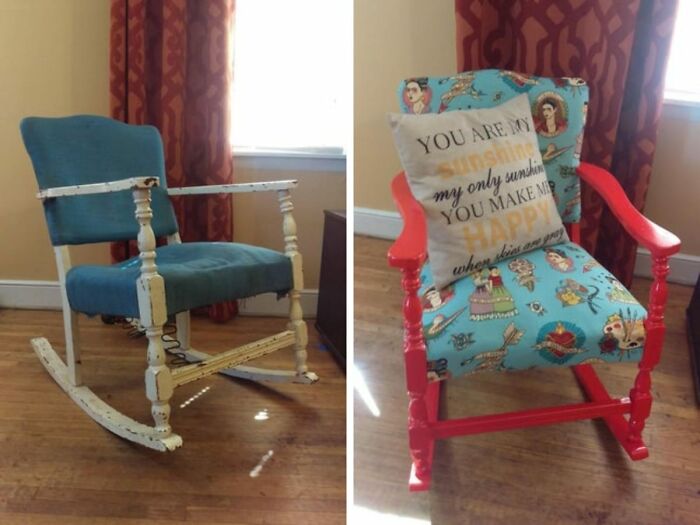
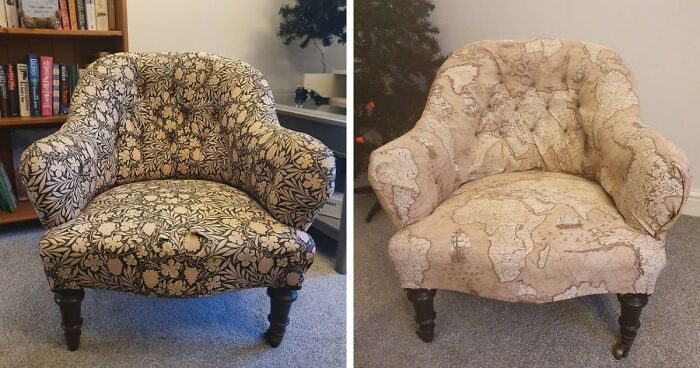
13. Repainted Furniture Upholstery
[TAG16]
Another thing you could do is give some of your furniture pieces a makeover. For example, you can paint vinyl upholstery in case any of your chairs or other pieces have it and that would change the look of the whole room. You can use spray paint for that and it’s actually easiest than you might think.
14. Cork Notice Strip
[TAG17]
Next time you come across a self-adhesive cork strip in a store you should get a roll because it’s a useful thing to have around. You can use it to make all sorts of little things around the house, like this cork notice strip for instance.
You can put this next to your desk or in your kitchen and pin various things like notes, pictures, recipes, shopping lists, and so on.
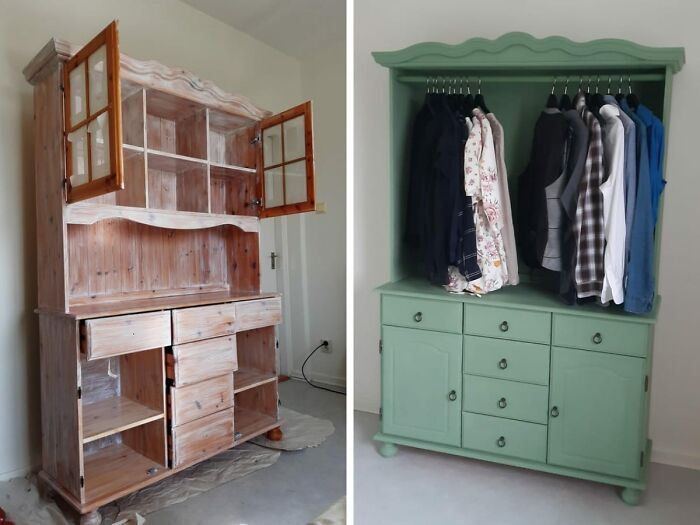
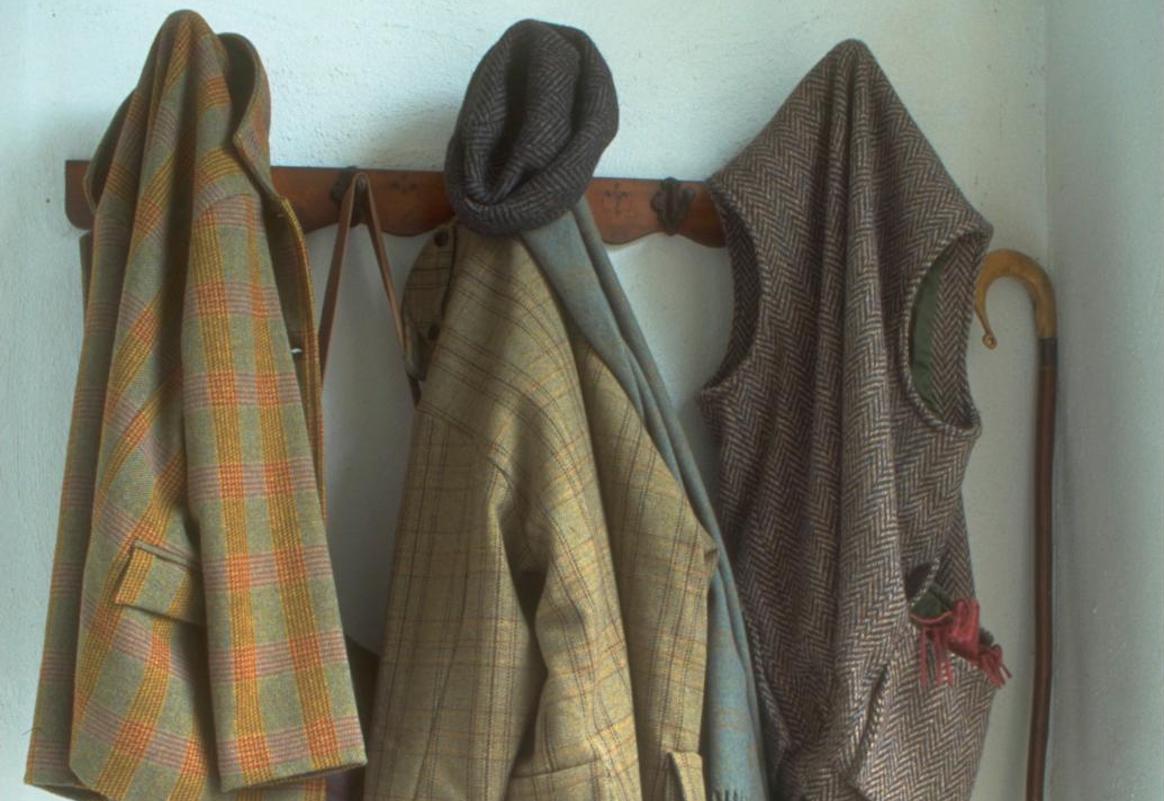
15. Wooden Coat Rack
[TAG18]
Every entryway needs a coat rack. Finding the right one is not easy but you can make things simpler by opting for a wood coat rack that you can make yourself. It can be as tall as you want and you can make it out of any type of wood you think suits your space best.
16. Repurposed Jar Desk Lamp
[TAG19]
Mason jars are awesome because there are so many interesting and practical ways in which they can be repurposed, not just as storage containers but also as something completely unexpected. On that note, check out this mason jar desk lamp and picture all the nice ways in which you can customize it and make it your own.
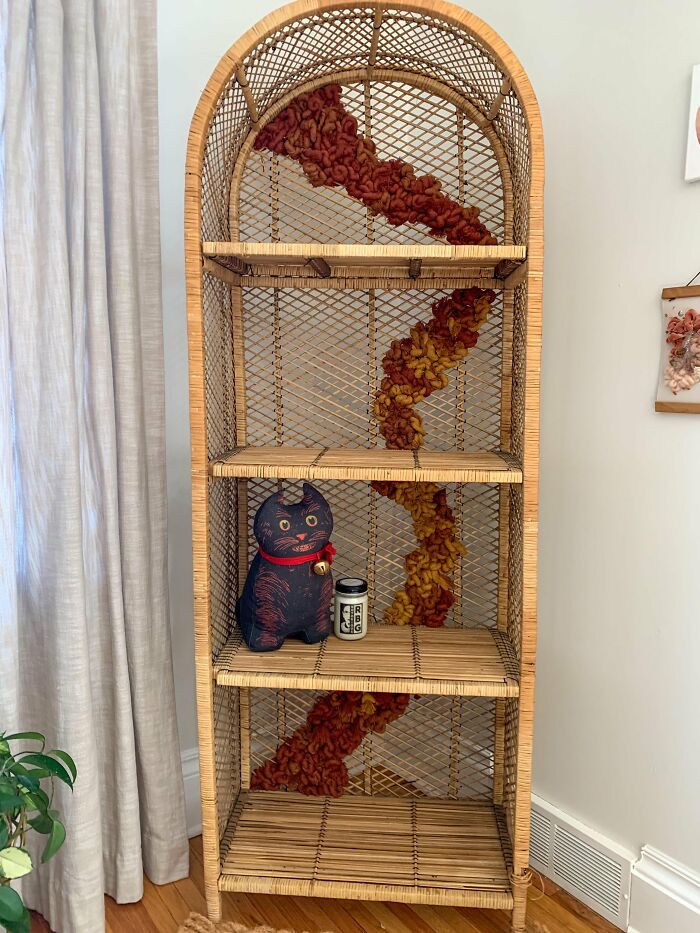
17. Yarn Wall Hanging
[TAG20]
Some things are only meant to be decorative and don’t really serve any practical purpose. They are however what makes a space feel like home.
This yarn fringe wall hanging is a nice example of something simple that you could craft in your spare time. Match it to your existing Bohemian decor and feel free to customize it in any way you see fit.
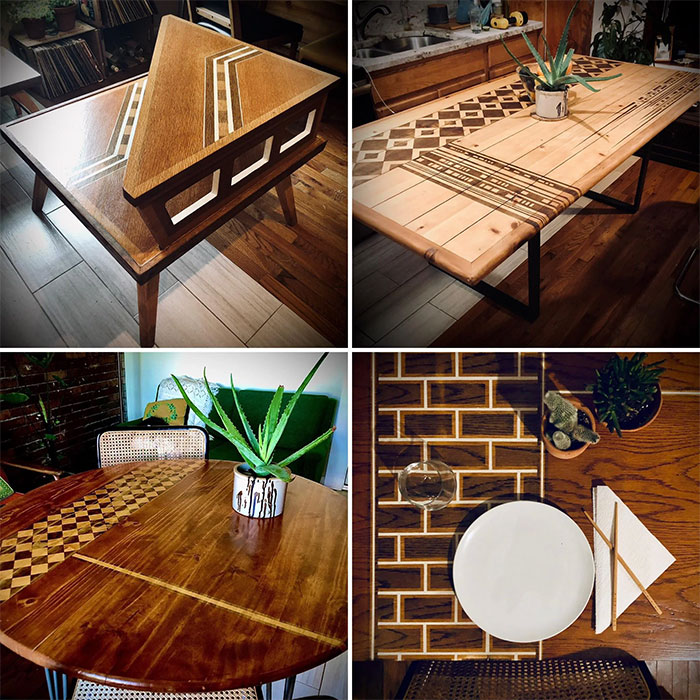
18. Wooden Serving Tray
[TAG21]
If you have a piece of wood handy, one of the things you can make with it is a serving tray. Sand it, stain it, paint it, add handles, and anything else that you think would improve the design and the experience.
You can use this tray when you’re serving drinks and snacks out on the patio or when you’re entertaining guests in your living room.
19. Copper Pipe Magazine Rack
[TAG22]
Pipes are a lot more versatile than you might think, especially when it comes to industrial-style furniture and accessories. You can use them to make all sorts of cool things for your home, like this copper pipe magazine rack for example.
It’s such a simple project. All you need for it is a 2-meter pipe, 12 copper 90-degree connectors, a pipe cutter, and some strong adhesive.
20. Hanging Planter
[TAG23]
In case your patio or the outdoor deck could use some sprucing up, perhaps some planters could do the trick. You could make something yourself out of reclaimed materials. A wooden pallet planter could be a fun little project.
First, you take the pallet apart, then you cut some boards to size, and finally, you assemble the new planter. The best part is adding all the little details at the end.
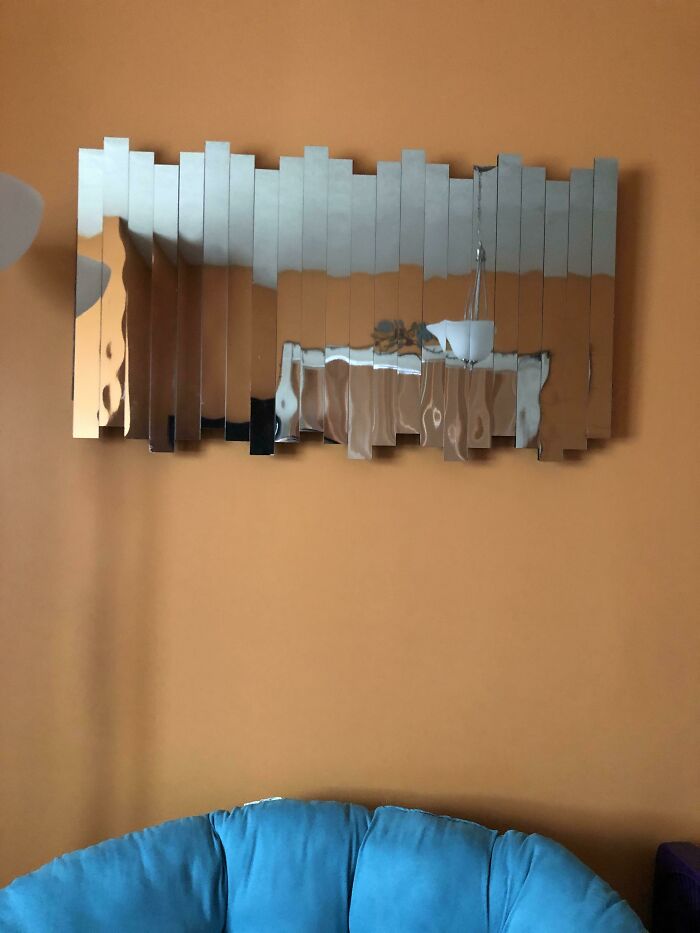
21. Geometric Wall Art
[TAG24]
Paper is one of the most underrated resources when it comes to DIY projects. It’s incredibly versatile and can be used for just about anything.
Some of the best projects involving paper are focused around decorations, like this geo wall art for example. It’s a little something that you can hang on a wall or display on a shelf and even though it’s abstract it and simple it really brightens up the space around it.
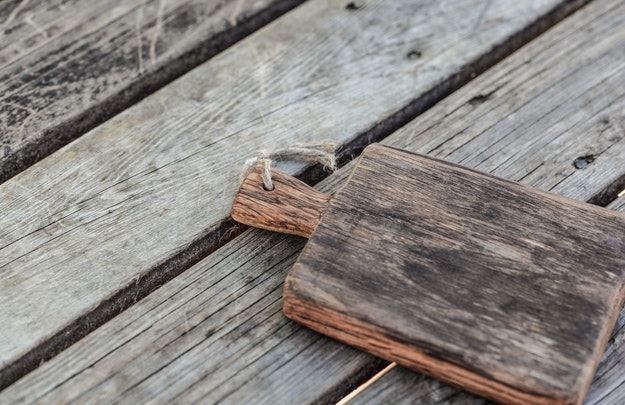
22. Custom Coaster Set
[TAG25]
Making your own coasters is quite fun and satisfying. There are a ton of different designs you can try and lots of different materials that you can use.
If you prefer something minimalist, these X-shaped coasters are probably just what you’re looking for. They’re made of balsa wood strips and they can be painted in any color for like. The black sure suits their minimalism well.
23. Tin Can Planters
[TAG26]
How many times have you thrown away empty cans without even thinking twice about it? After seeing these lovely tin can planters you might reconsider.
They look adorable, and they’re so easy to make you don’t have any excuse not to try this project. They’re great for little succulents or kitchen herbs.
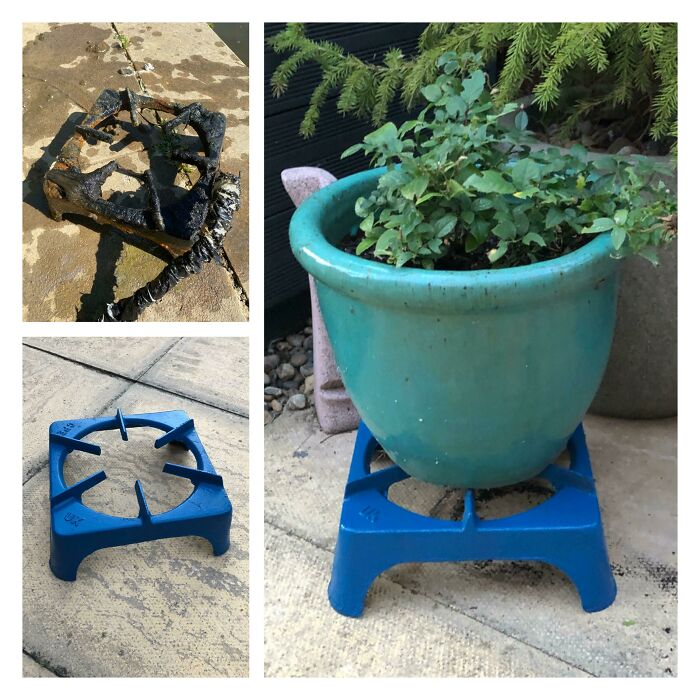
24. Tree Trunk Planter
[TAG27]
On the subject of DIY planters, there are a lot of different things that can be repurposed in order to make something really beautiful and special. A tree trunk or a log piece, even a tiny one, can be an amazing resource.
Drill out the center to make a hole for the soil and the plant. Also, it might be nice to spray paint a section of your new tree trunk planter just to add a bit of color to it.
25. Mason Jar Centerpiece Crafts
[TAG28]
You can also put a few different glass jars to good use and make a lovely Mason jar centerpiece for the dining table. You can decorate the jars with seasonal items such as flowers, twigs, twine, tree clippings, etc.
This design right here has a nice fall-inspired vibe. If you’re making a spring or a summer centerpiece, something more colorful would look great.
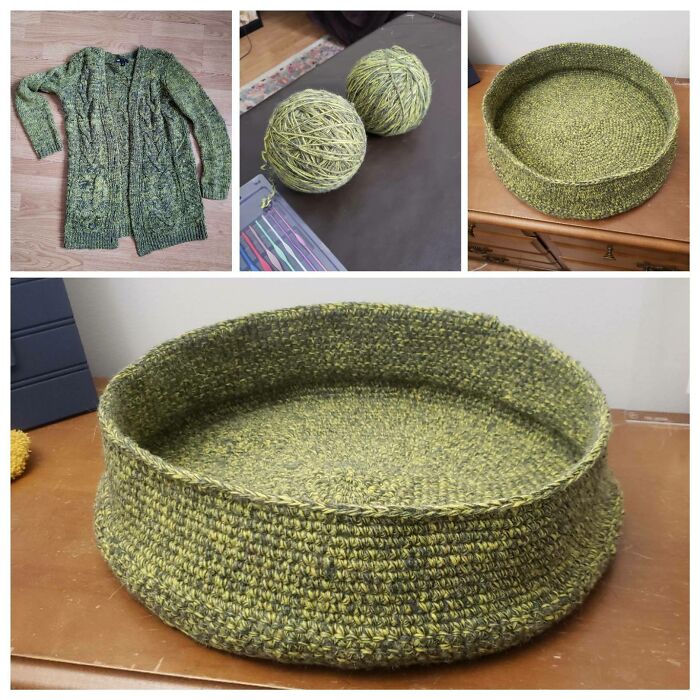
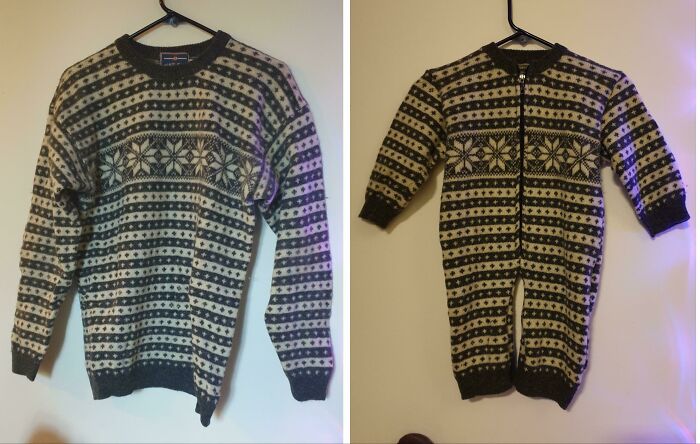
26. Knitted Planter Cover
[TAG29]
There’s not a lot you can do with an old sweater but there are still a few cool and interesting ways to repurpose it. One of the things you can do on a lazy afternoon when you’re bored is to turn a sweater into a planter cover.
It’s a cute little idea if you want to add a warm and cozy touch to your decor. This would make a nice winter project.
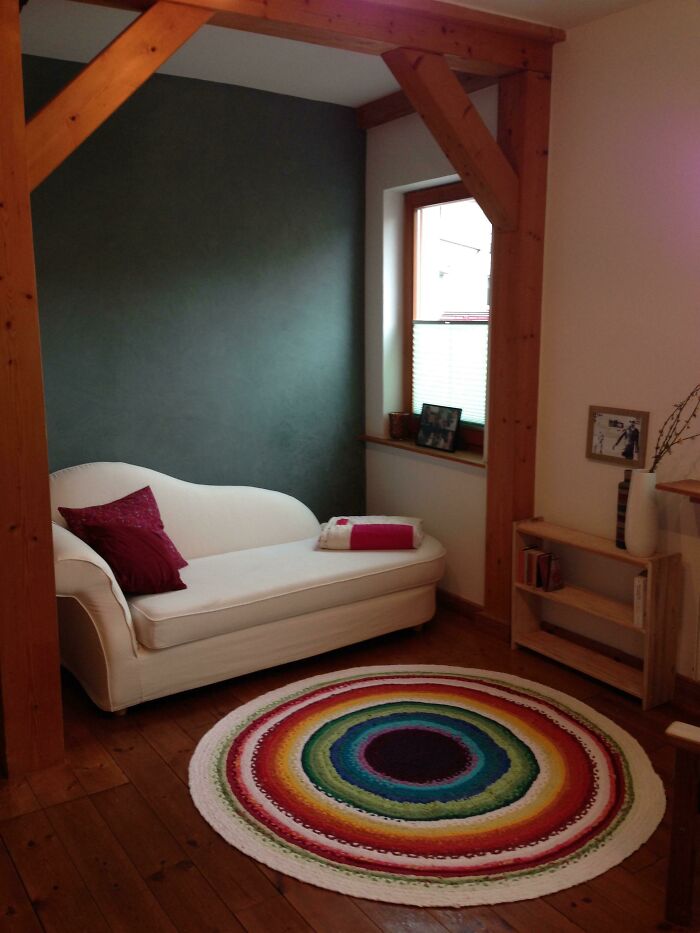
27. String Wall Art
[TAG30]
If you have some leftover yarn from previous projects, it might be nice to use it to make some string wall art for your home. Mix and match different colors based on the supplies that are available to you.
All you need is a wooden dowel and a bunch of yarn, and you can make something eye-catching that makes your home feel extra cozy and inviting.
28. Woven Basket Lampshade
[TAG31]
Baskets are great not just as storage containers but also for some more unusual projects. A woven waste paper bin may not seem like a very interesting item but wait until you see it turned into a basket lampshade.
You can do something similar for your entryway or perhaps for the home office or the bedroom as a way to add some texture to the decor.
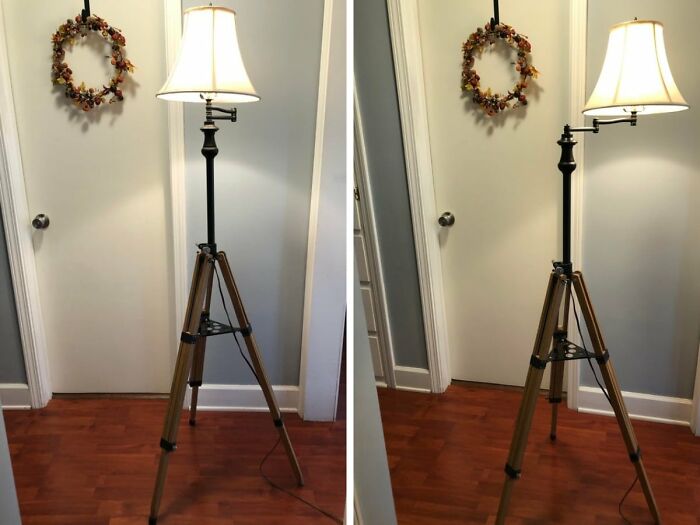
29. Brass Sconce Lamp
[TAG32]
You could even make a stylish light fixture from scratch, given enough time and the necessary resources. It’s actually not that difficult, especially if you make something small and simple like this swing sconce lamp for example.
Something like this would be perfect for a cozy reading corner or the bedroom. You could also add a small lampshade if you wanted to.
30. DIY Pumpkin Votives
[TAG33]
Autumn is amazing because it gives us pumpkins and there are so many beautiful crafts that you can do with them. Mini pumpkins are absolutely adorable and these pumpkin votives are super lovely.
They’re made from real pumpkins, which are carved out and painted. Of course, it’s also possible to do something similar with faux pumpkins any time of the year but there’s something special about the scent of real pumpkins that makes this project extra special during fall.
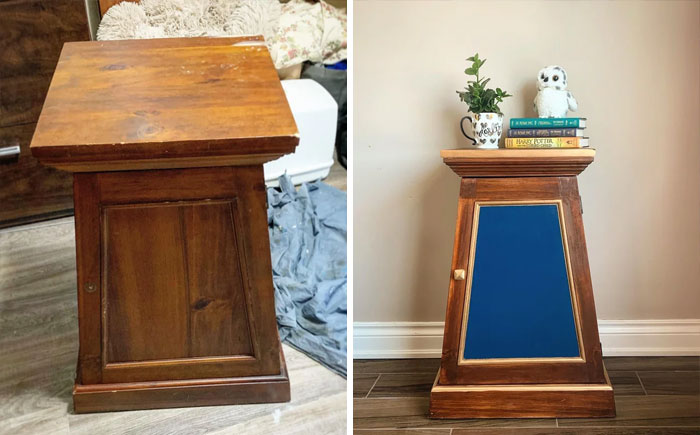
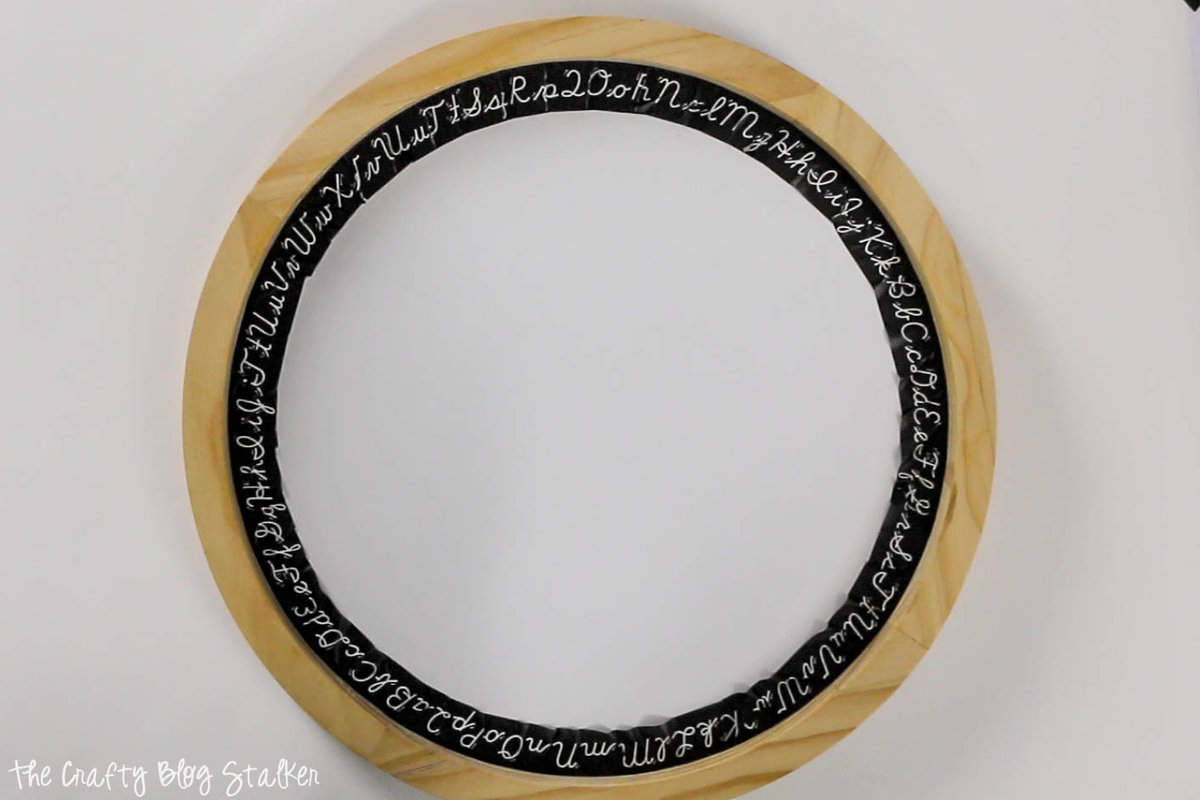
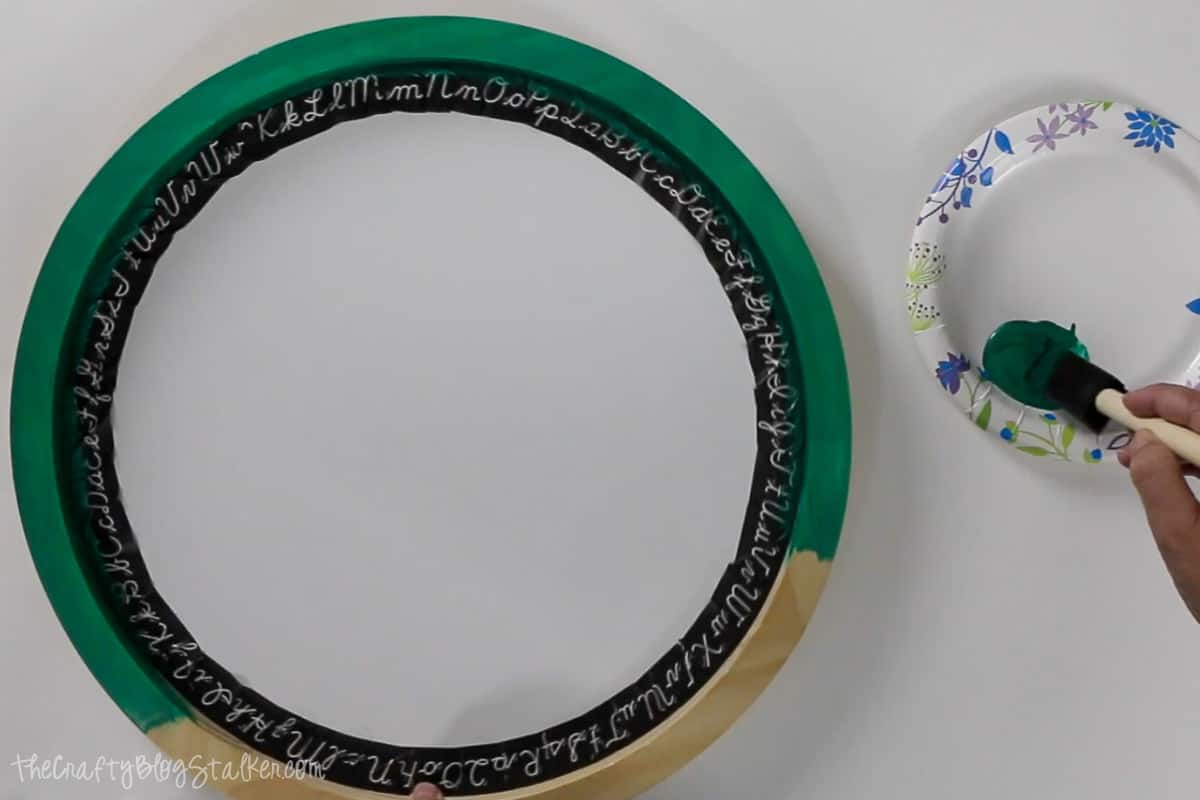
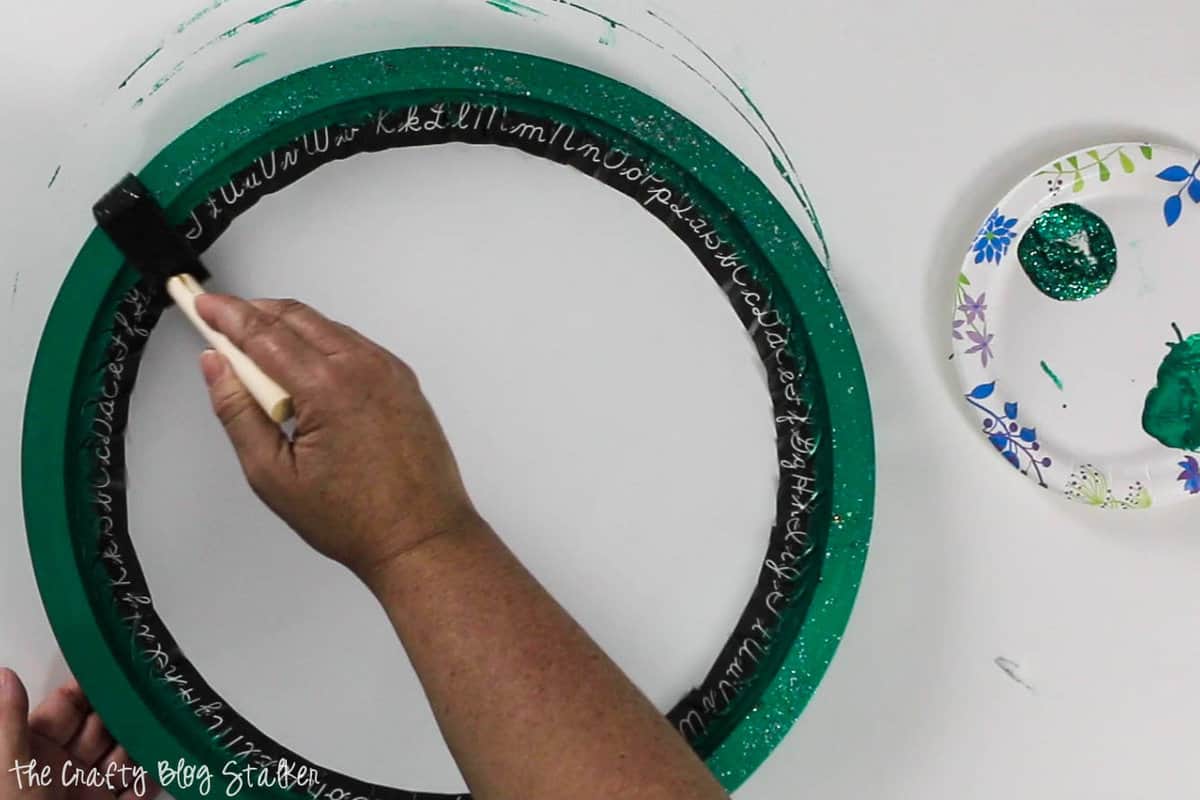
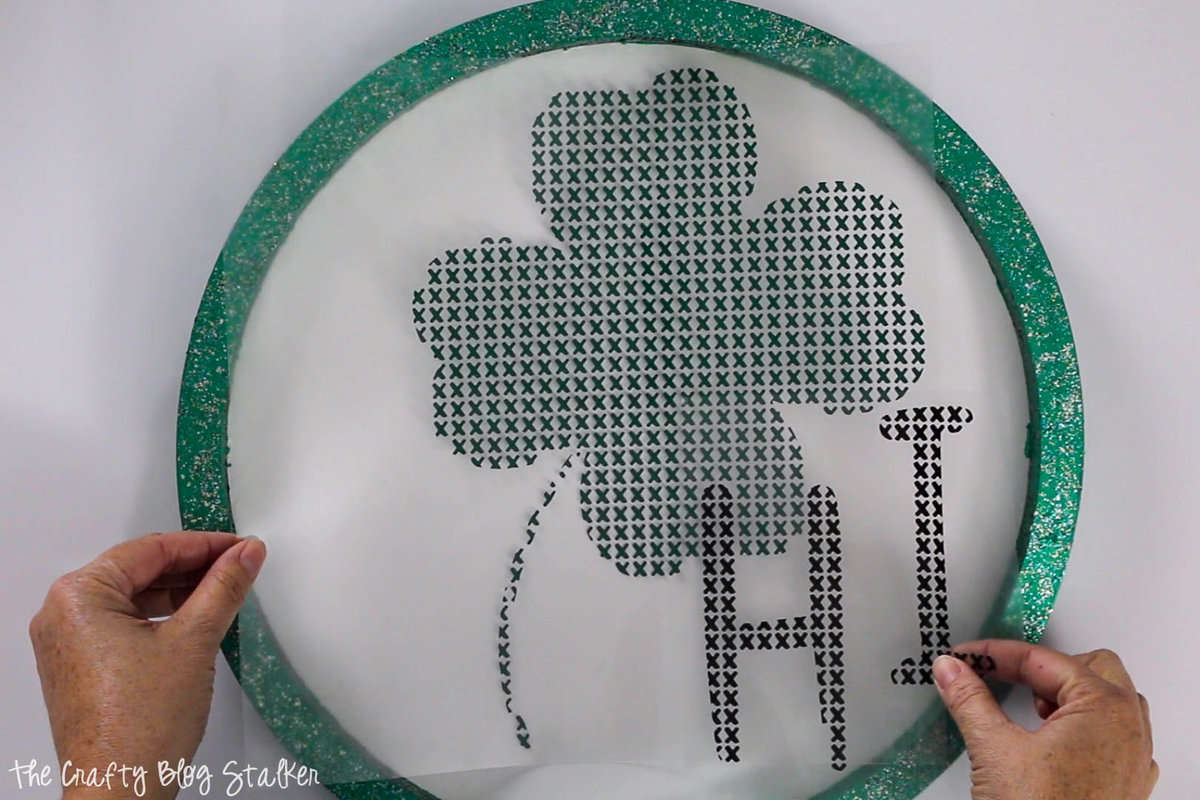
31. Framed Chalkboard
[TAG34]
If you haven’t already, you should really try using chalkboard paint in one of your projects. It’s a lot of fun, and you can use the paint to make things that are not just cool to look at but also useful, like this framed chalkboard.
You can hang something like this in the kitchen or the entryway to write lists and messages on it. Make sure you pick a frame that reflects your style.
32. Elastic Memo Board
[TAG35]
On a similar board, a memo board wouldn’t be difficult to make at all and would make a nice addition to your workspace, especially if you’re working from home. This elastic memo board can be made from a simple piece of plywood and some elastic headbands, and you can customize it in all sorts of different ways using paint, washi tape, and other resources.
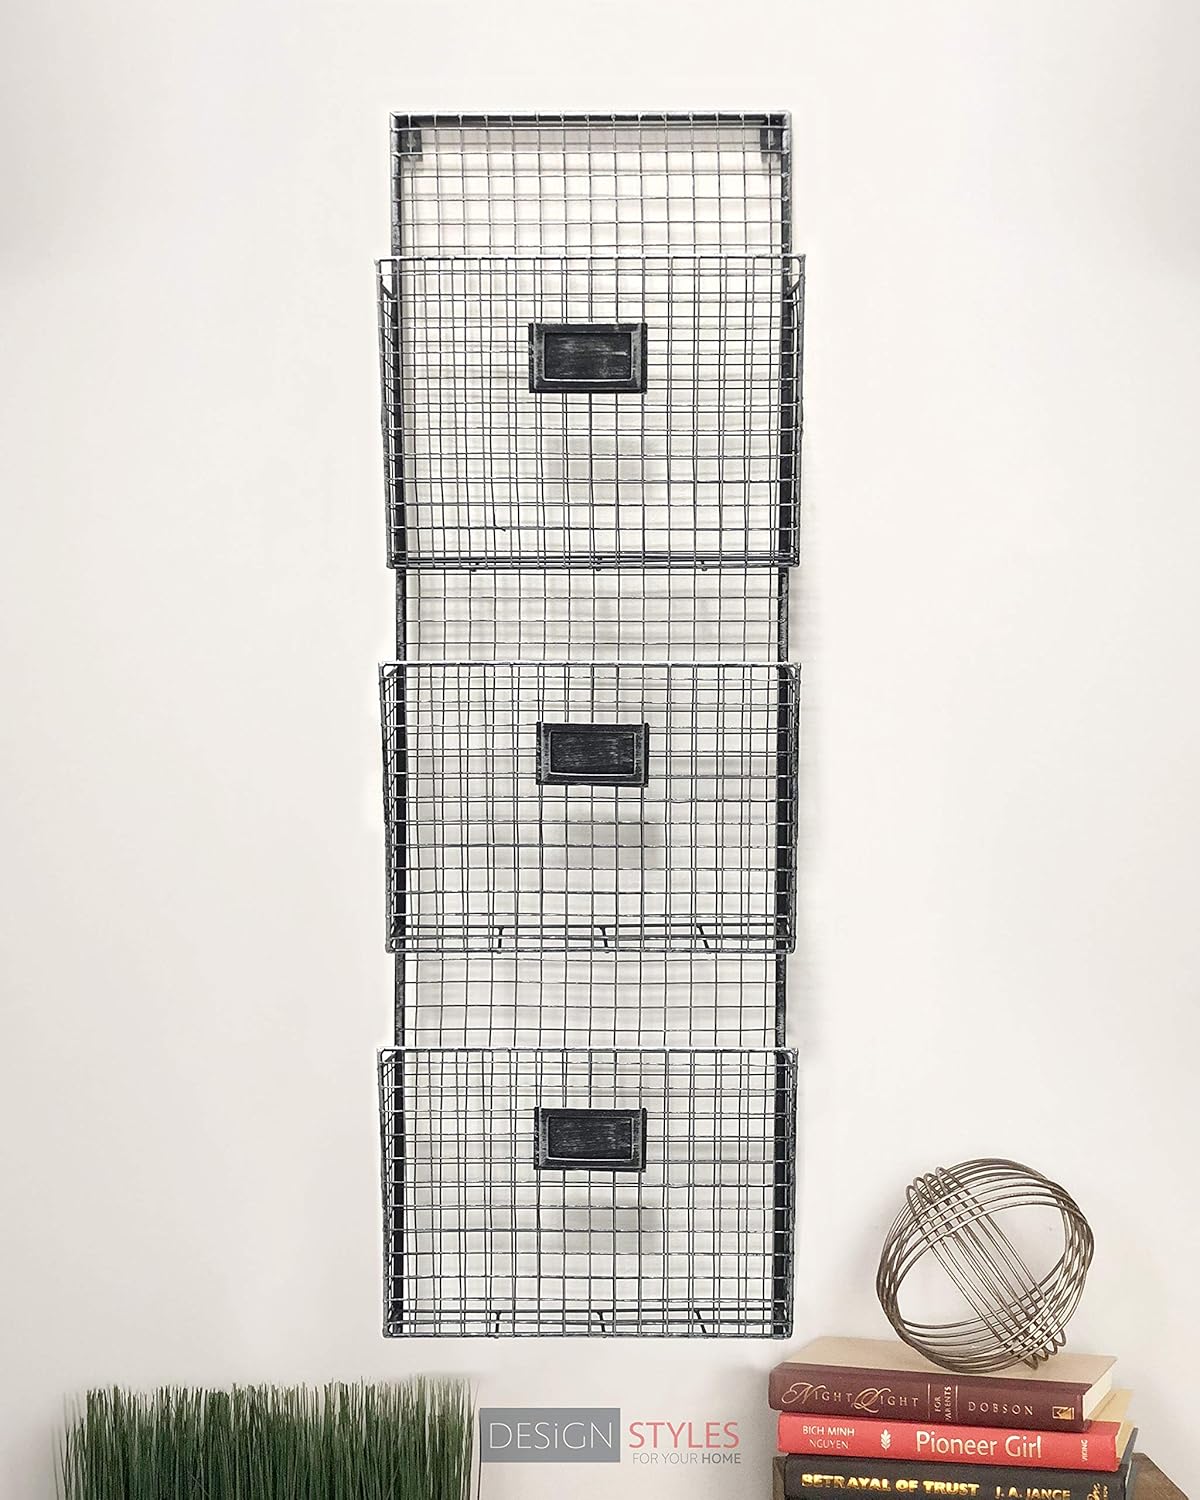
33. Hanging Shelves Crafts
[TAG36]
You can always add more shelves to a space if you feel the need for some extra storage or a place to display some decorations. Usually, you’d need to drill holes into the walls when installing the shelves but there are also alternative solutions. This hanging rope shelf can be attached to the ceiling or to the underside of a cabinet.
34. Framed Letter Wall Art
[TAG37]
There are many different ways to decorate an empty wall. One of the most common options is to hang a bunch of framed pictures or some paintings, posters, and other similar things.
If you want to make your own wall art, you can simply print out some letters. Framed letter art is very versatile and there are many different ways to customize your own design if you decide to make something similar.
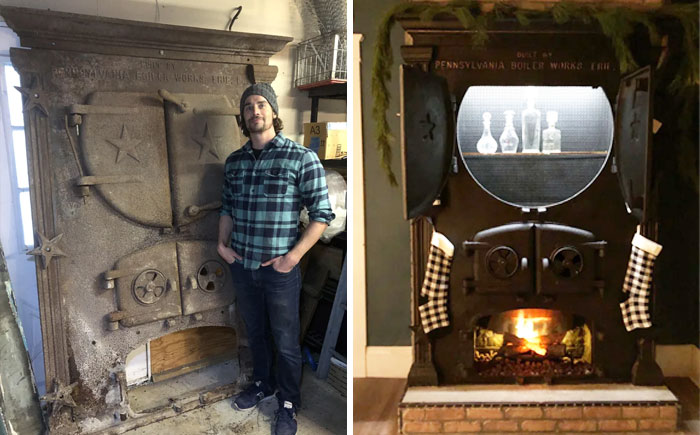
35. Dried Orange Garland Craft
[TAG38]
If you are looking to spruce up your fireplace this holiday season, consider adding this dried orange garland to your living room or entryway. As well as adding a fun decoration to the room, it will also add a pleasant citrusy scent.
All you’ll need to get started is a bag of oranges and a few kitchen supplies, which you are bound to have already. This quick and easy craft is one of our favorite ways to brighten your home for the holiday season.
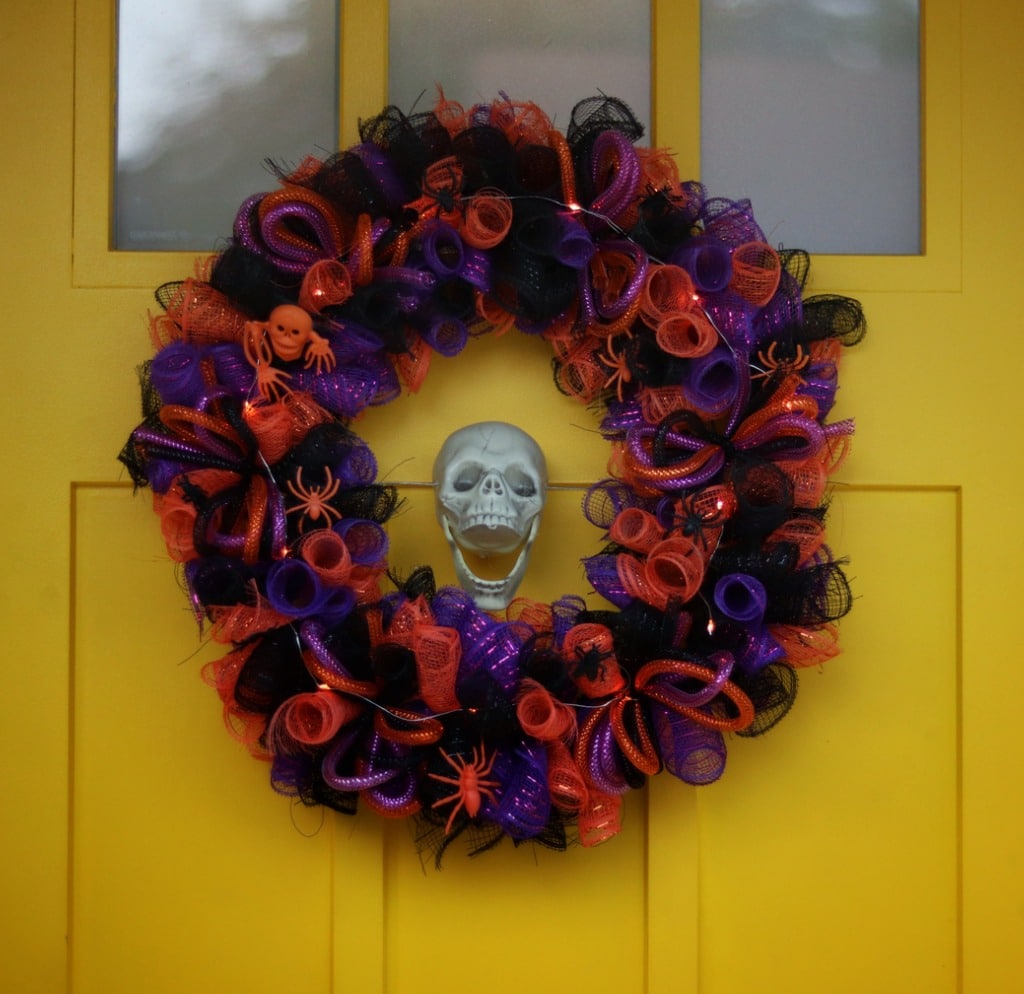
36. Yarn Spider Web Craft
[TAG39]
When it comes to Halloween, it’s understandable not to want to spend a fortune decorating your home. You also may not want to cover up your lovely home décor with spooky decorations. If you want an inexpensive and subtle decoration to add to your home this year, create this Halloween yarn spider web.
It will take you very little effort to create, and you can add the finished spider web to any room in your home. Your kids will love having a few webs on their windows to get in the spooky mood this season.
37. Clay Pot Succulent Crafts
[TAG40]
Succulents have become incredibly popular to add to homes, adding some much-needed life to kitchens and living rooms. These cute little clay pots are easy to make and look beautiful to house your plants.
Succulents are such a low-maintenance plant to add to your home and require very little care and attention.
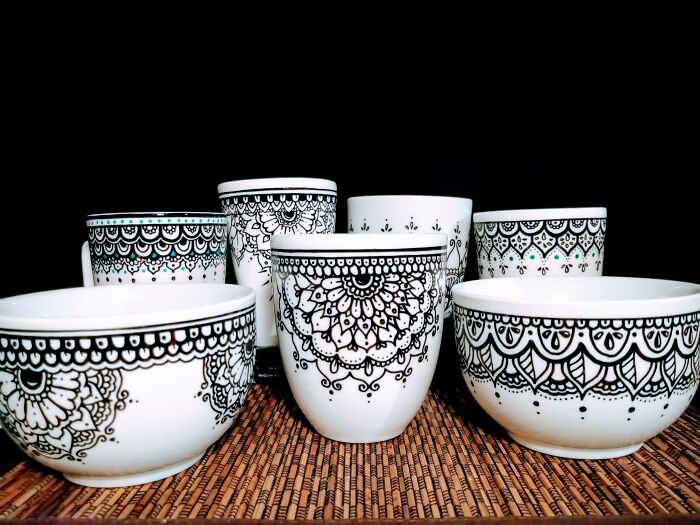
38. Baked Sharpie Plates Craft
[TAG41]
If you are looking for a fun craft to enjoy with your whole family, try out these baked sharpie plates. You’ll create something that’s really useful and that your kids will enjoy using every day. To make these plates, you’ll just need a selection of colorful Sharpies and to preheat your oven ready to finish off the project.
39. Essential Oil Reed Diffuser Craft
[TAG42]
Essential oil reed diffusers make the perfect Christmas or birthday gift, and what better way to show someone how much you care than by creating one yourself. These essential oil diffusers will naturally fragrance the air as the essential oil serum travels up through the wooden reeds.
Use any oil of your choice to create a gift that your family and friends will love receiving this year.
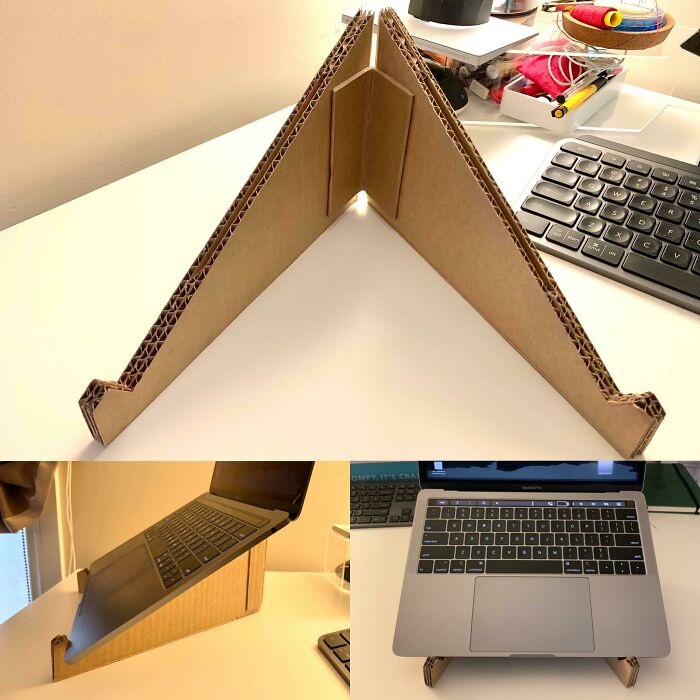
40. Cosmic Mousepad DIY
[TAG43]
This DIY cosmic trend inspired mousepad will add a fashionable touch to your office. Even with more people opting to use laptops today, mousepads are still an essential accessory for many computer users.
This cosmic design will add some personality to any desk and will look great no matter how your home office and desk are decorated.
41. Button Covered Christmas Ball Craft
[TAG44]
We love adding new decorations to our Christmas tree each year, and this DIY button covered Christmas ball will sparkle wherever it’s placed in your home. Use any color and size buttons you like to customize this project to your tree’s décor.
We love the little pins that are used in this project, as they add a little extra sparkle to the ornament.
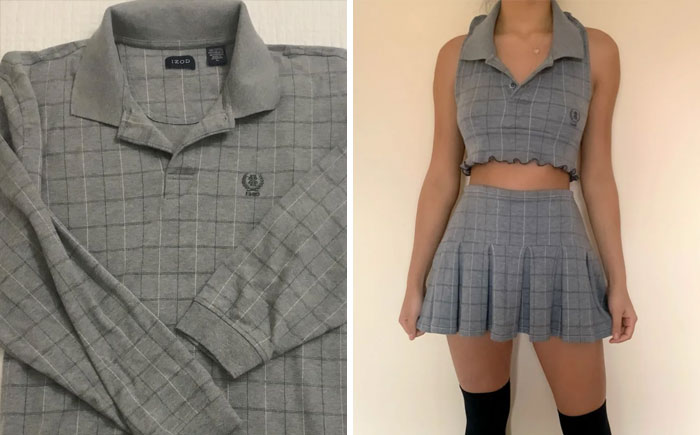
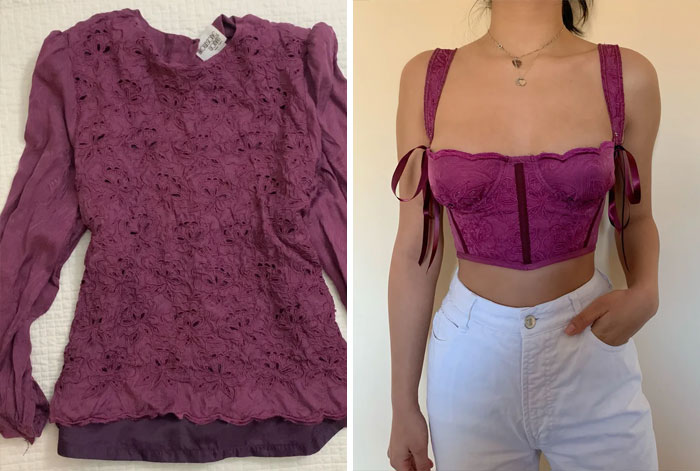
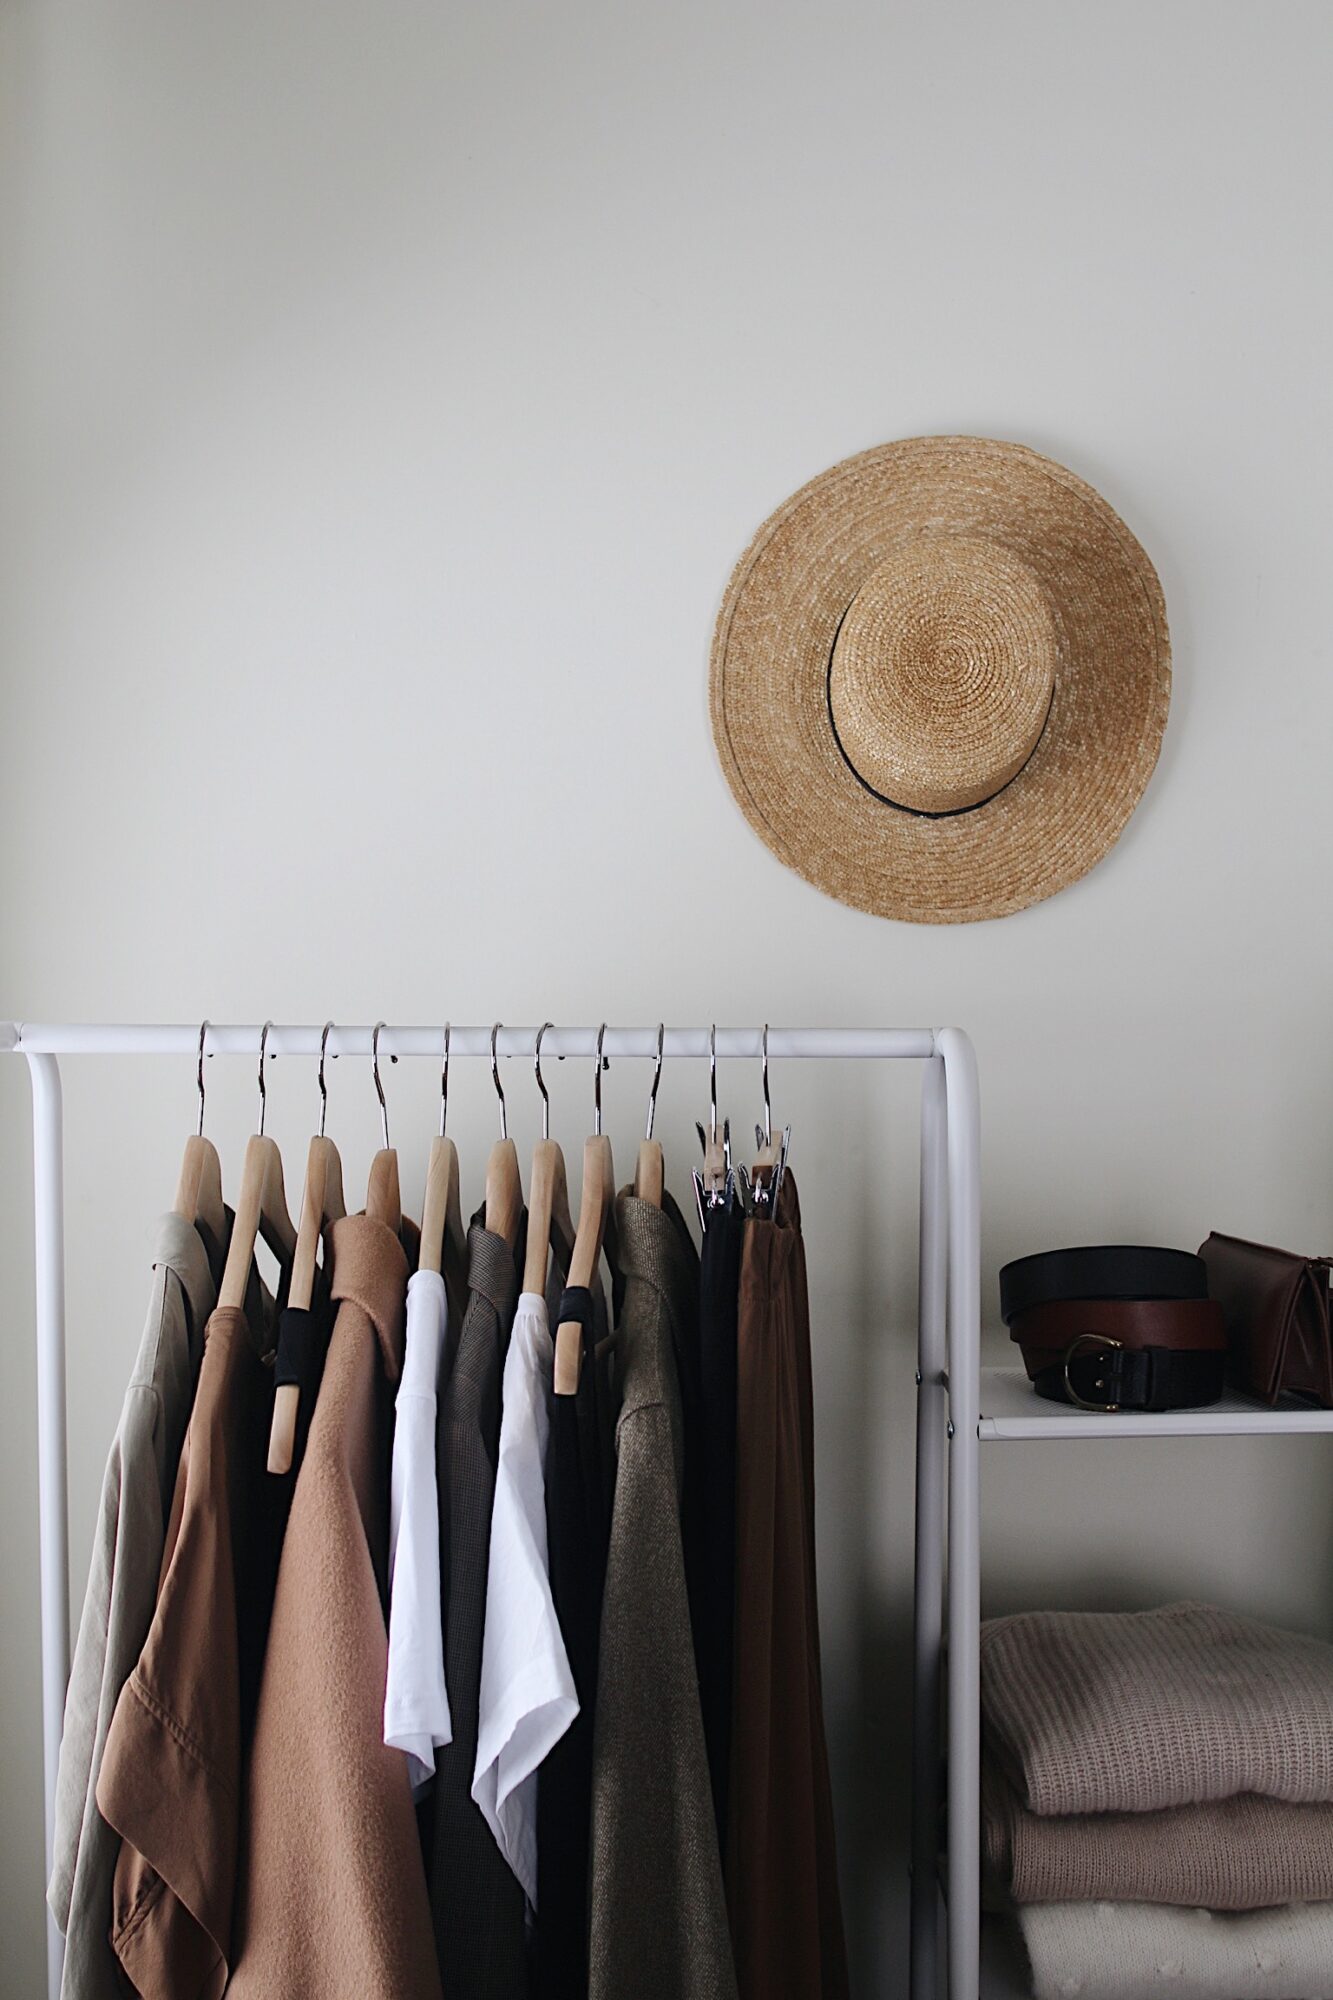
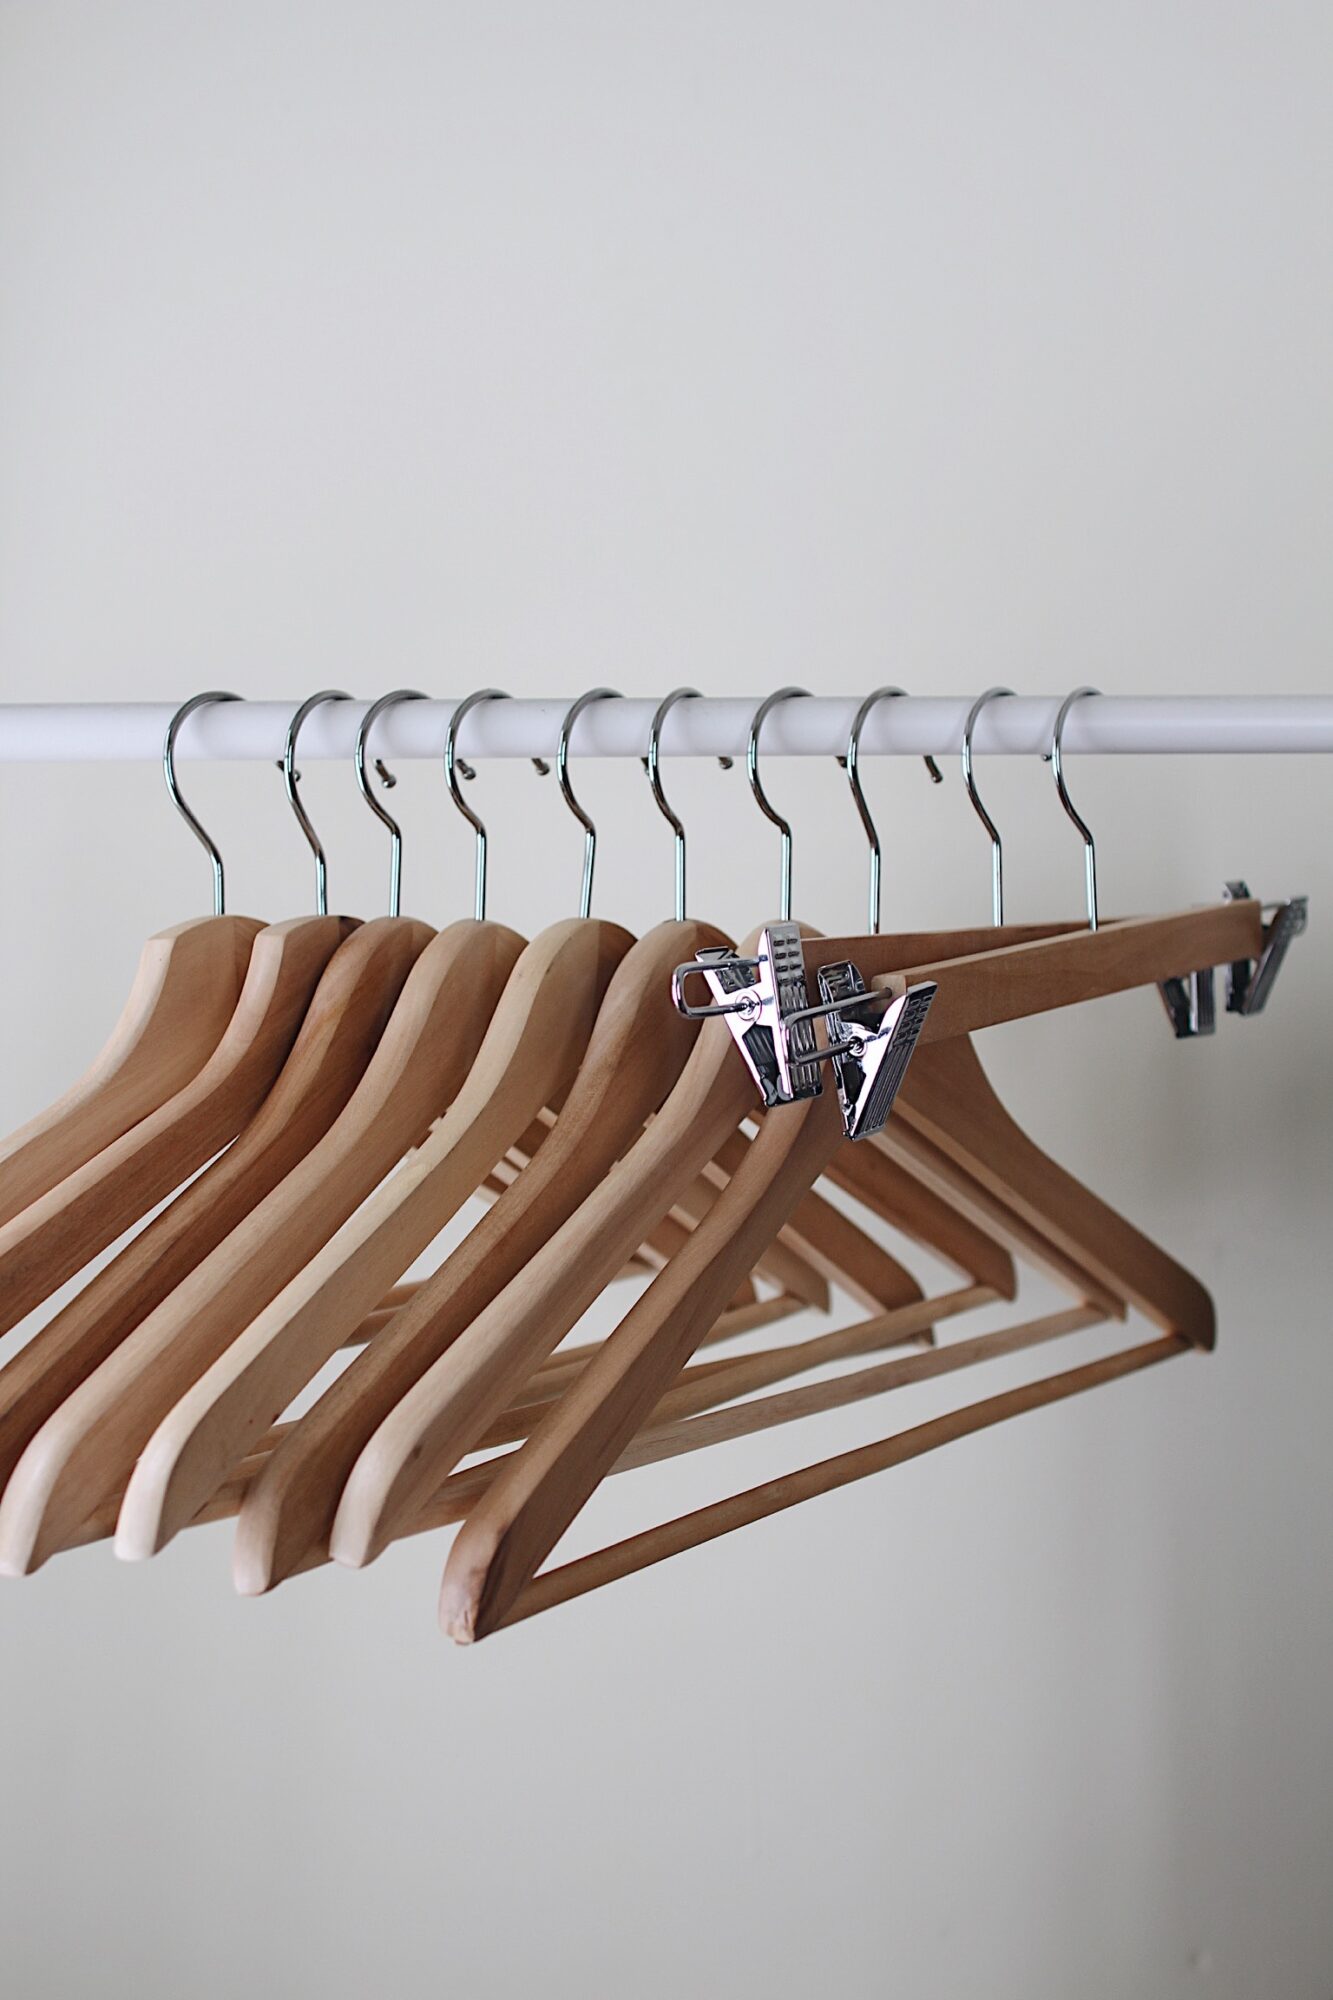
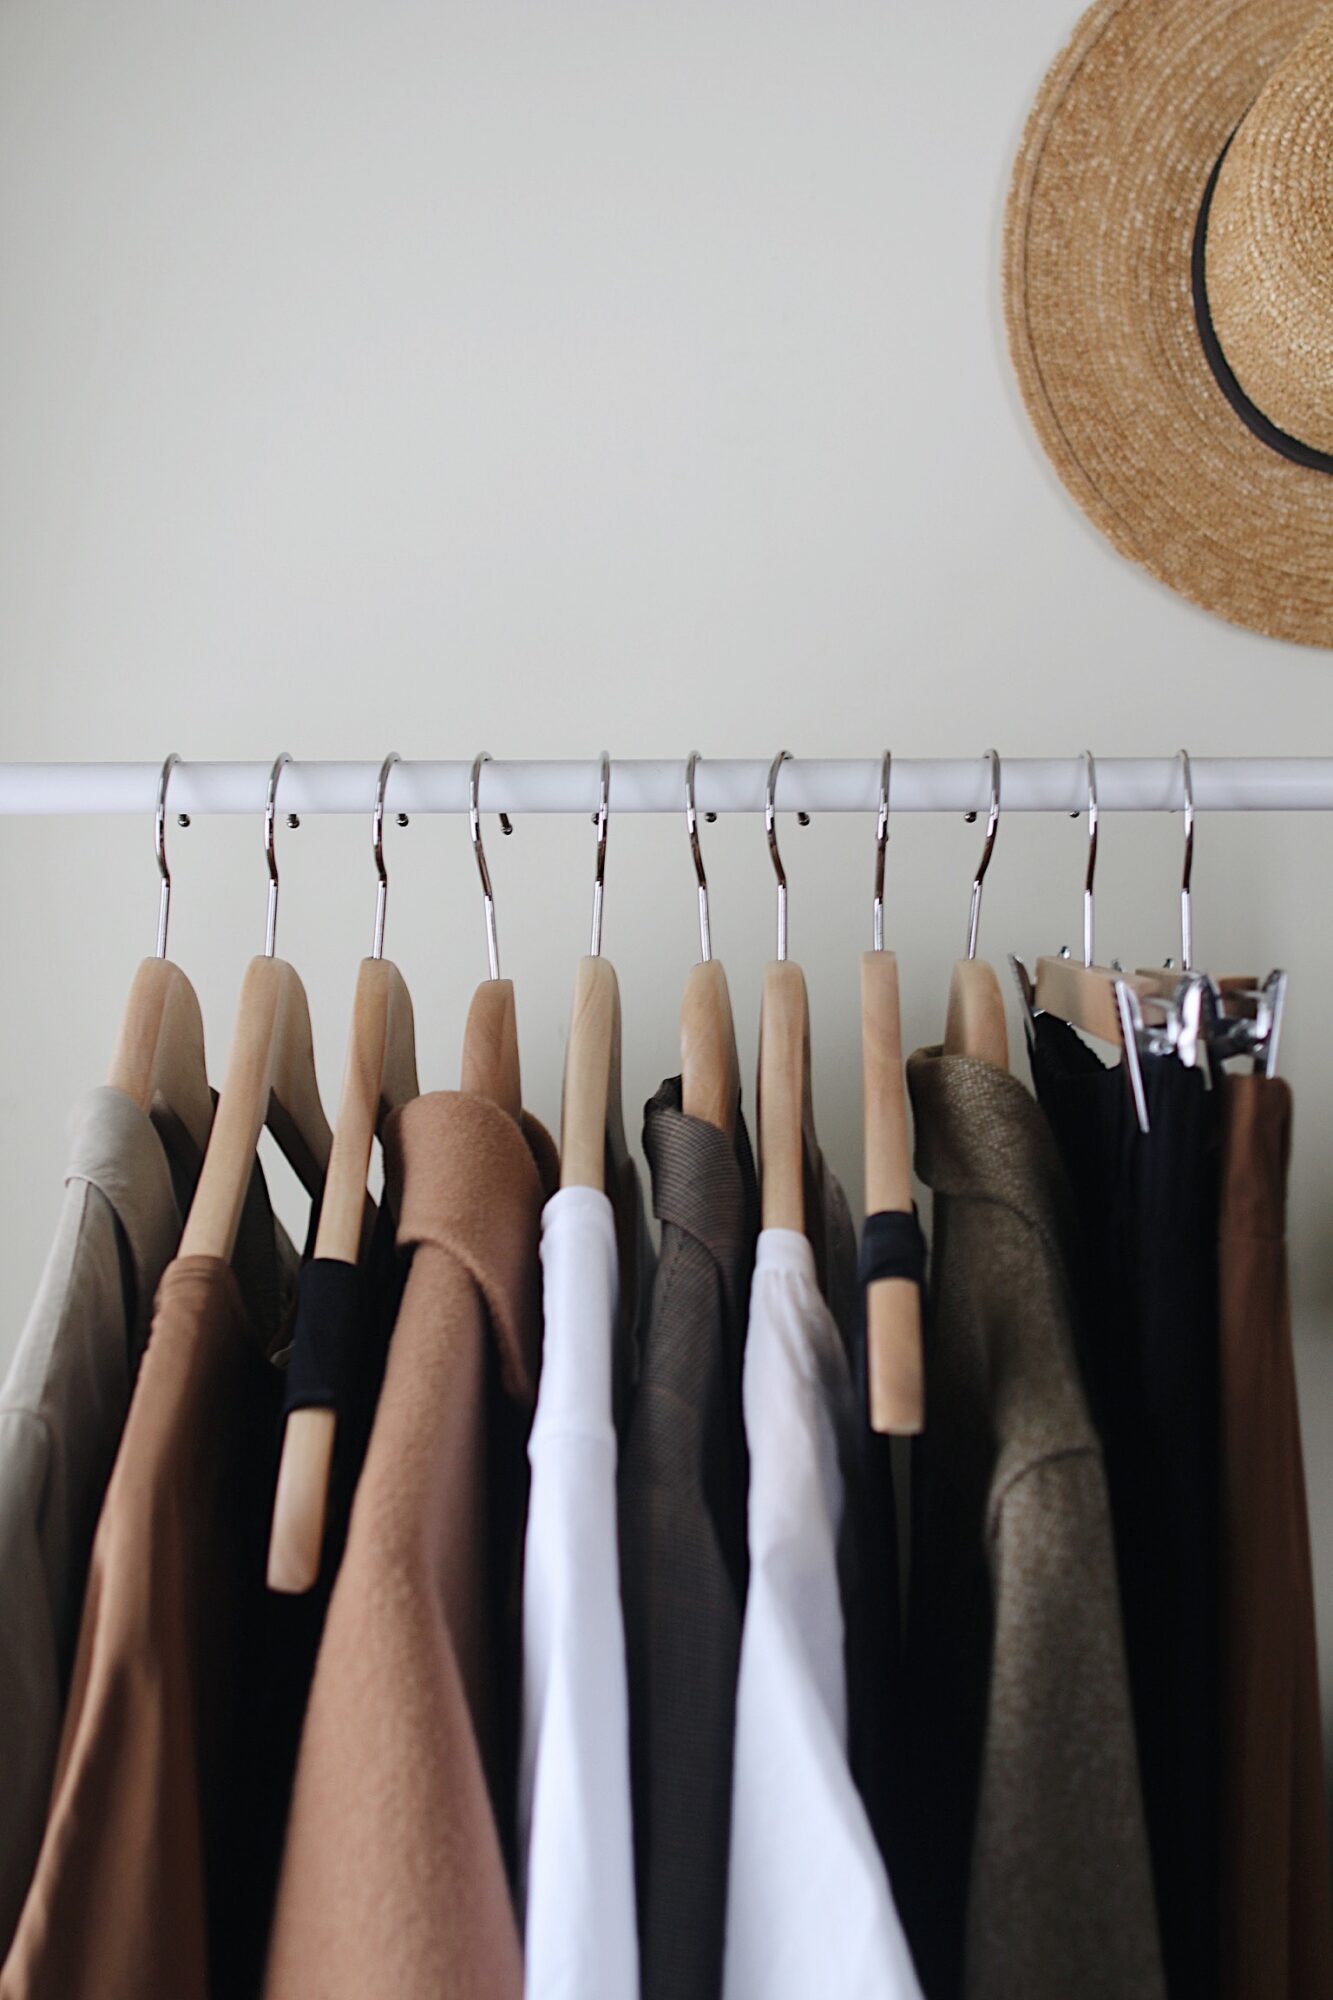
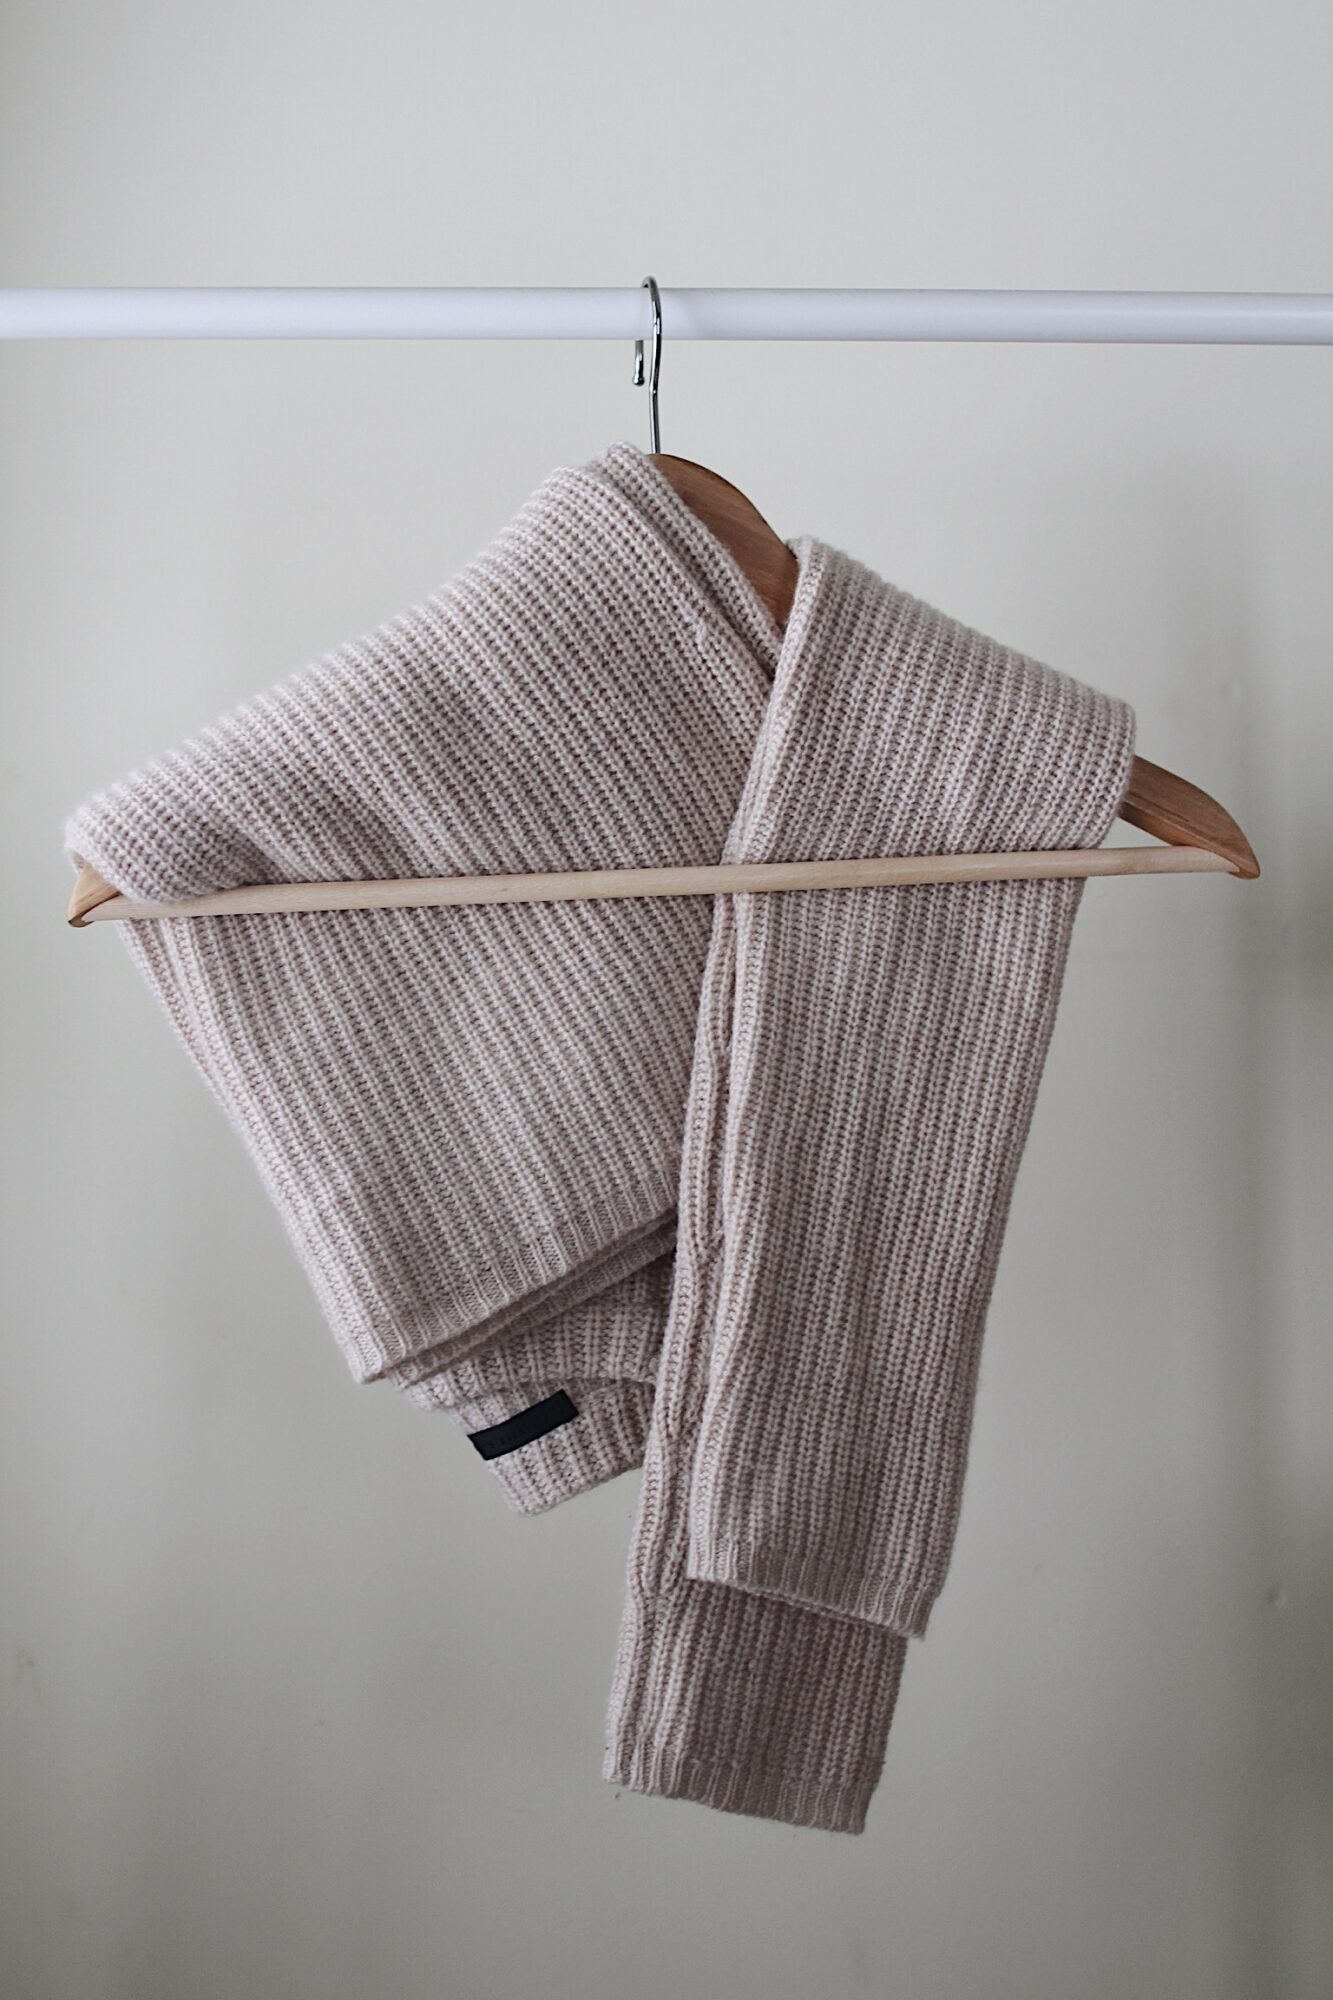
42. Design Inspired Hanger DIY
[TAG45]
Hangers aren’t exactly the most exciting item in the home. However, will a little effort, you can create a stylish and pretty hanger that you’ll enjoy adding to your wardrobe. If you have an open wardrobe or like hanging clothes around your room, you’ll love the sleek and trendy look of these hangers.
43. Felt Ball Coasters DIY
[TAG46]
For anyone who is looking for a simple DIY project to gift your friends and family this year, you’ll love these DIY felt ball coasters. As with most DIY projects, you can customize the color and size of each coaster to fit the recipient’s needs.
They will add a cozy touch to any table, and you could even give a matching mug with them to make a complete holiday gift this year.
44. Kusudama Flower Ball Tutorial
[TAG47]
To create these beautiful Kusudama flower balls, you’ll just need origami paper, craft glue, and paper clips. They create stunning little flowers, which were originally used for potpourri and incense in ancient Japan.
You’ll love displaying these around your room or gifting them to your loved ones to put a smile on their face.
45. Pom Pom Pillow DIY
[TAG48]
If you are bored of your usual pillows in your living room, create your own pom pom pillow. You’ll add a fun and fluffy border of pom poms to any pillow, which is a simple and cheap project for any room in your home. Choose a bright color that perfectly complements your pillow, and enjoy this creative and easy project today.
46. Painting Mason Jars DIY
[TAG49]
As you can see, we love using mason jars as the base for our DIY projects. This simple project guides you through painting mason jars, which offer an easy way to decorate on a budget.
We love the metallic paint used on these mason jars, and you’ll enjoy adding a statement piece to any room. Mason jars generally last forever, so this quick project will give you years of enjoyment.
47. Kids Bean Bag DIY
[TAG50]
If your kids love reading or playing video games on their summer break, they’ll love lounging about on this DIY kids bean bag. You are probably wondering how this is a quick and simple project, but you’ll be impressed to learn it takes just forty-five minutes to create this bean bag from start to finish.
The only thing you’ll need to be able to do is to sew on a zipper, and you’ll be ready to start this exciting DIY craft project.
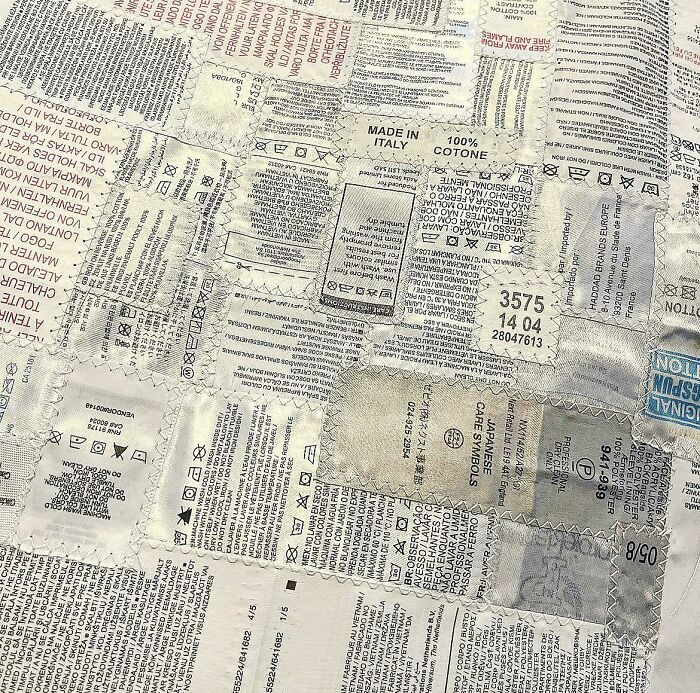
48. No-Sew Fabric Napkins DIY
[TAG51]
Many DIYers are put off by fabric-based projects as they usually involve sewing. However, these DIY no-sew fabric napkins don’t use any sewing whatsoever in their creation.
It’s a budget-friendly project that can use up any fabric scraps around your home. Either choose a single color or pattern or mix things up with a selection of bold and fun colors and prints.
49. Halloween Dish Towel Pillows DIY
[TAG52]
If you are short of Halloween decorations this year, have a go at turning your dish towels into Halloween pillows. You’ll brighten up any chair with these fun pillow covers, and you’ll barely spend anything in the process. You don’t have to finish up any edges when creating these pillows, as they are already done for you.
50. Argyle Sock Vases DIY
[TAG53]
If you are sick of finding odd socks around your house, put them to good use with these DIY argyle sock vases. This is a fun way to add more character to any vase in your home and will add a quirky decoration to any countertop or side table.
All you’ll need to get started is a vase or glass jar, socks, a needle and thread, scrap fabric, and scissors.
51. Bookends Crafts DIY
[TAG54]
Chances are you have at least a few books lying around your house. If not in your bedroom or living room, maybe in your kitchen or office.
Either way, DIY bookends are an easy craft that you can make in an afternoon but can add some pizazz to your home. Check out these cute dinosaur DIY bookends and consider making them for use in your home.
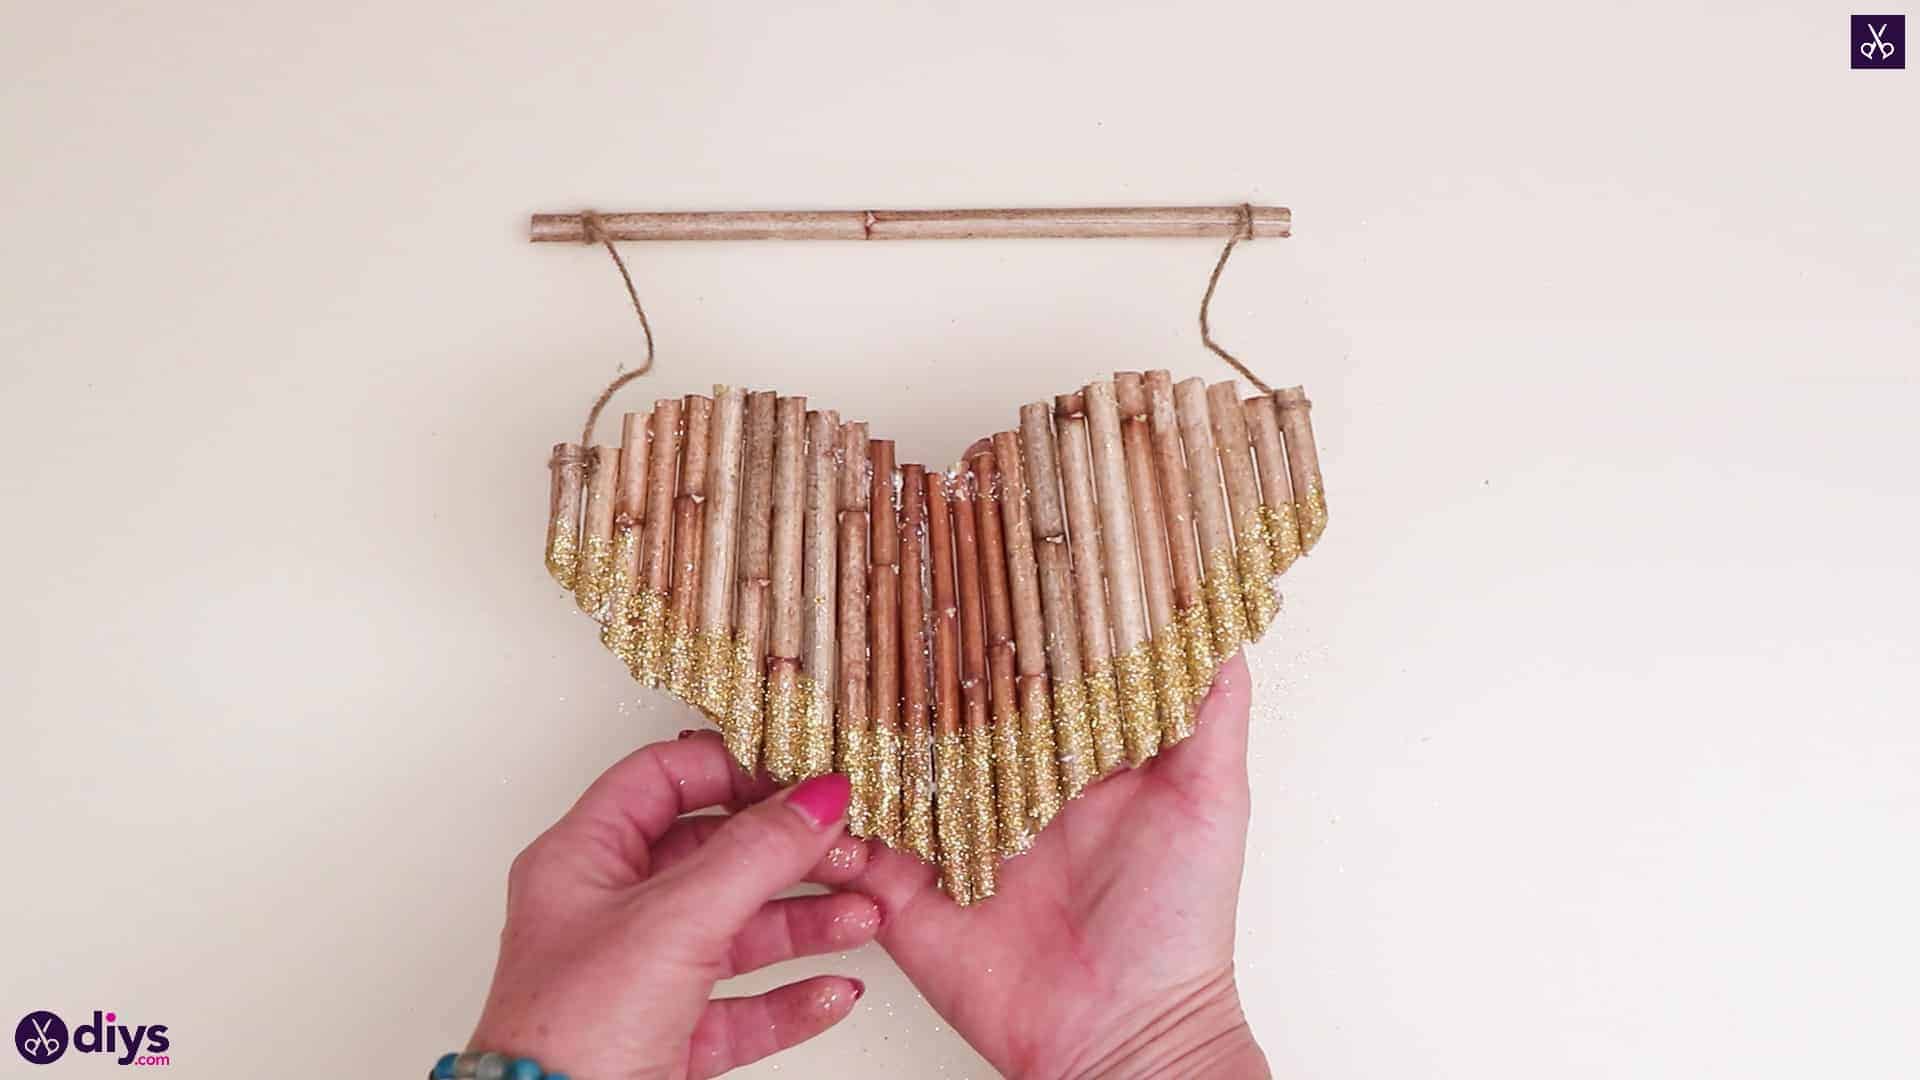
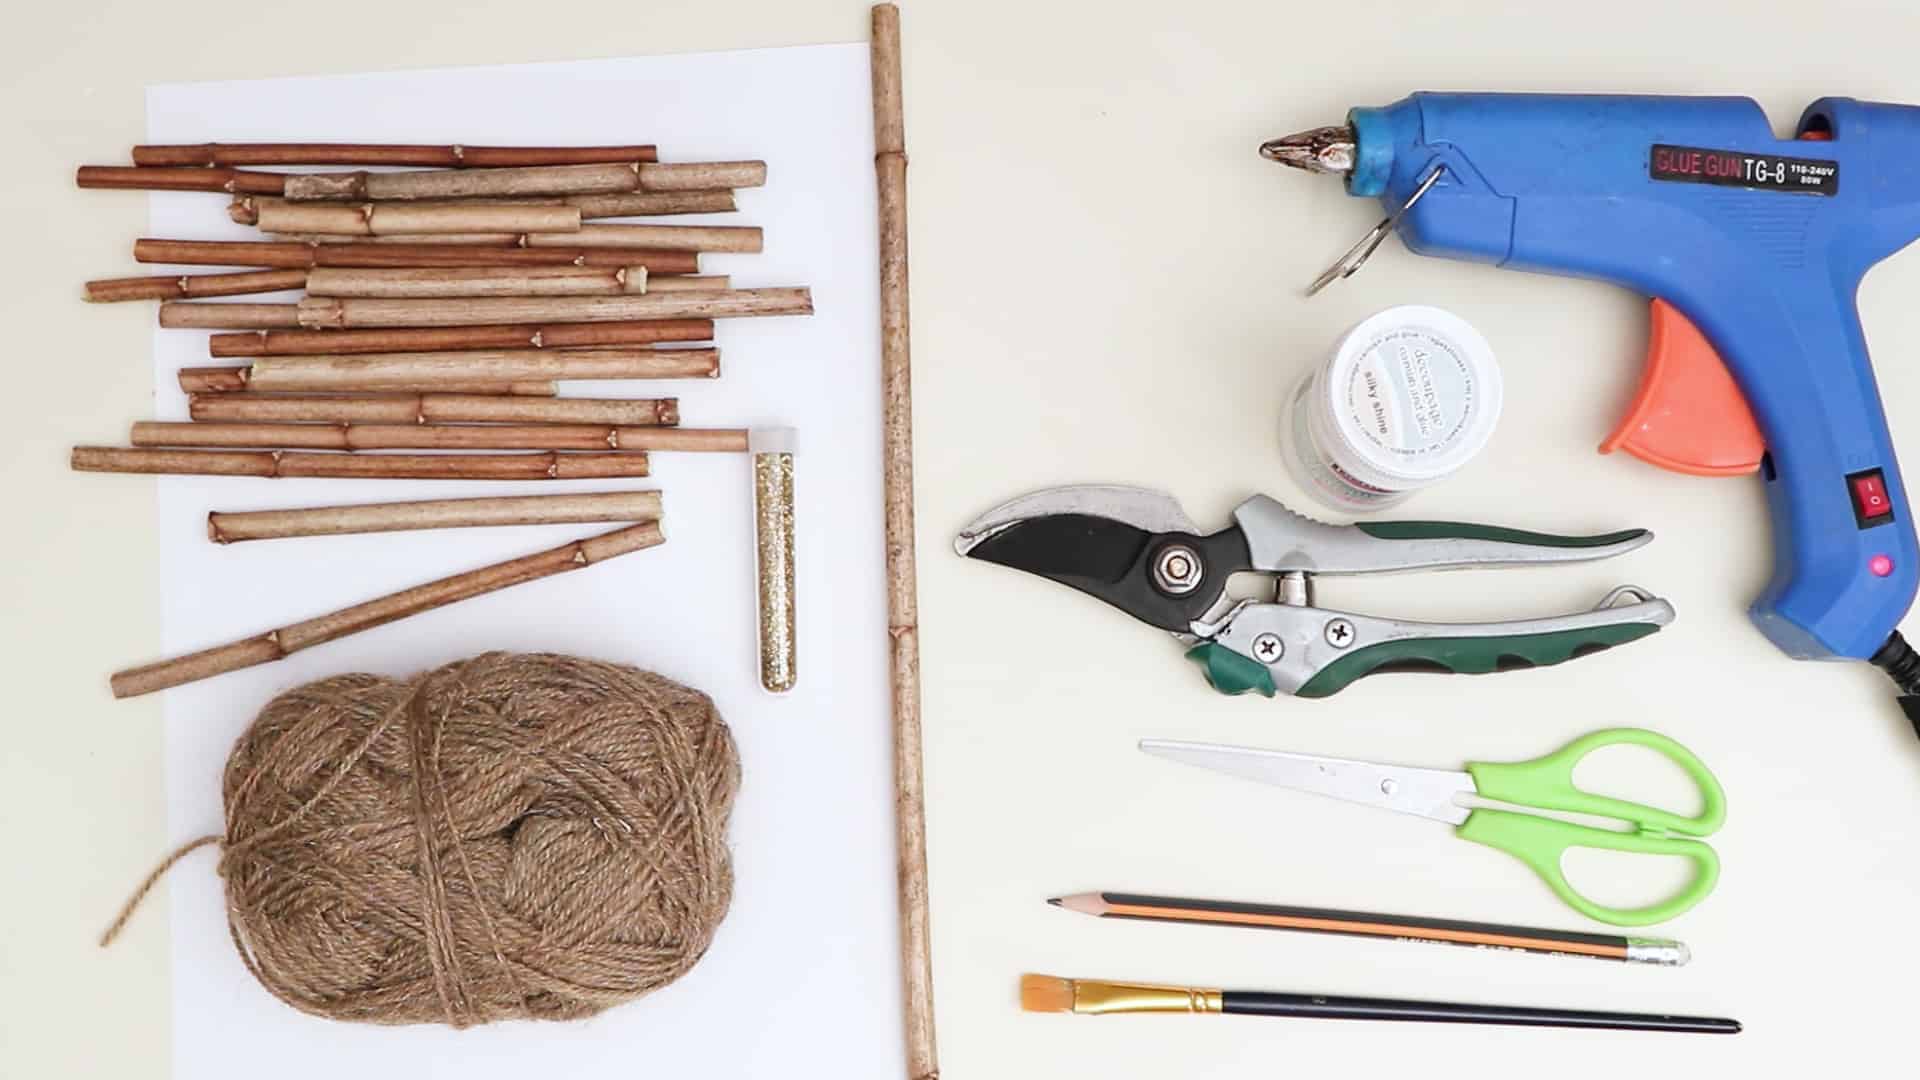
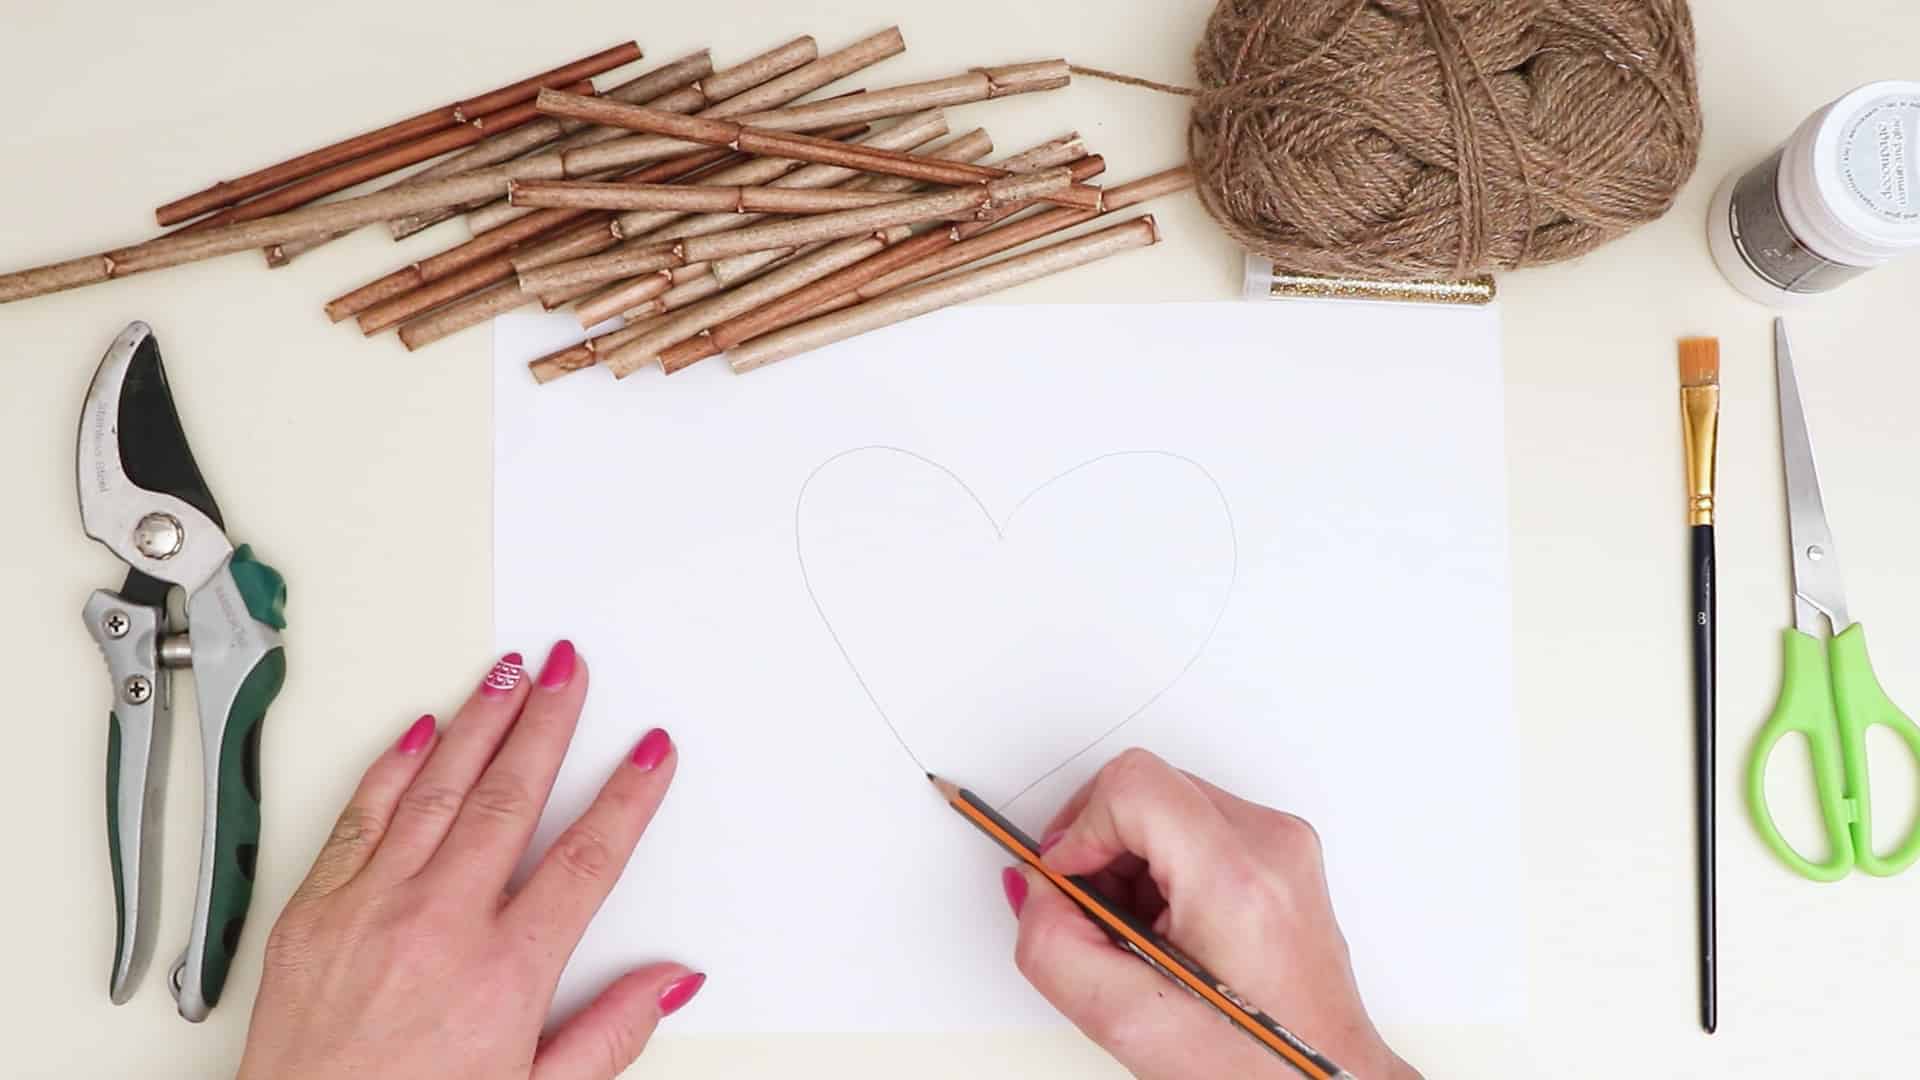
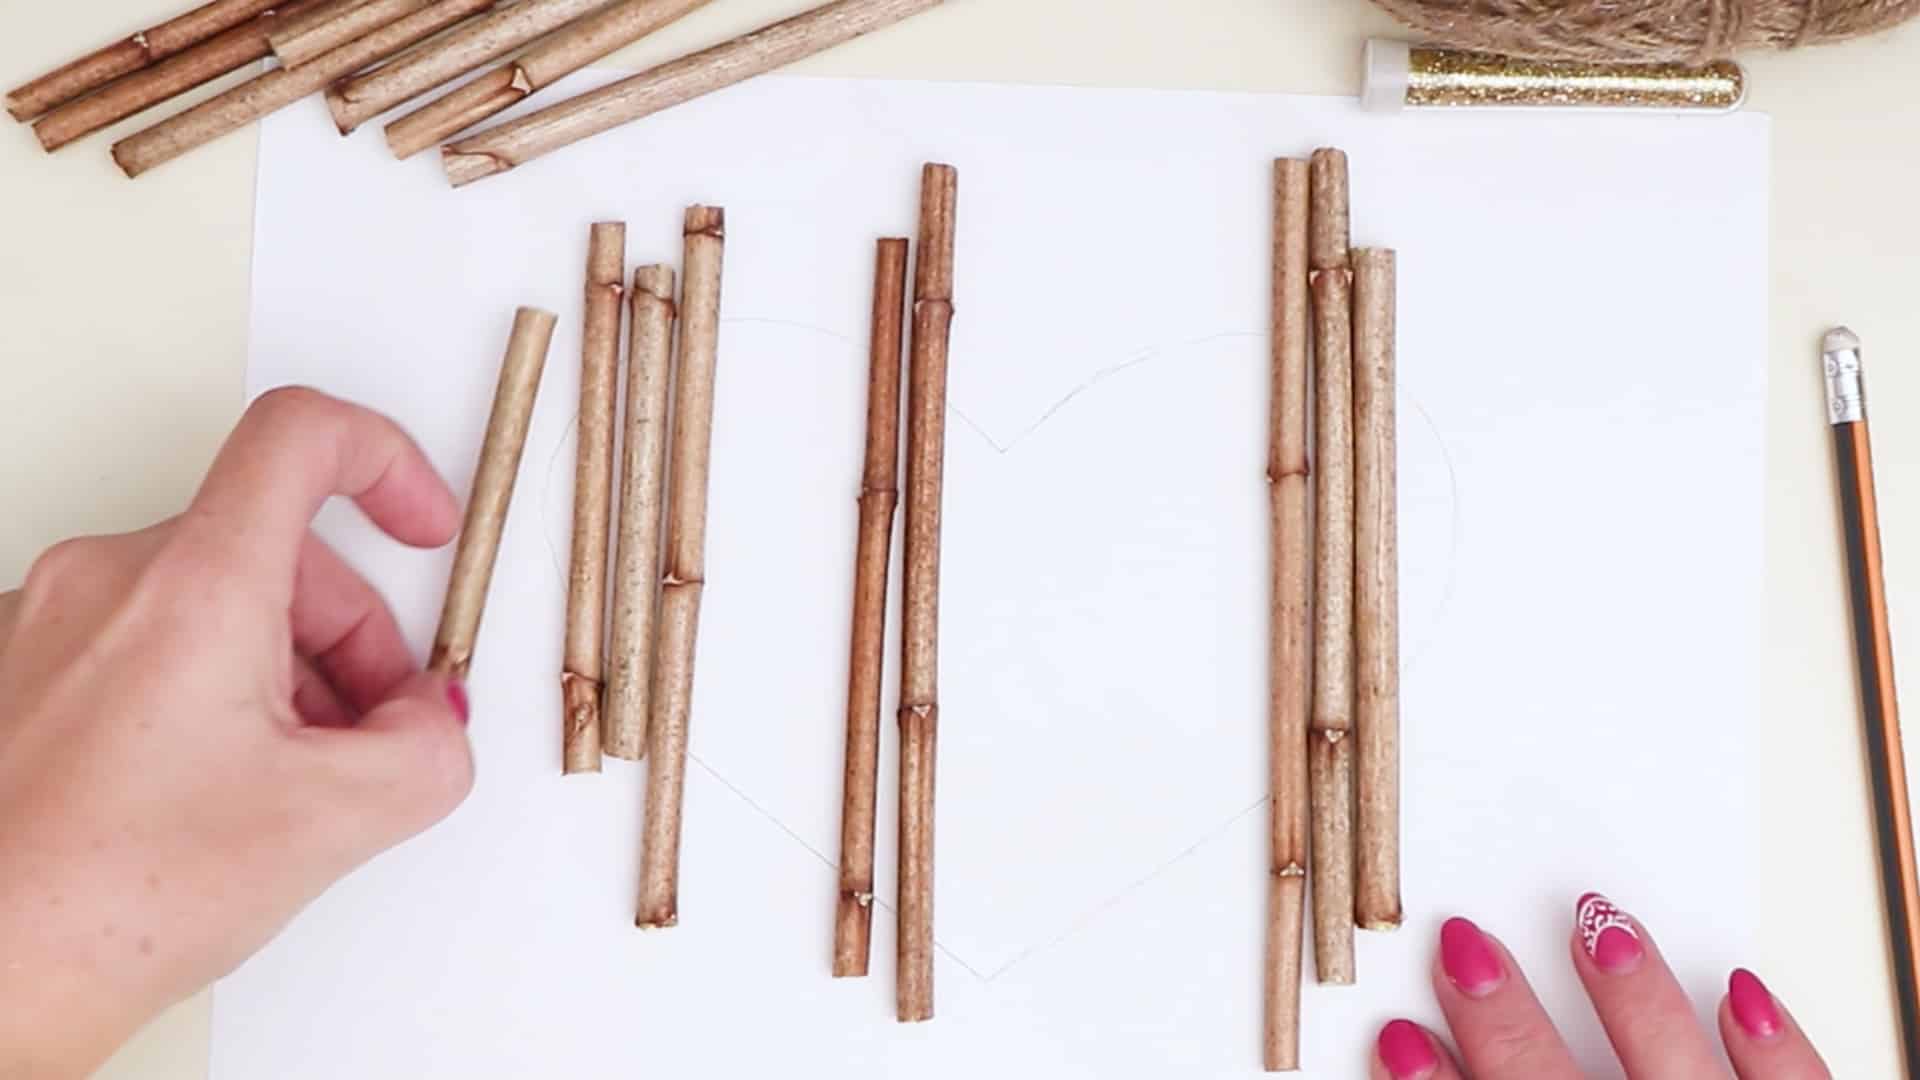
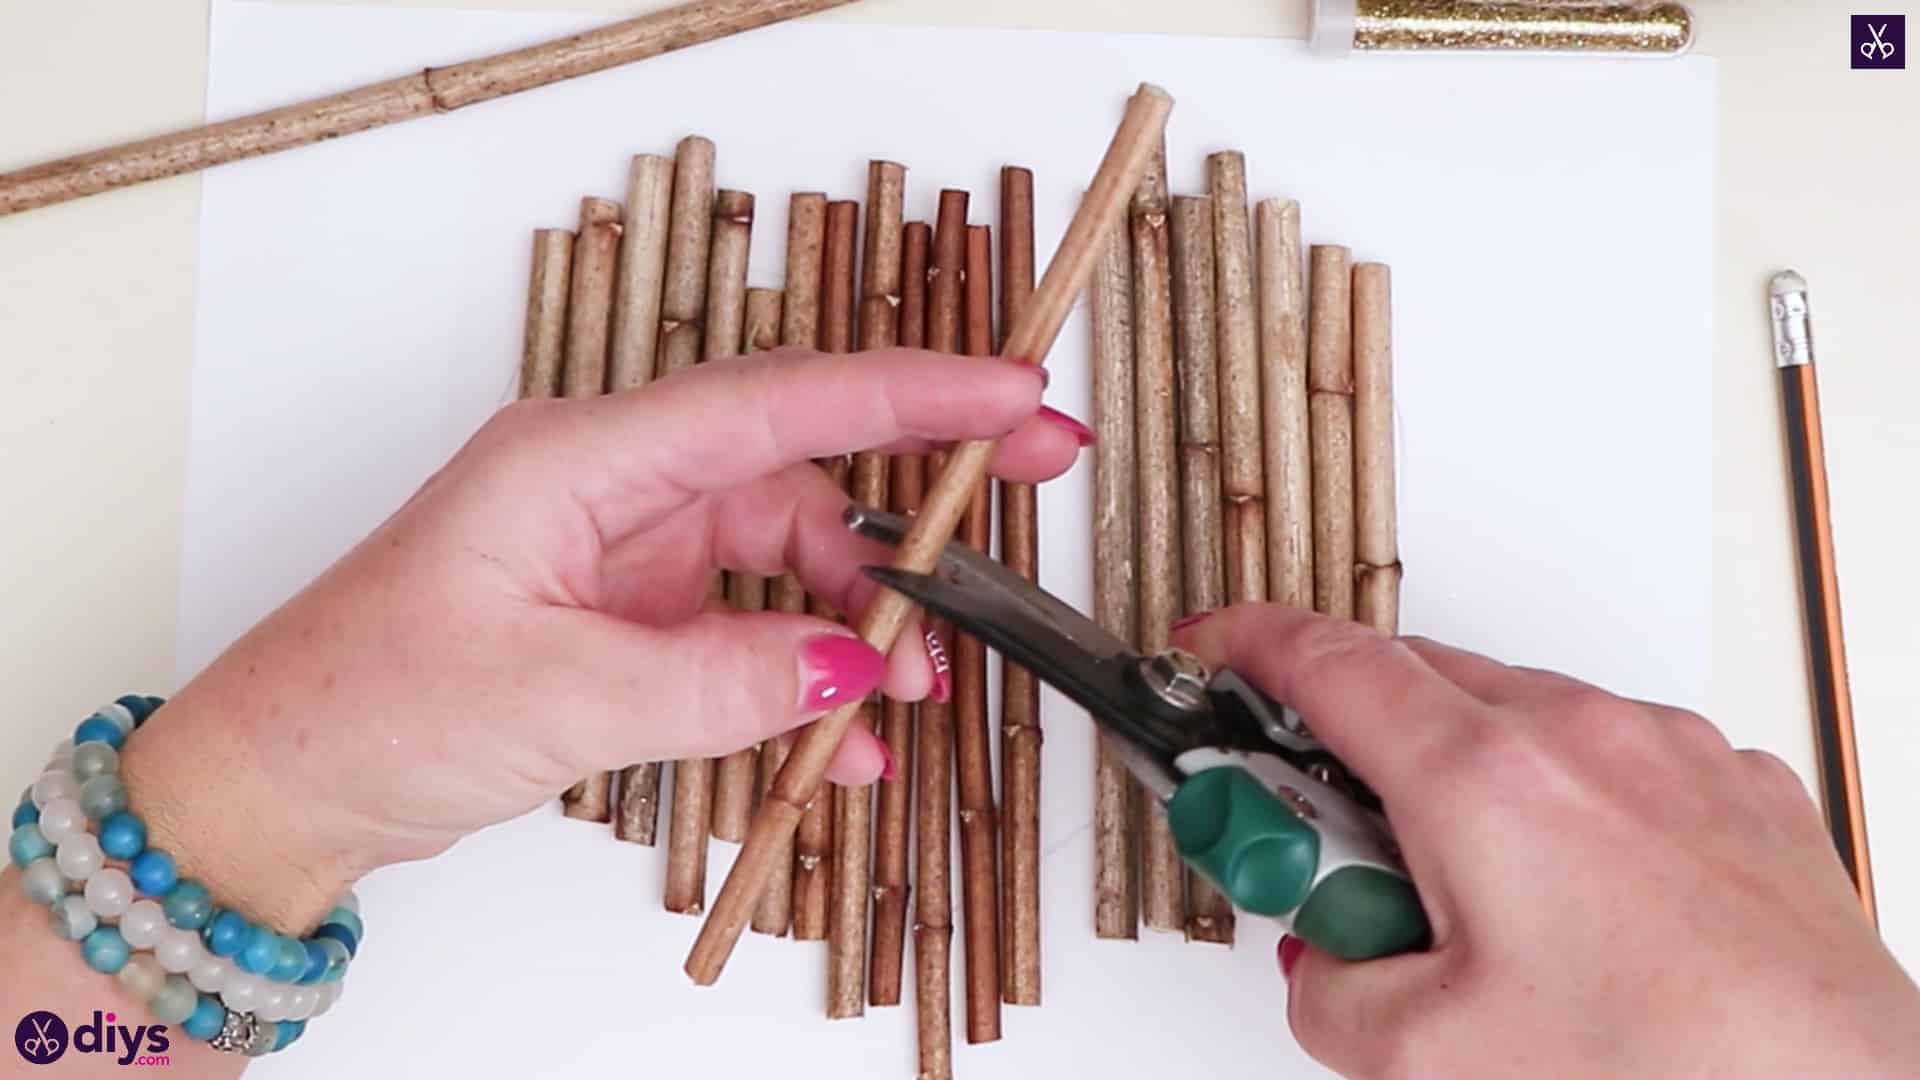
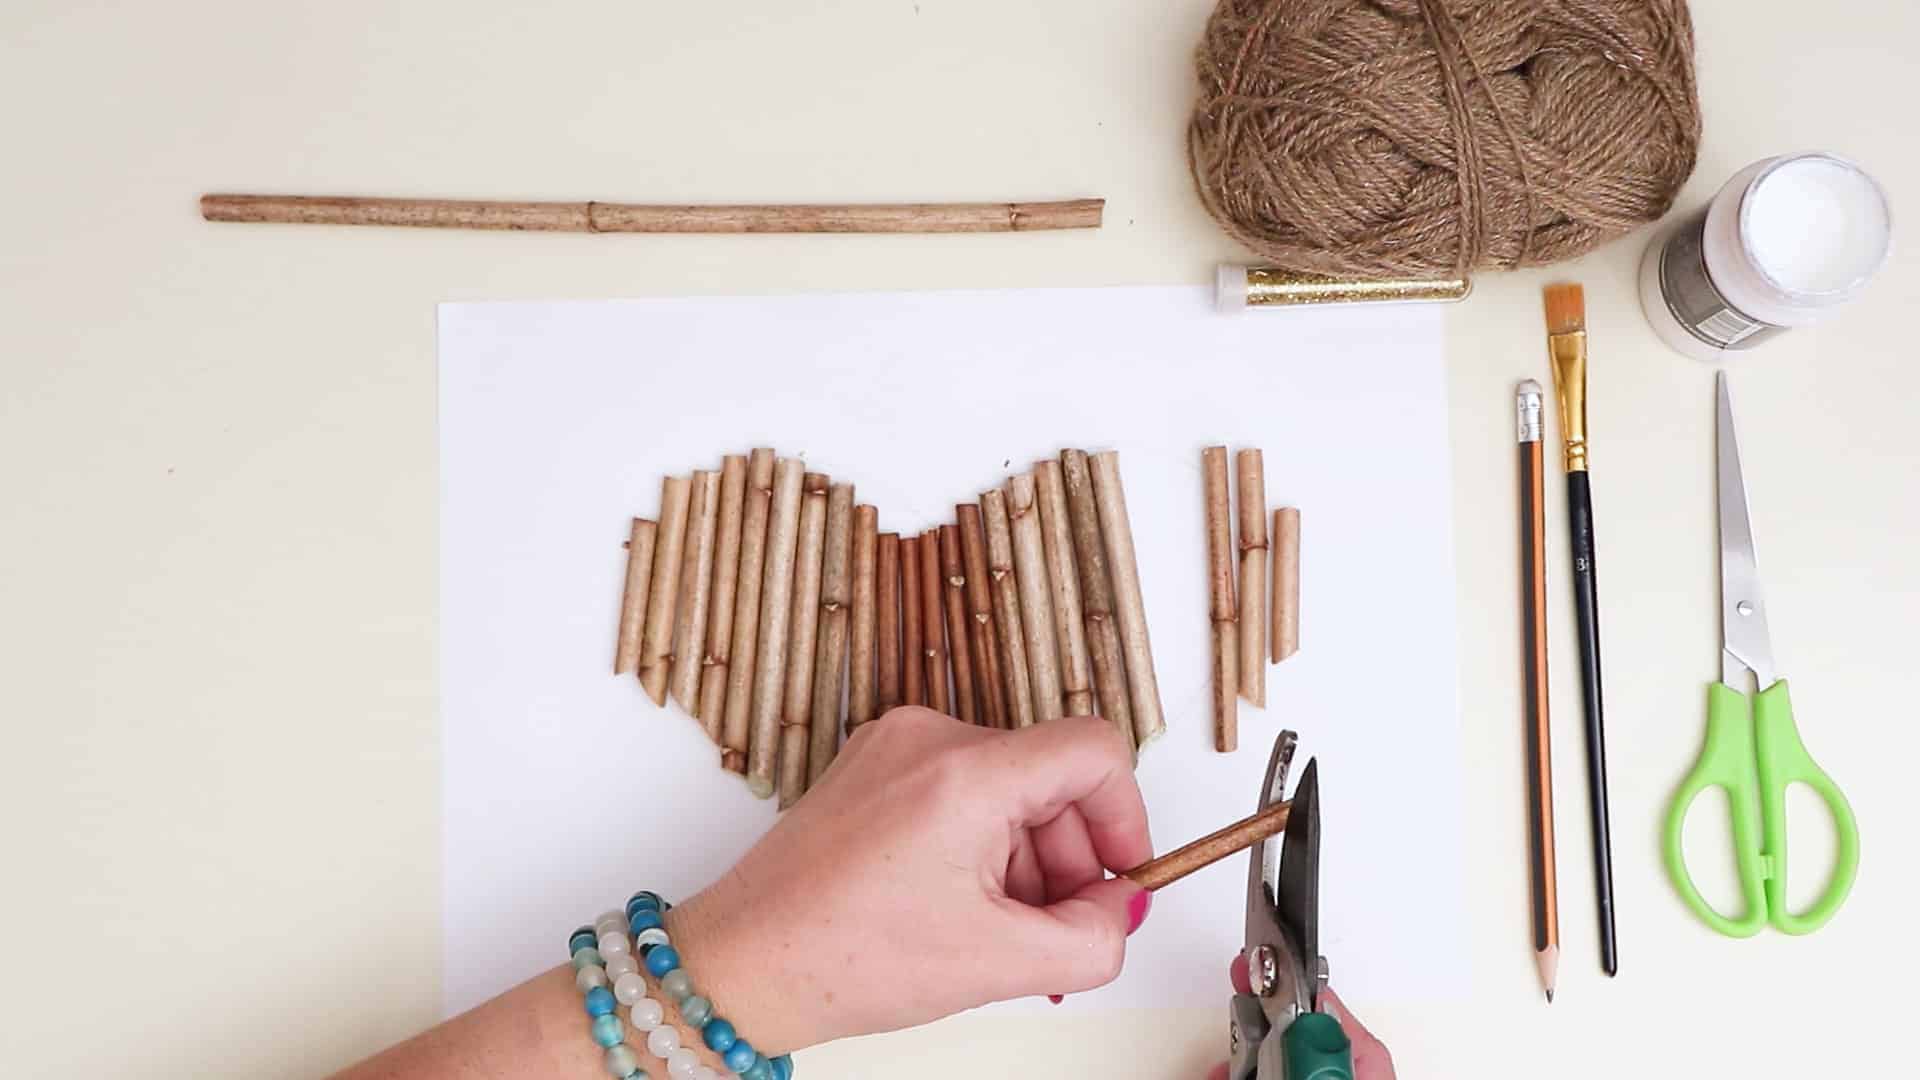
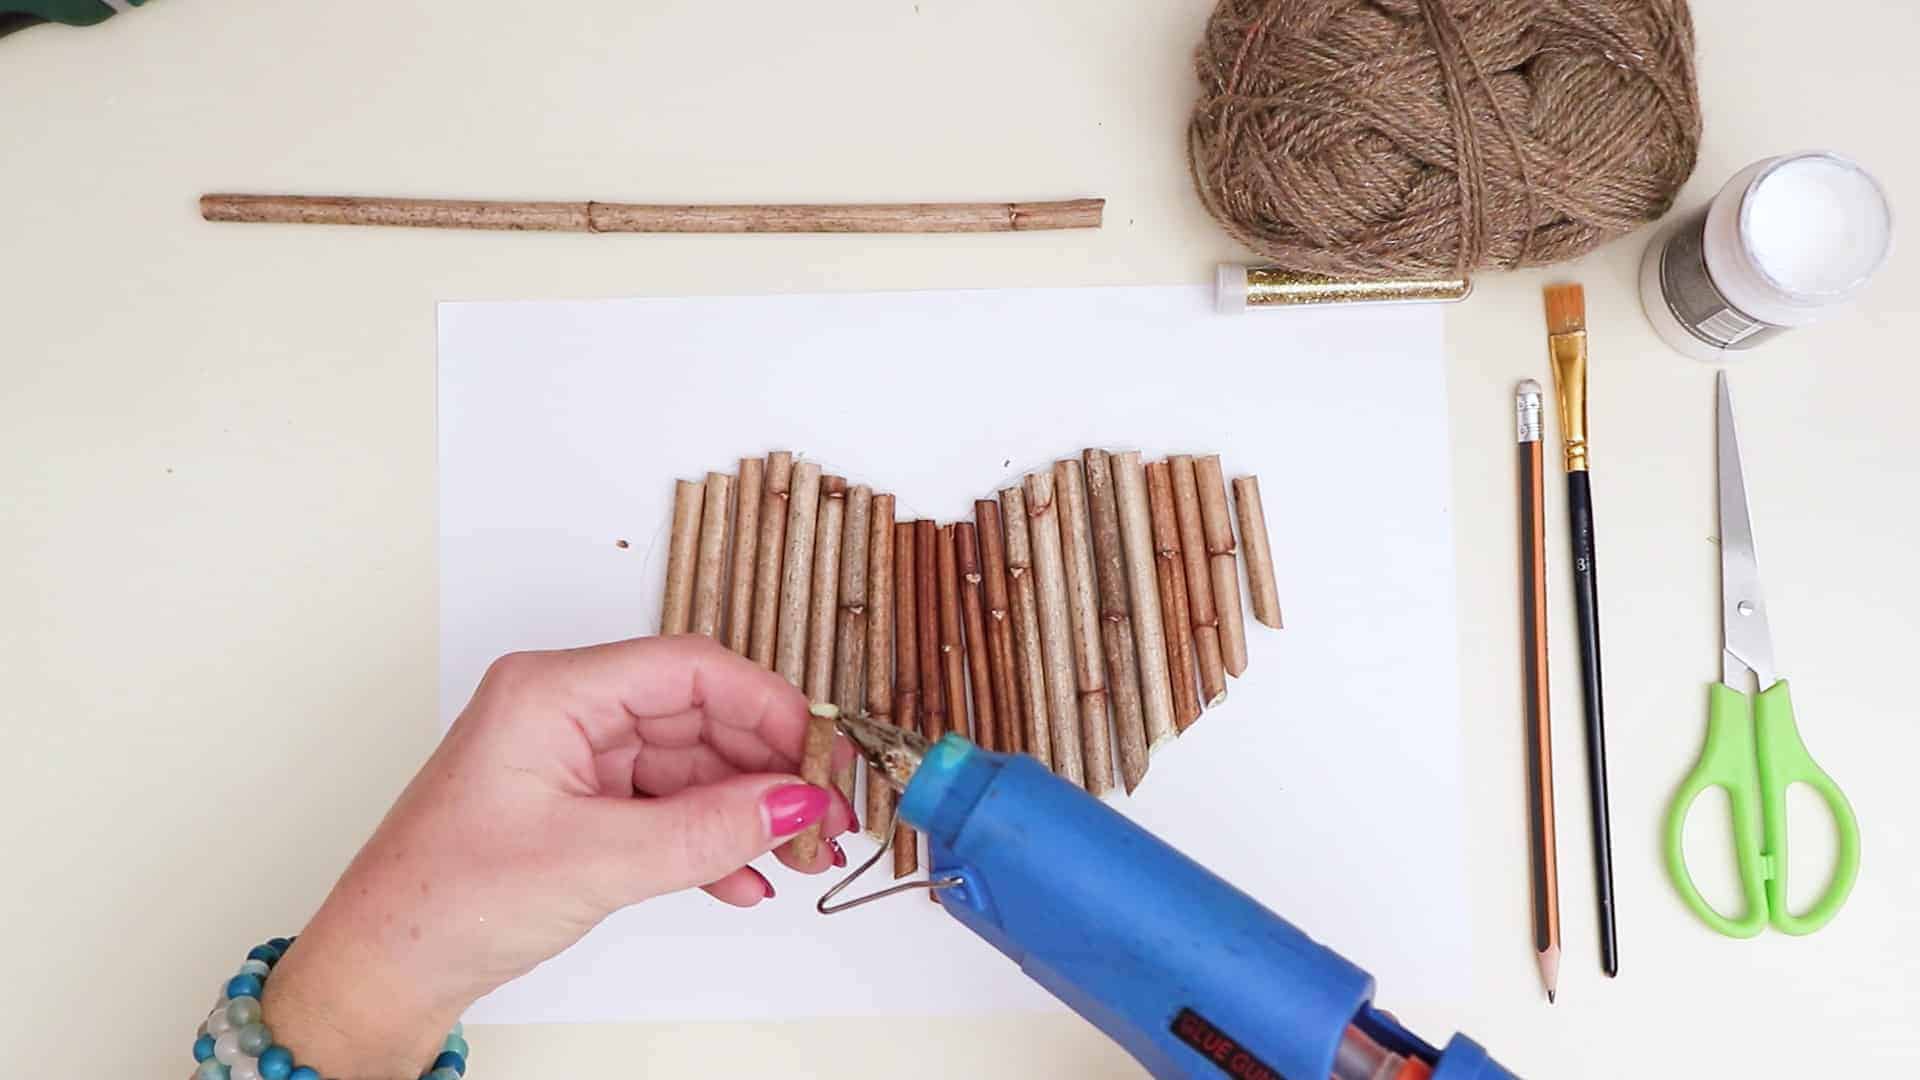
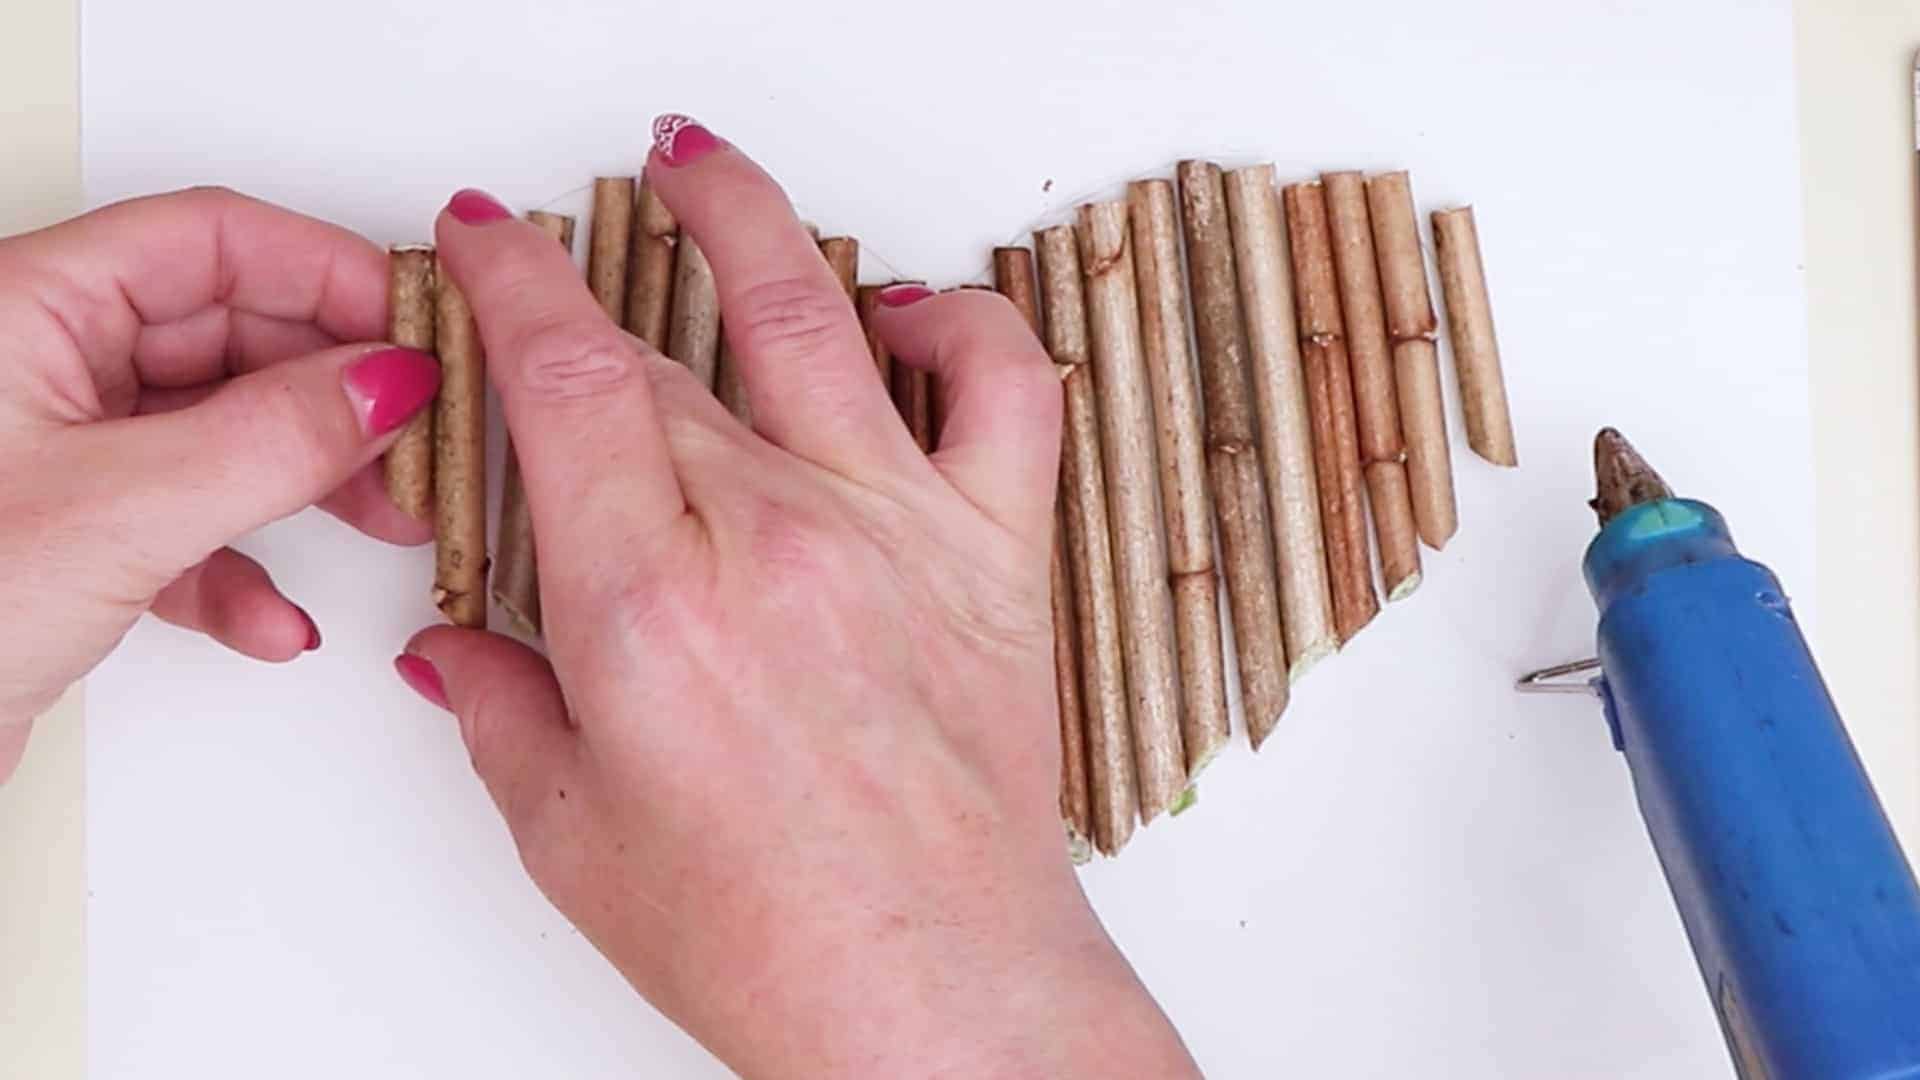
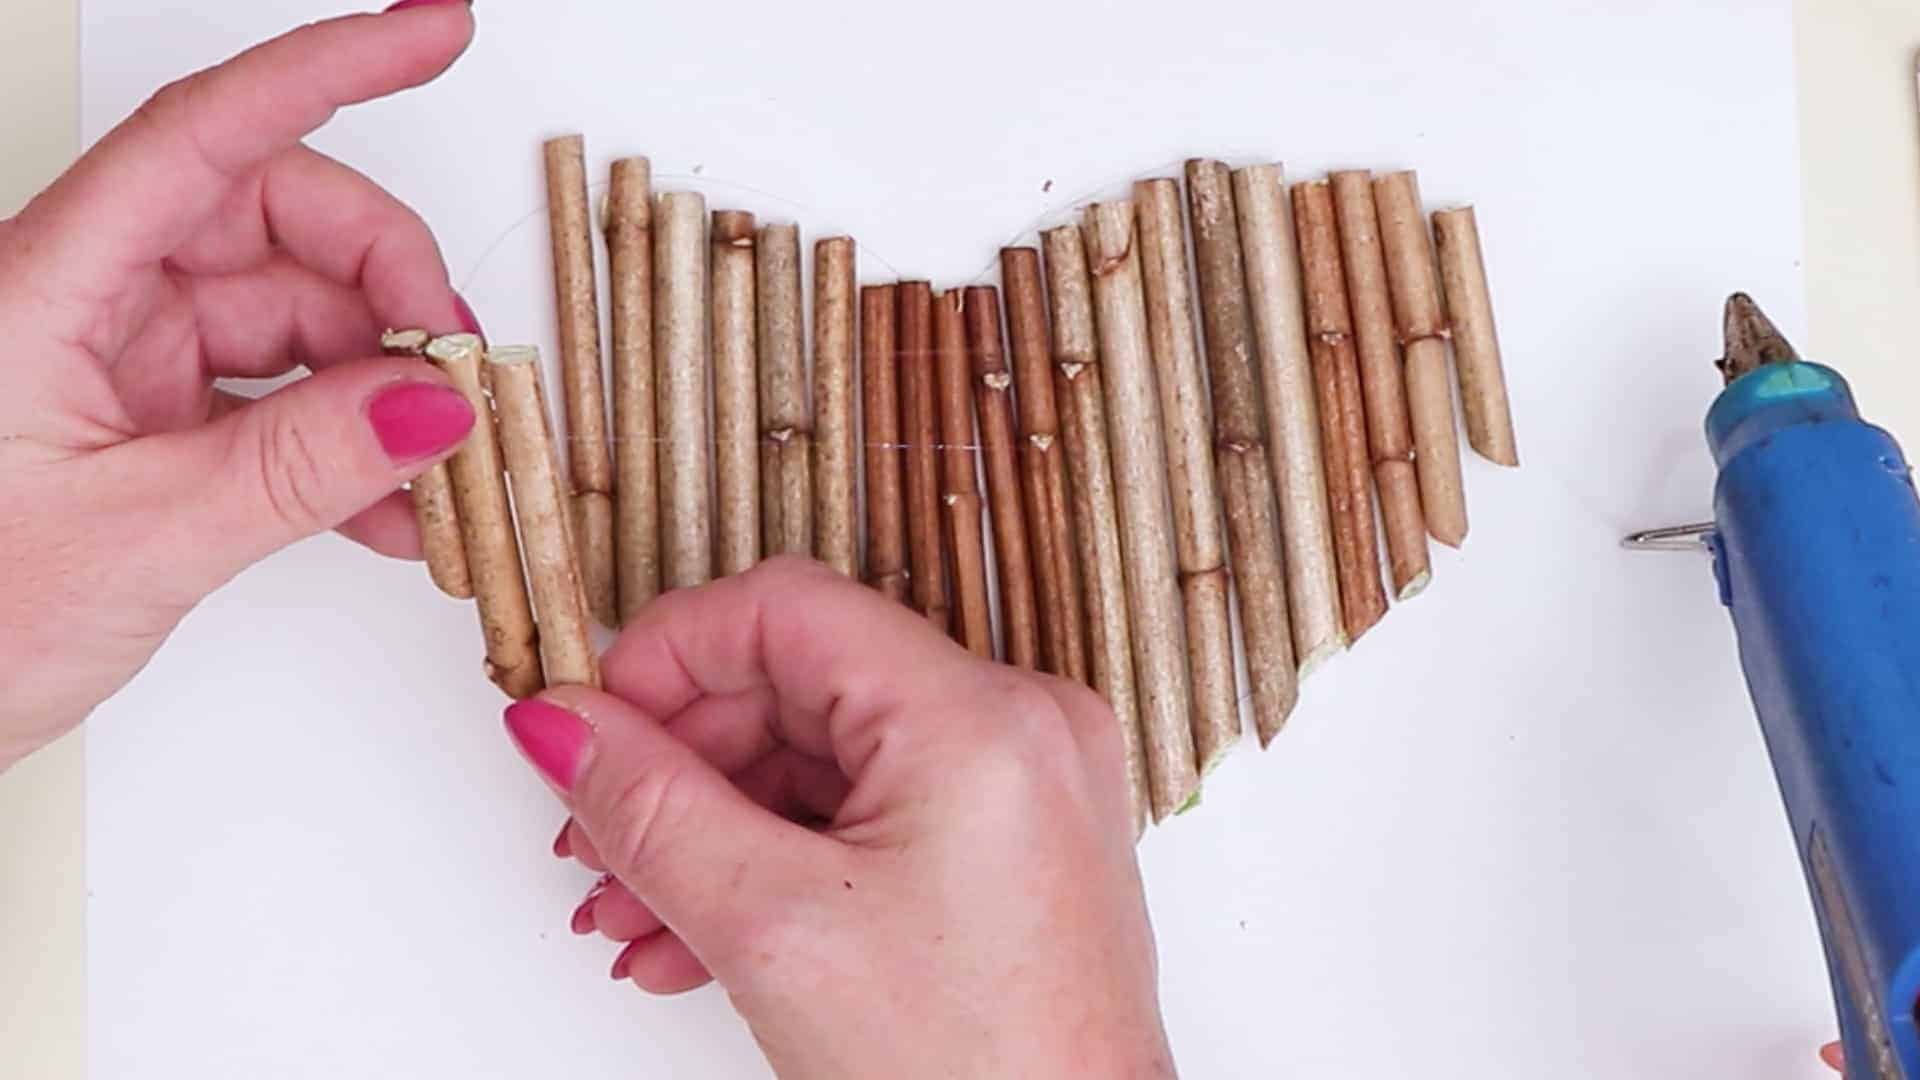
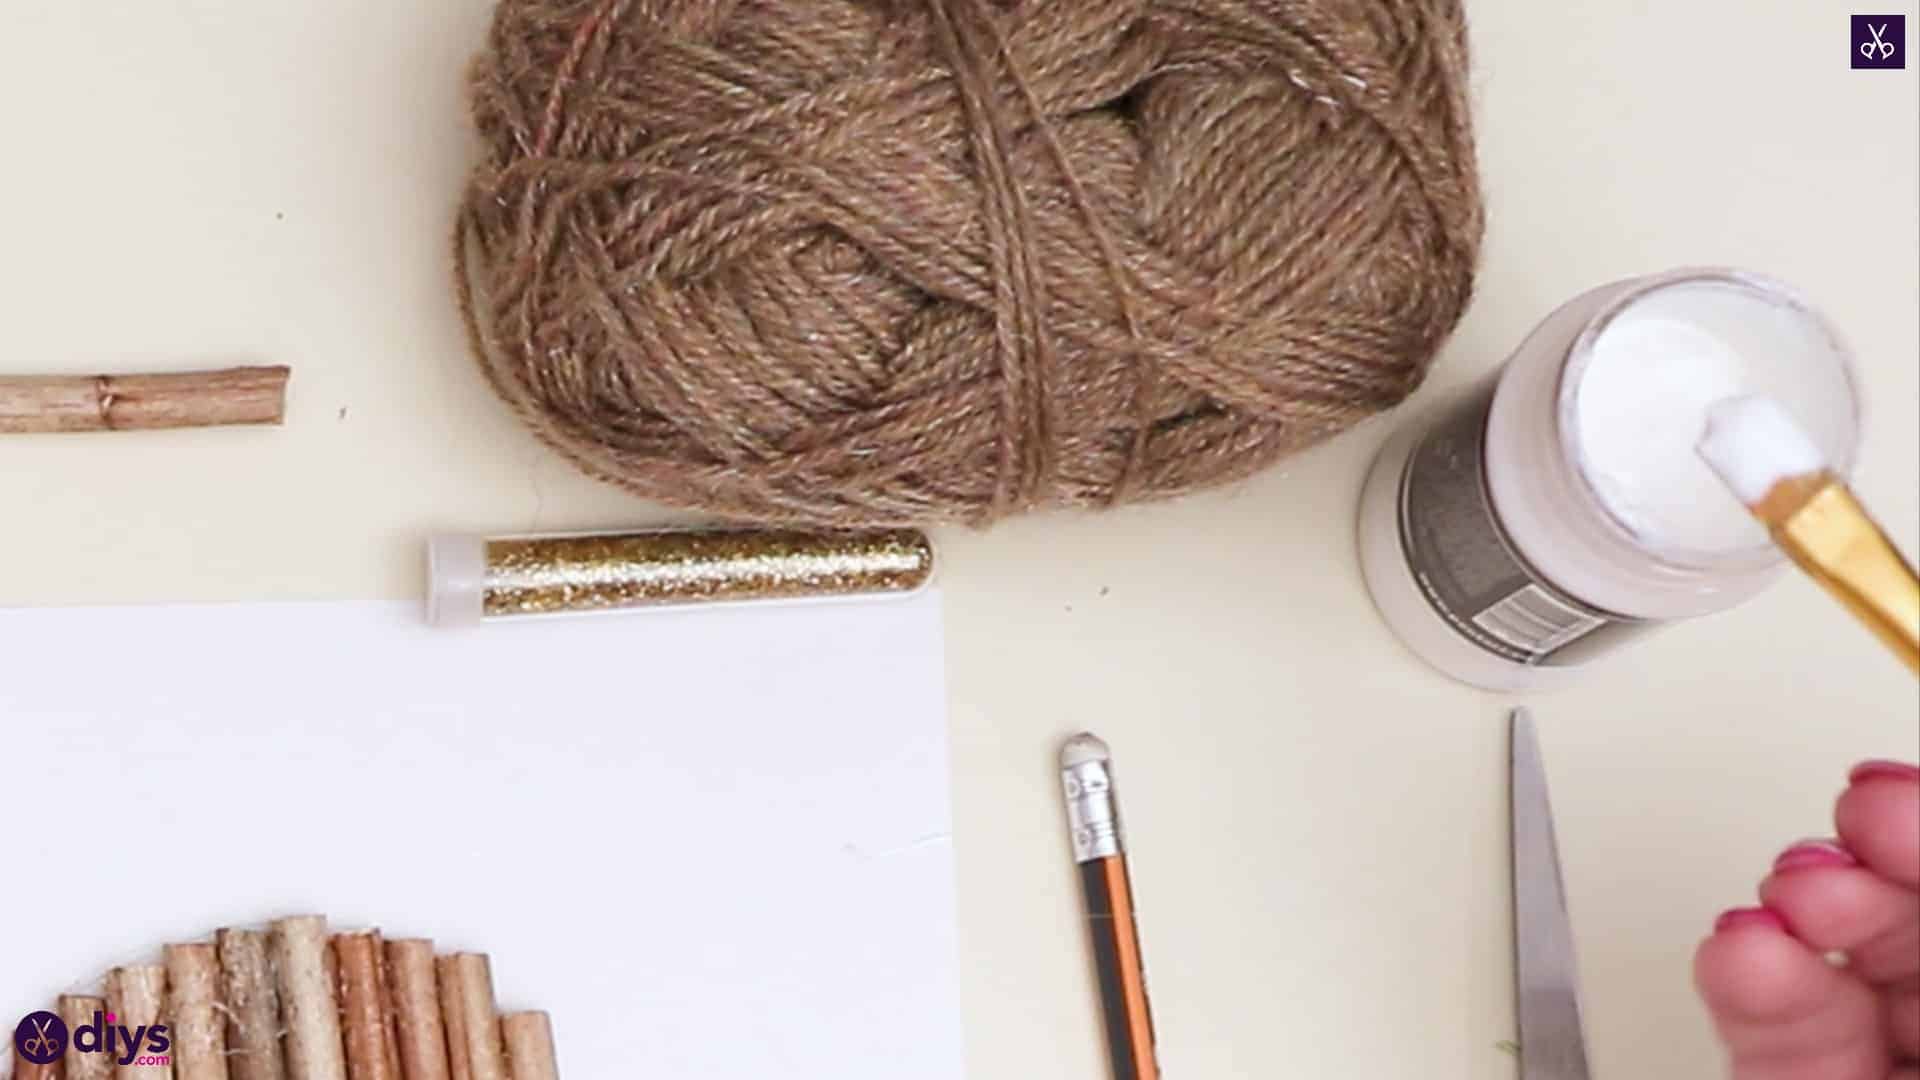
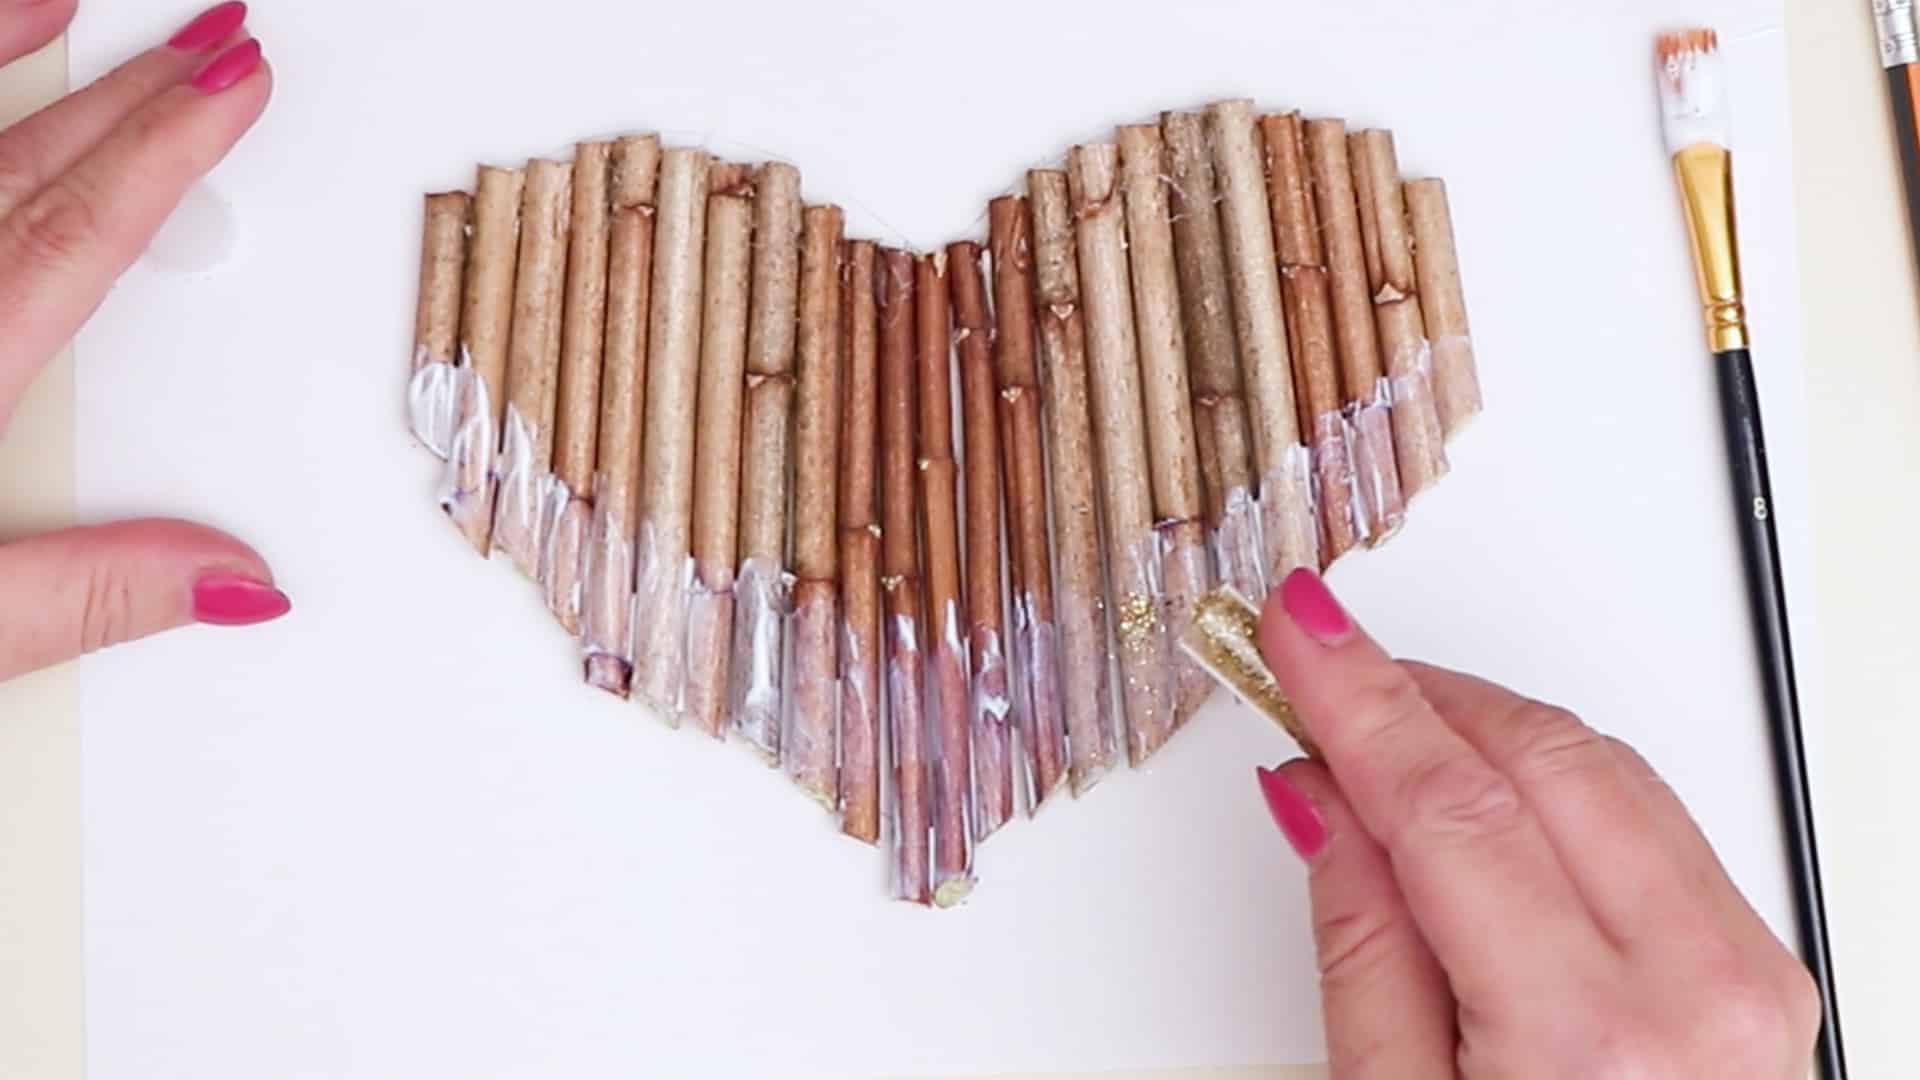
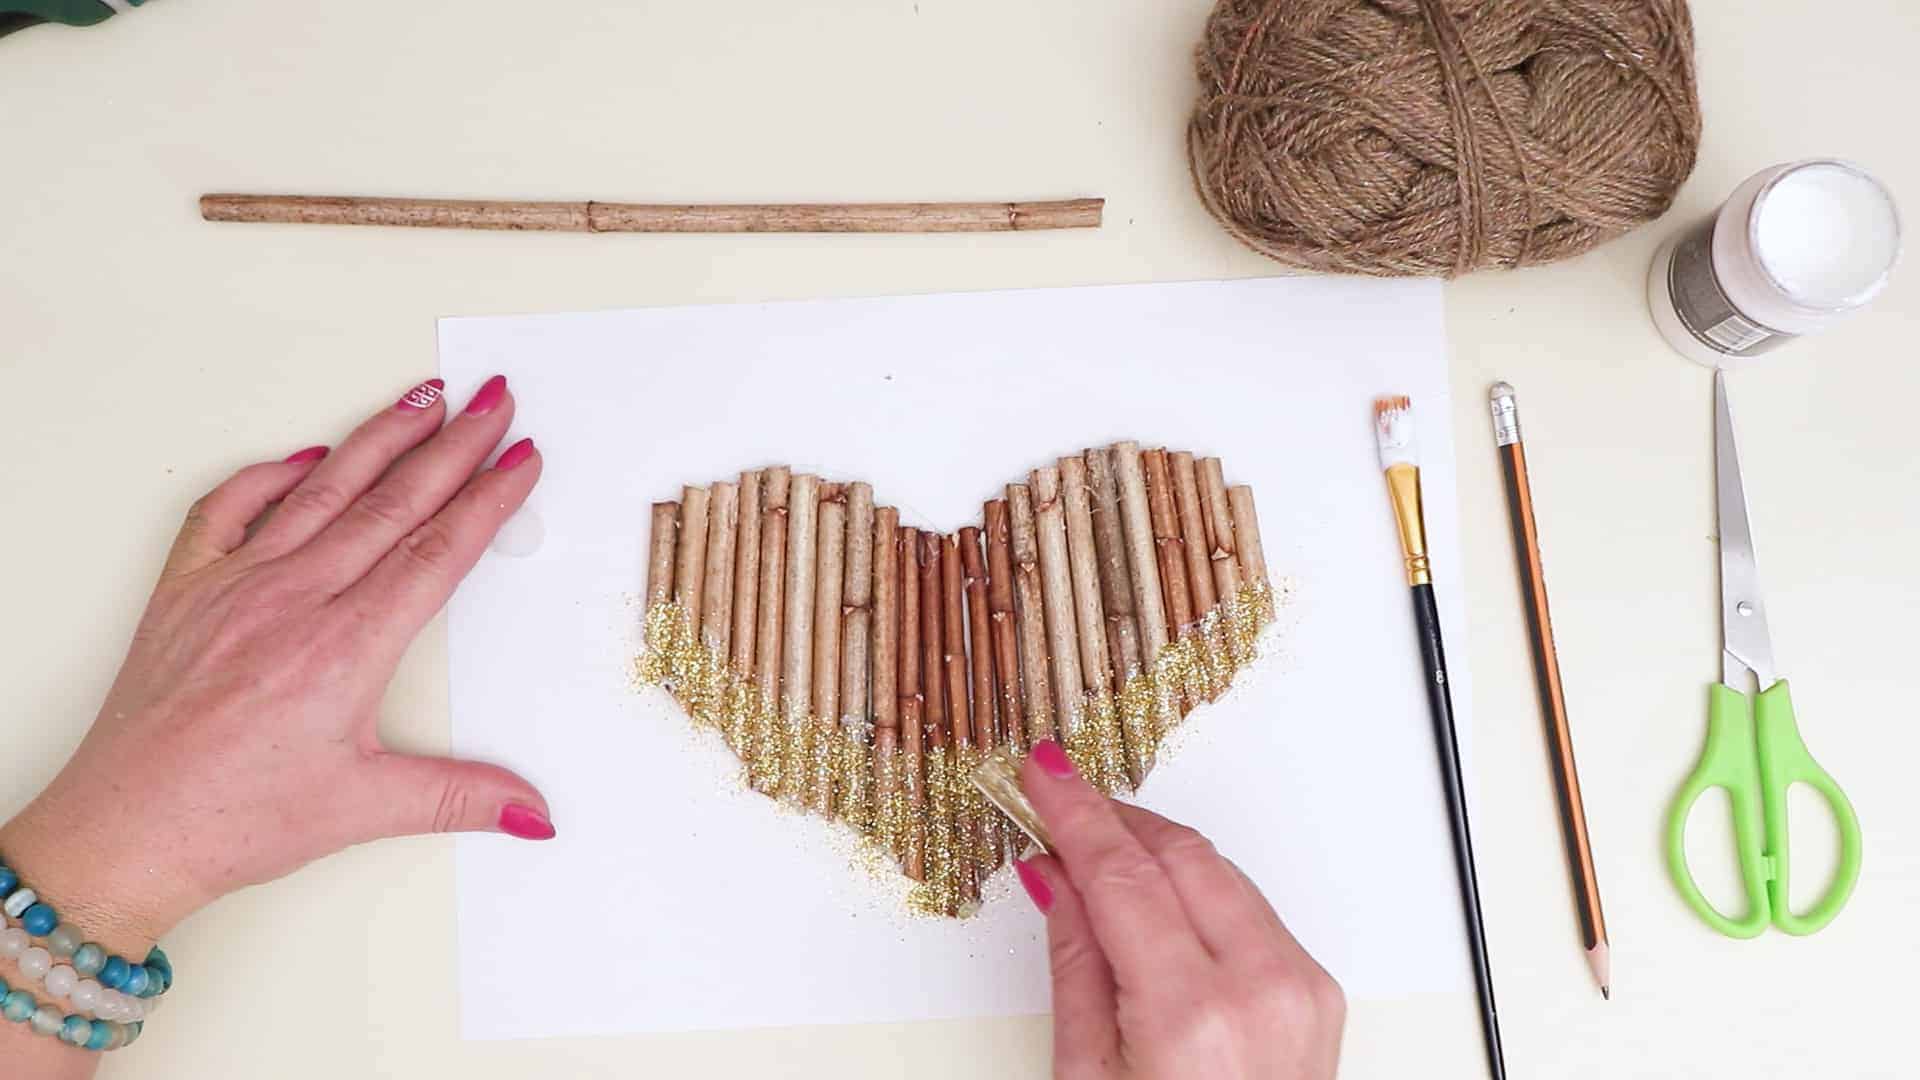
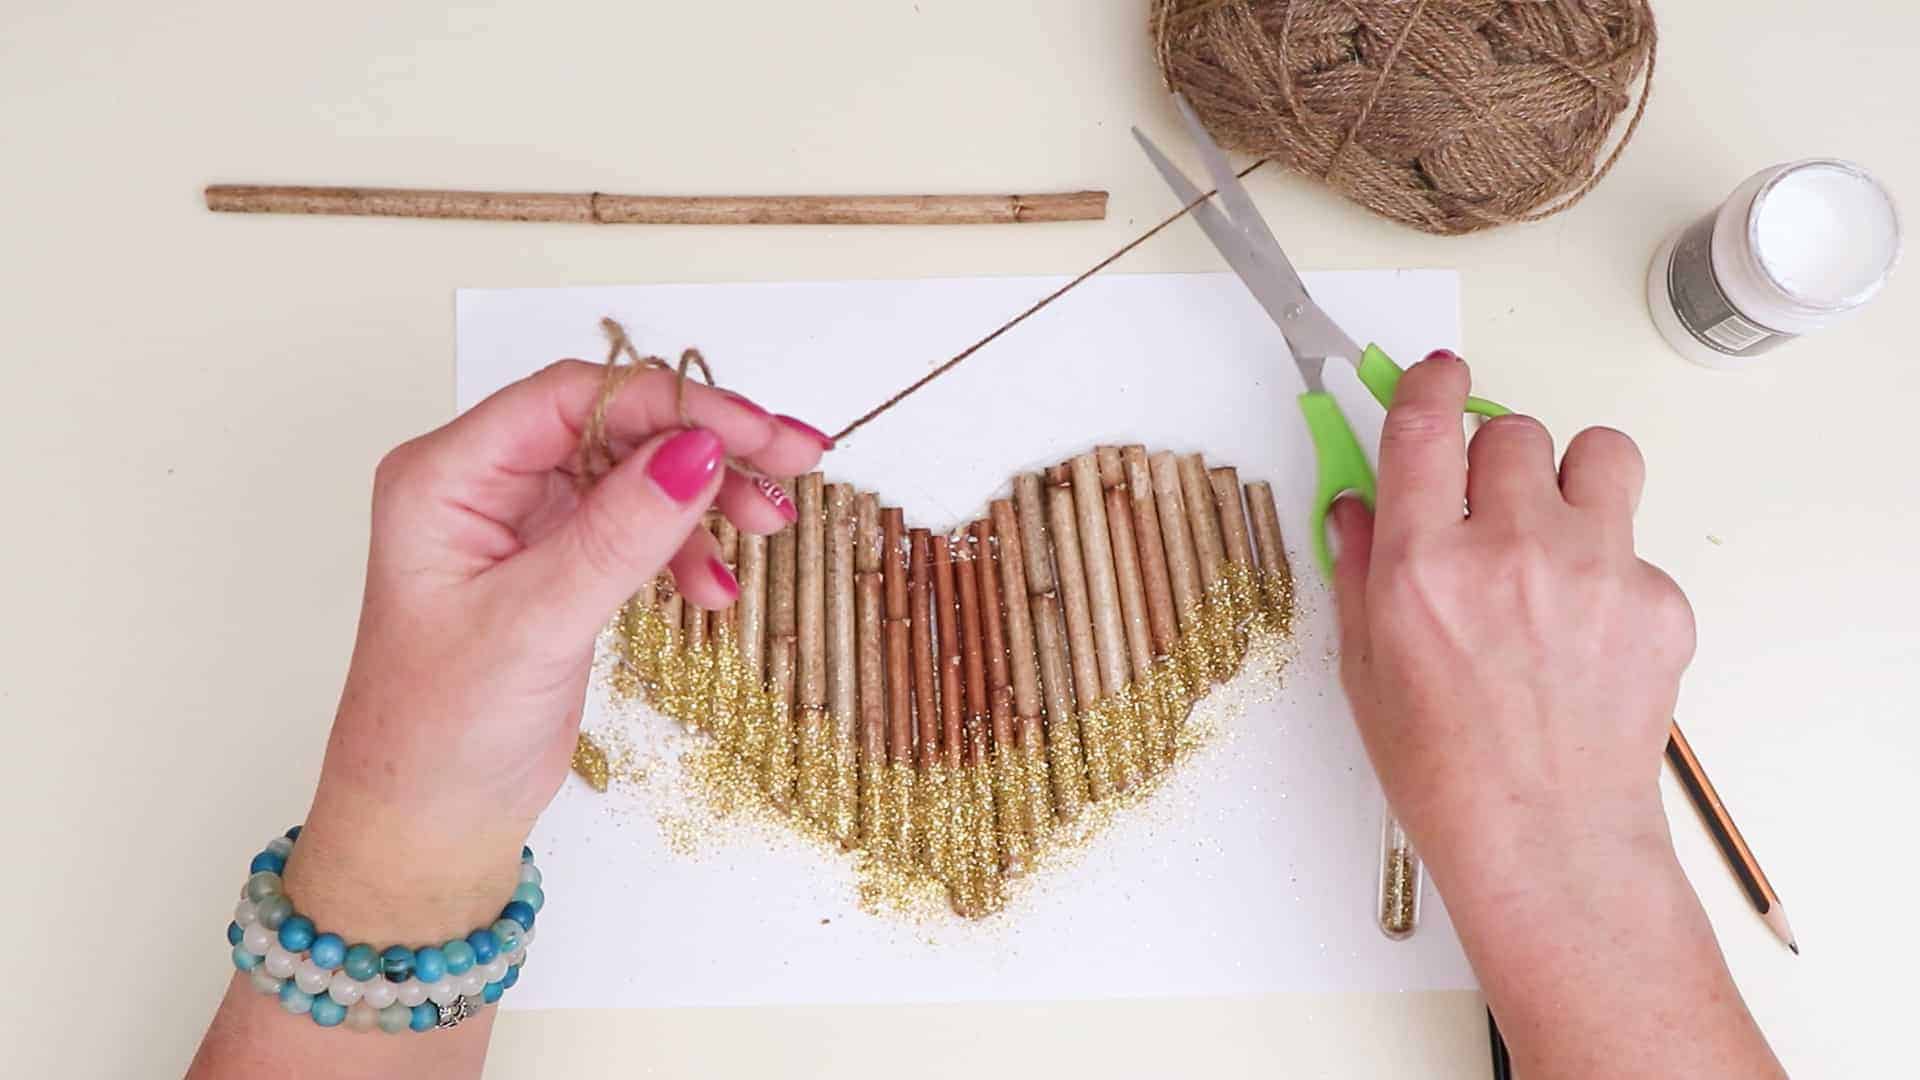
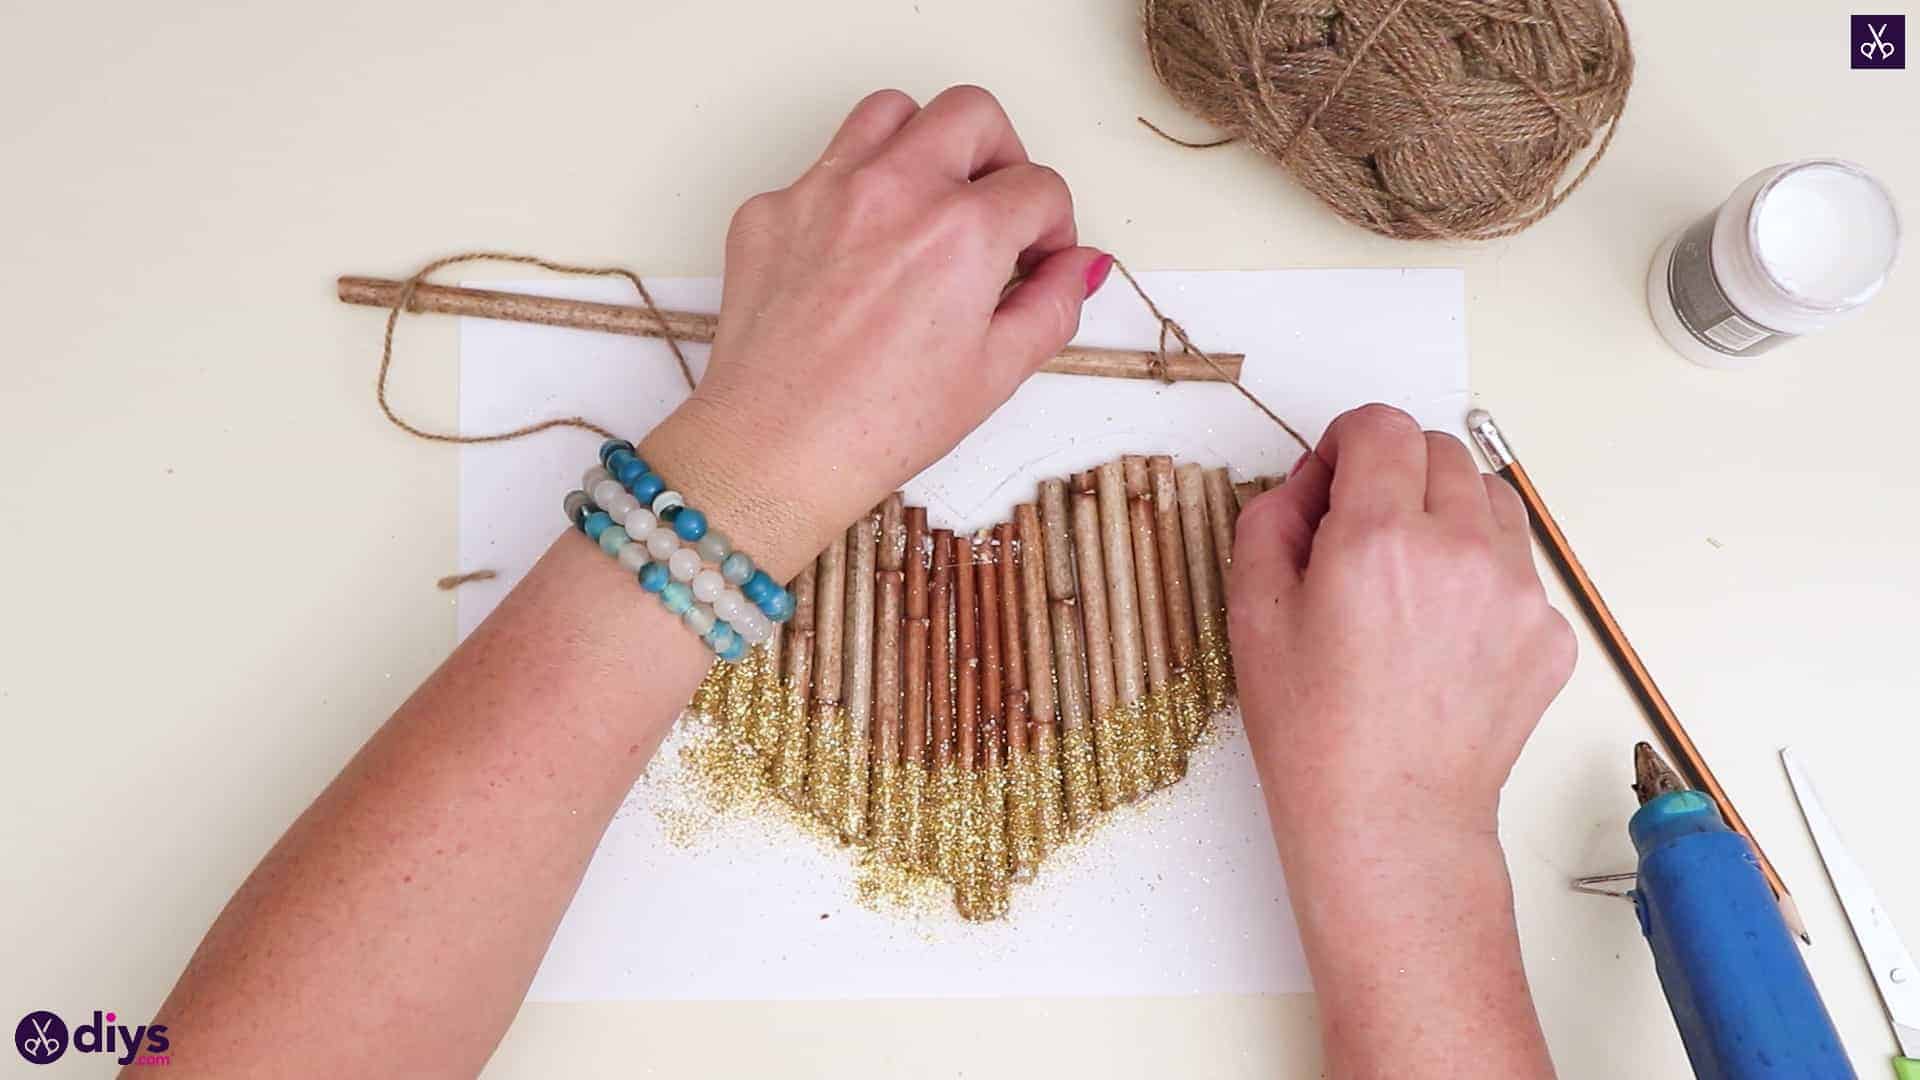
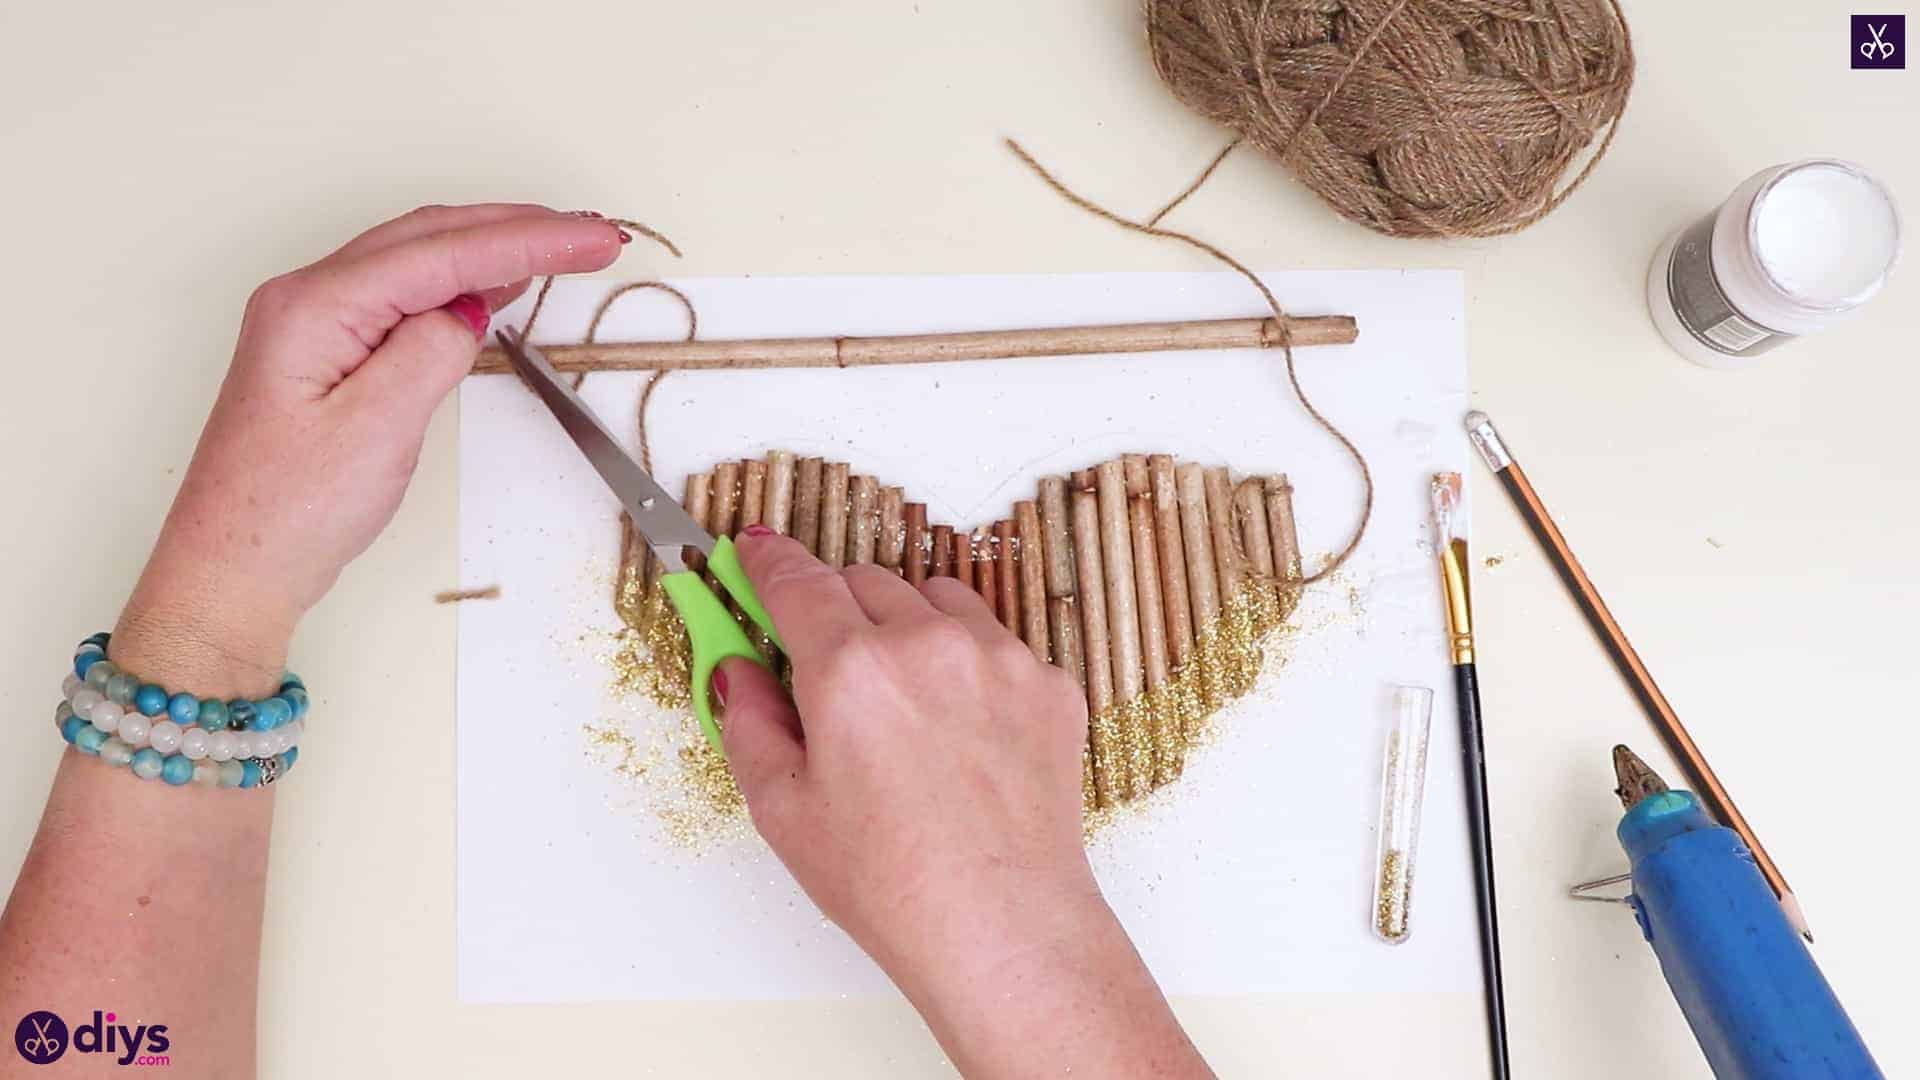
52. Heart String Wall Art DIY
[TAG55]
Decorating your home can be pricey, mainly due to the cost of acquiring art for your walls. Instead of breaking your carefully planned budget, try this easy craft to create art for your wall using just string and nails—two things you probably already have lying around the house.
You’ll be surprised and awed at how cute this project will turn out.
53. Make Your Own Picture Frames
[TAG56]
In the modern day, where everything is digital, it can be difficult to find a place to store and display cherished photos of your family. So next time you have a photo that you absolutely must display, consider making a DIY photo frame.
There are many ways you can do this, and this idea for a rope photo frame is an easy craft that won’t take you long to make.
54. Paper Flower Bouquet Craft
[TAG57]
Flowers are a beautiful addition to any home. But live plants can be difficult to care for and hard to have around when you have allergies. Instead, follow these instructions to make your very own paper flower bouquet that won’t wilt, need water, or cause any sneezing.
And don’t be afraid to switch up the paper style and color to make one of these for every room in your home.
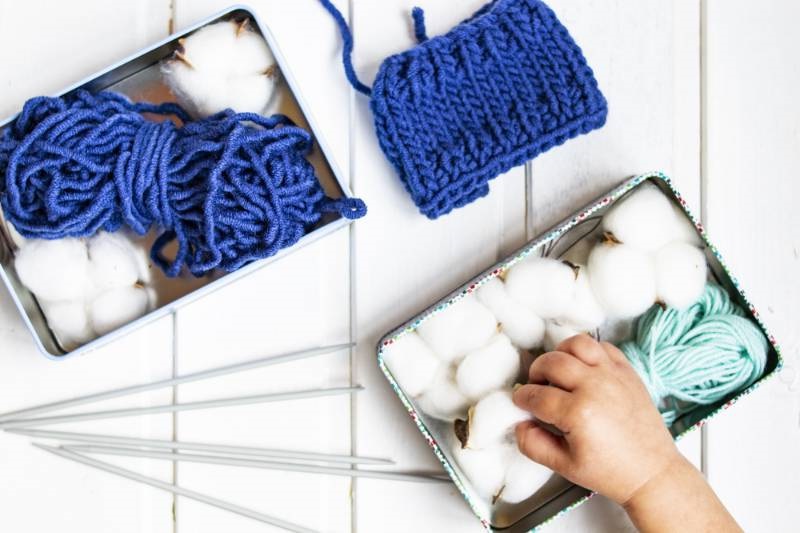
55. Tin Can Organizer
[TAG58]
Keeping your home organized can be difficult, especially when you have many small items covering every available surface. That’s when you should take the time to make this tin can organizer to store your hair ties, barrettes, and other small accessories.
It’s an easy craft that will only require some tin cans, decorative paper, and of course, your imagination.
56. Wooden Coasters DIY
[TAG59]
When it comes to coasters, you will probably need more than one set. This is because most sets only have four pieces, and at some point, you will likely have more than four guests over.
So if you have already made the other coasters on this list, but still want more coasters, consider making these wooden coasters for an additional set. They are a quick, easy craft that you can customize to suit any style of décor.
57. DIY Drawer Organizer
[TAG60]
For those that are taking the time to make multiple crafts on this list, you have probably acquired quite a collection of craft supplies. If these craft supplies are cluttering your drawers and countertop, then it’s time to make this DIY drawer organizer to keep everything in its place.
Don’t be afraid to make multiple of these in different colors and place them in every drawer in your home.
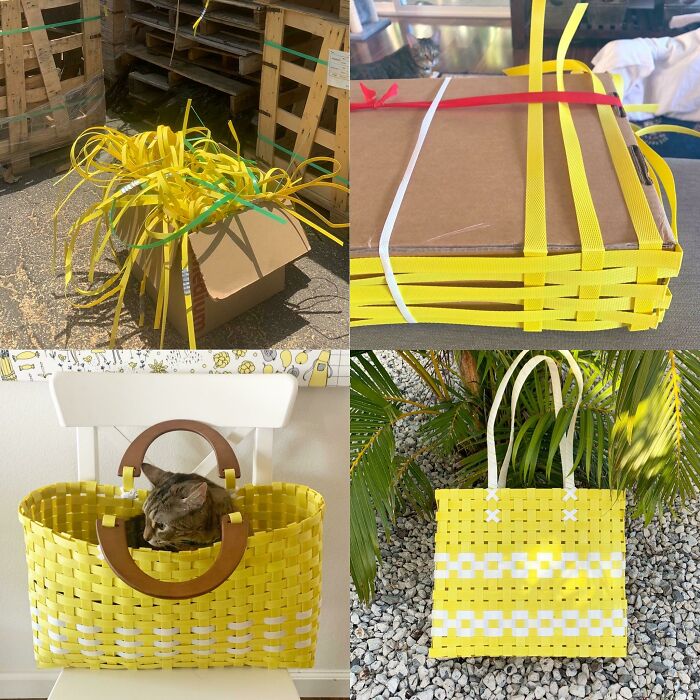
58. Rope Jewelry Basket DIY
[TAG61]
Just like your hair ties and barrettes can clutter every available surface, so can your jewelry. That’s when you should spend an afternoon making this rope jewelry basket for your home.
It’s an easy craft that can help you to stay more organized. And as with every project on this list, don’t be afraid to make three or four and give the others as gifts.
59. Headboard Upgrade DIY
[TAG62]
When you think of furniture, large DIY projects that take days to finish probably come to your mind. But did you know upgrading your headboard is actually an easy craft?
You’ll simply need some wood, foam, fabric, and then a drill to get the job done. This way you can save money and make the exact headboard you need to match your bedroom’s décor.
60. Paint Dipped Vases DIY
[TAG63]
Vases are another item that you will need multiple of to keep your home organized and stylish. For this easy DIY craft, you will need some paint and the vases or milk jug that you want to upgrade.
Feel free to try metallic colors or even glitters if you like. This project is easy but a little messy, so be sure you also have cardboard or paper on hand to catch any extra paint.
Frequently Asked Questions (FAQ)FAQ
What is the Most Popular DIY Craft?
Currently, the most popular DIY crafts are those items that are ‘upcycled’ or that the materials to make them came from something else. This is because many people are environmentally conscious about their purchases.
What DIY Crafts Sell Best?
The DIY crafts that sell the best are personalized items for pets, bath products (such as soap and bath bombs) and bookmarks.
What are the Easiest DIY Crafts to Make?
The easiest DIY craft to make are those that involve very few steps, such as a clothespin wreath or DIY no-sew cloth napkins.
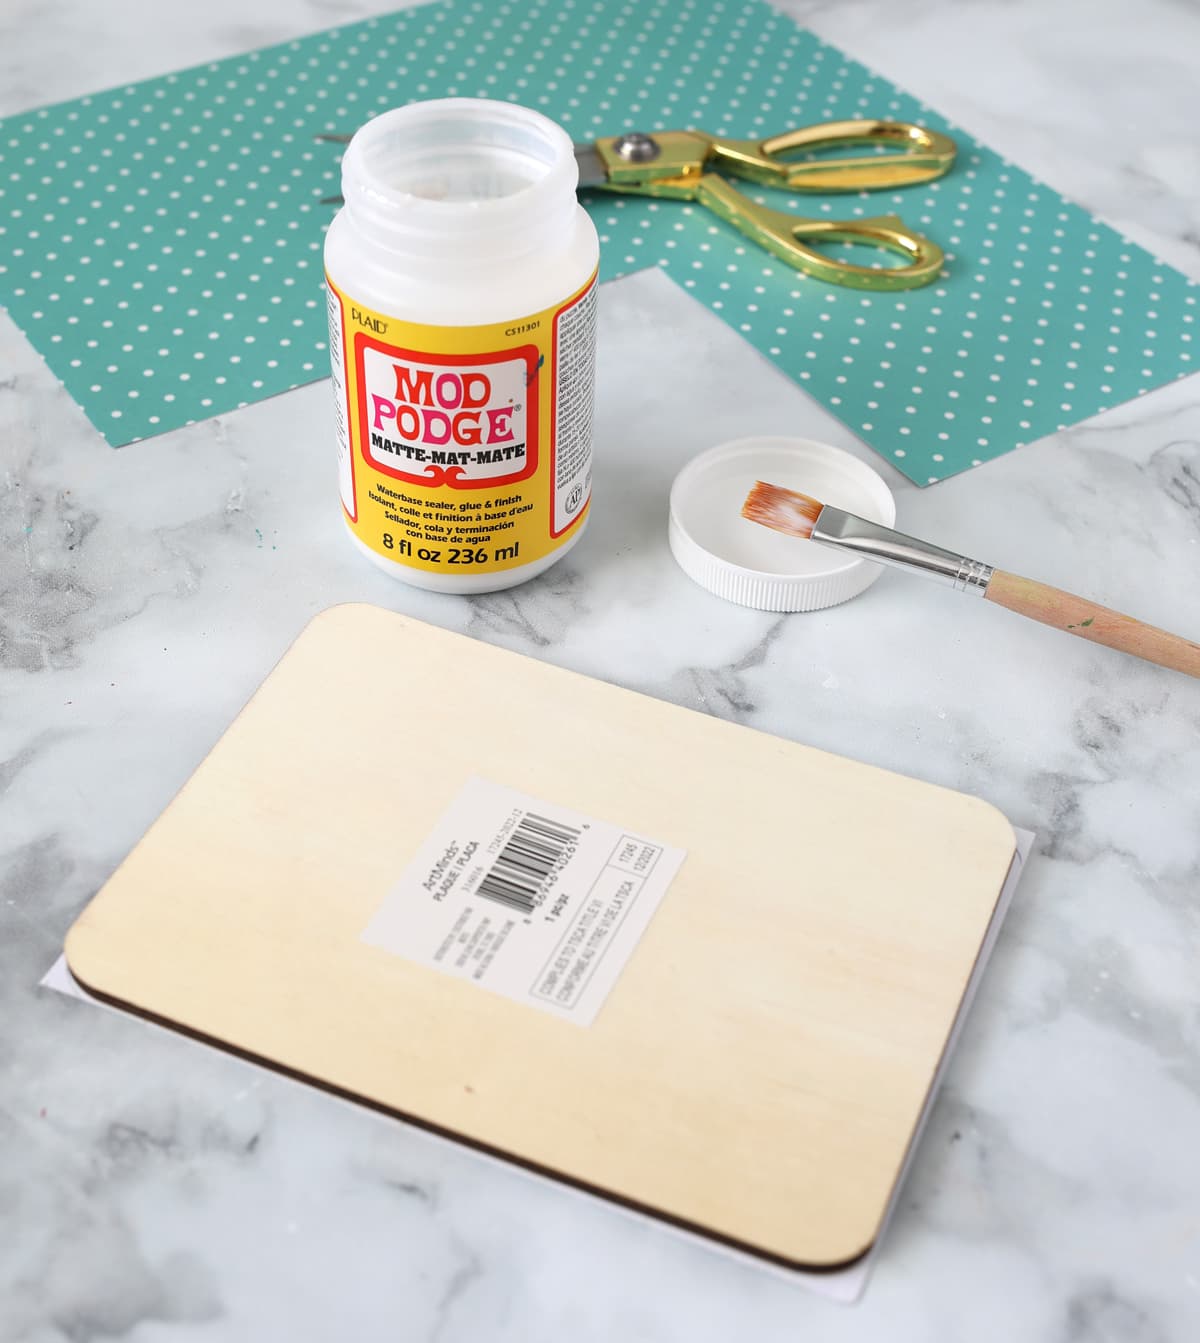
What is Mod Podge?
Mod podge is a type of glue that is commonly used for DIY craft projects. It is unique because it can be used to attach many mediums to one another, such as fabric, paper, and even wood.
What Age Can a Kid Help with DIY Crafts?
The age at which a child can help with a DIY craft will depend on the age and maturity of the child. Younger children as little as 5 or 6 can help with tasks like gluing and painting, but if your craft includes woodworking, or cutting, you may need to wait until your child is 11 or 12 to allow them to help.
What Age is Too Old for DIY Crafts?
You are never too old for DIY crafts. Anyone at any age, including adults, can make any DIY craft they please as long as they are physically able to.
Is It Profitable to Sell DIY Crafts?
Yes, as long as you price your DIY crafts properly, and find a site that won’t charge you an arm and a leg to sell them, selling DIY crafts is a very profitable business.
Which one of these 60 easy DIY crafts is you most excited to try first? These home projects are simple yet effective and will brighten up various rooms in your home this year.
Even if you are a complete beginner crafter, you’ll find something here for you to create. From there, you’ll gain even more confidence, and you’ll soon be trying out some of the more challenging DIY crafts on our site.
The post Fun And Simple DIY Crafts To Try In Your Spare Time appeared first on Homedit.
]]>


![Cheap steak [The Armoury]](https://eatbook.sg/wp-content/uploads/2019/06/Cheap-steak-The-Armoury.jpg)