
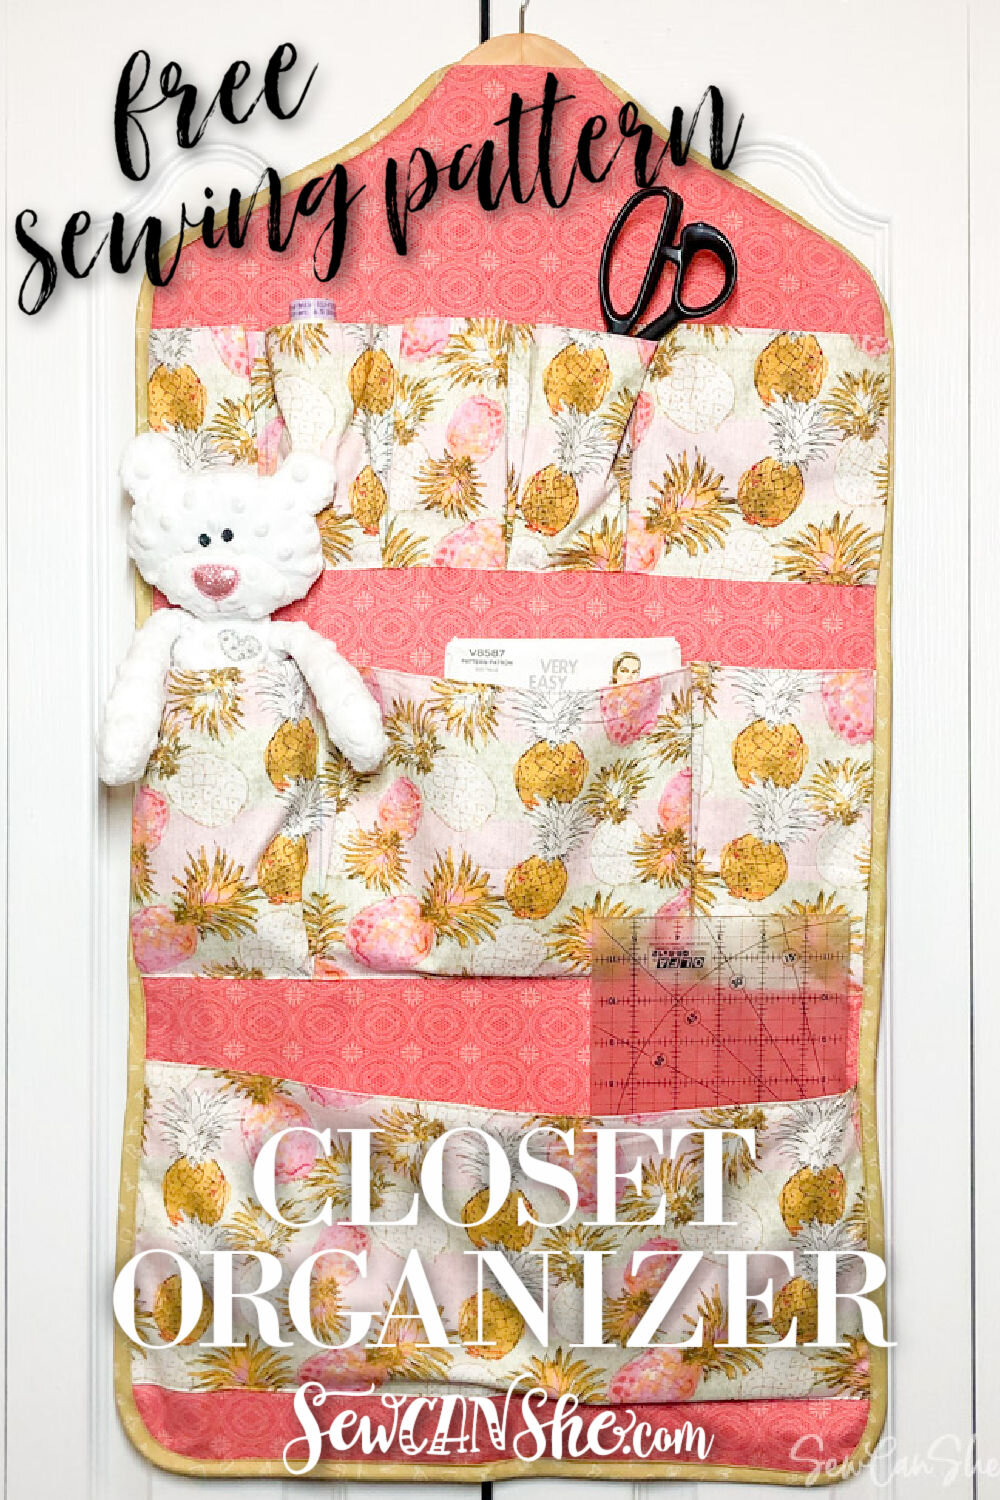
Sew an organizer covered with pockets that you can hang in your closet! This free closet organizer sewing pattern is perfect for your sewing and craft supplies, fashion accessories, bathroom necessities, gift wrappings, and more. There are pockets on both sides plus a big interior pocket so every bit of space is used. I’ll show you easy step by step instructions for sewing this organizer and putting it to use in your home. Get sew organized today.
This blog post has been converted to an optional PDF that’s optimized for printing. Find it here. The Closet Organizer Tutorial is included in the blog post below and is totally free to read, print, and sew! Just hit CTRL +P on your computer to print. The Optimized for Printing PDF download for $2 is totally optional.
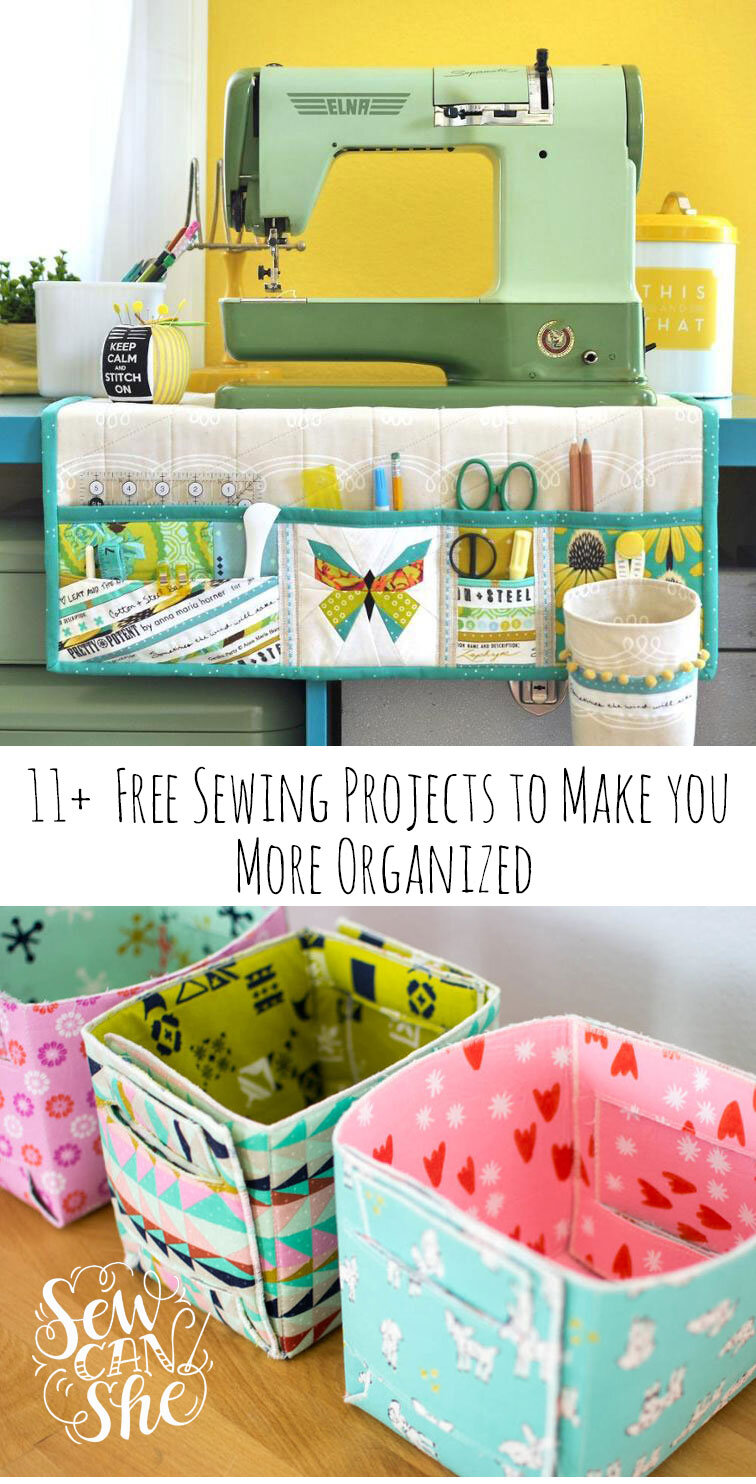
I also added this sewing pattern to my list of 11+ Free Sewing Projects to Make You More Organized – because it totally fits!
Sewing Materials for the Closet Organizer
My closet organizer is sewn from quilting cotton fabric, and I inserted a sturdy wooden coat hanger with a swivel hook so it can hang just about anywhere.
The finished size is approximately 19’’ wide x 35’’ tall. There are a total of 6 pockets, divided into 12 sections total.

The back of the organizer has 3 tall deep pockets that are great for storing long rulers, rolls of wrapping paper or embroidery stabilizer, sewing patterns, and more.

Access the inside of the fabric organizer using a long zipper. This provides storage for large flat items and also lets you insert a sturdy clothes hanger.
The pockets on this organizer are made similar to the way that I made the pockets on my Mug Caddy and #10 Caddy Organizer. They are so easy!
Let’s sew the Closet Organizer Sewing Pattern!
You will need:
-
a sturdy coat hanger
-
1 zipper, 18’’ or longer
-
1 yard of fabric for the exterior*
-
1 yard of fabric for the lining (interior – I used plain muslin to save money)*
-
1 yard of fabric for the front pockets*
-
1 yard of fabric for the back pockets*
-
a fat quarter or 1/3 yard of fabric for making the binding
-
Pins or Wonderclips
-
a fabric marking pen (such as a Frixion pen or blue fabric marker)
-
a regular mug with about a 3’’ opening (or the Creative grids curved corner ruler)
-
Sewing Stiletto (very helpful for sewing binding)
*More fabric may be needed if you are using a directional print.
Cutting
Note: all cutting dimensions are height x width, however I have turned some fabric pieces in the cutting diagrams in order to make the best use of fabric. If your fabric is directional, you will need extra fabric to ensure that the print is right side up.
From the fabric for the exterior of the organizer, cut:
-
2 rectangles 35’’ x 19’’
From the lining fabric, cut:
-
2 rectangles 35’’ x 19’’
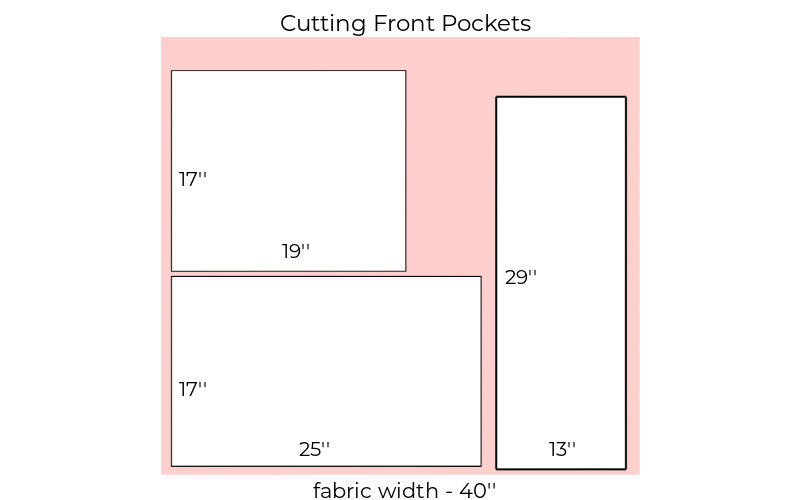
From your fabric for the front pockets, cut:
-
1 rectangle 17’’ x 19’’ (Pocket 1)
-
1 rectangle 17’’ x 25’’ (Pocket 2)
-
1 retangle 13’’ x 29’’ (Pocket 3)
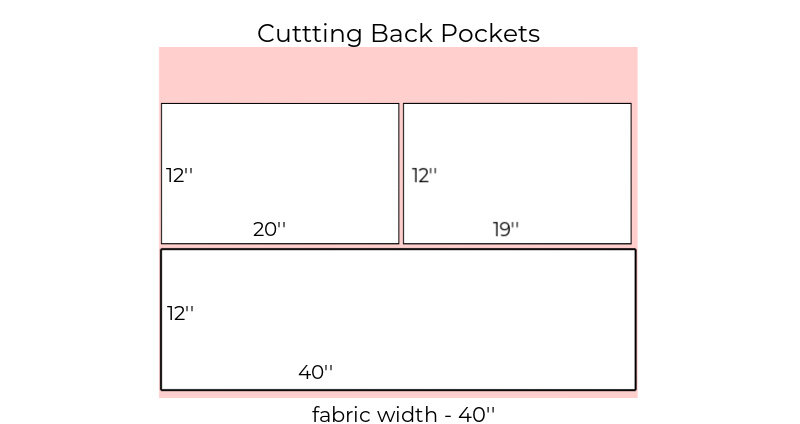
From your fabric for back pockets, cut:
-
1 rectangle 40’’ x 12’’ (Pocket 4)
-
1 rectangle 20’’ x 12’’ (Pocket 5)
-
1 rectangle 19’’ x 12’’ (Pocket 6)

If you are using 1/3 yard of fabric for your binding, cut:
-
7 bias cut strips of fabric that are 2 1/4’’ wide (strips cut at a 45 degree angle)
Sew the bias cut strips together to make one strip at least 3 yards long.
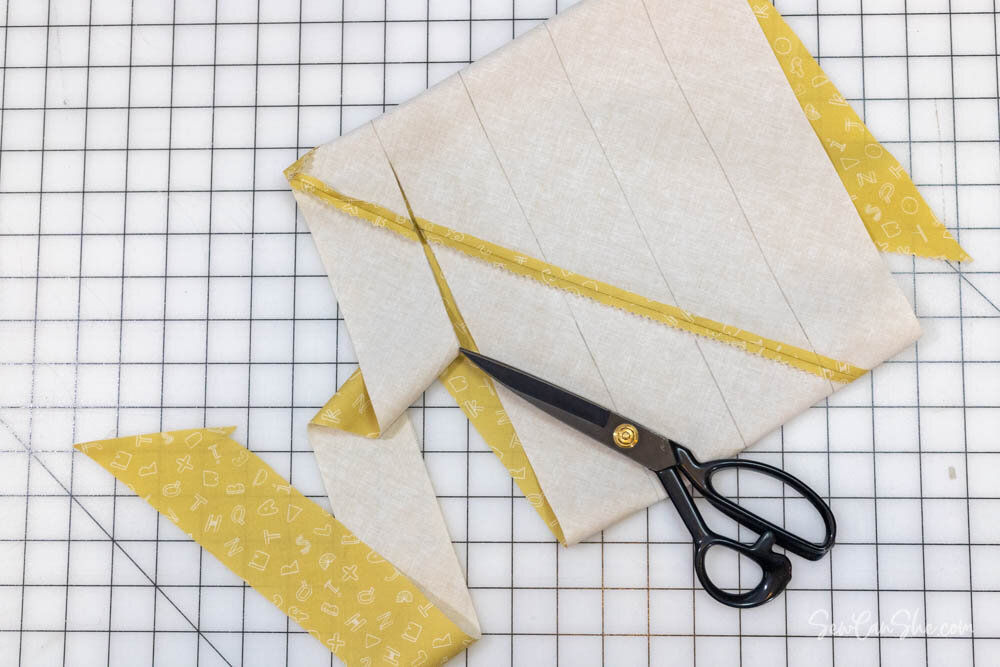
If you would like to use a fat quarter to make your binding, use my video tutorial for making 3+ yards of bias binding from a FQ. It is perfect for this project.
Mark the Front of the Organizer
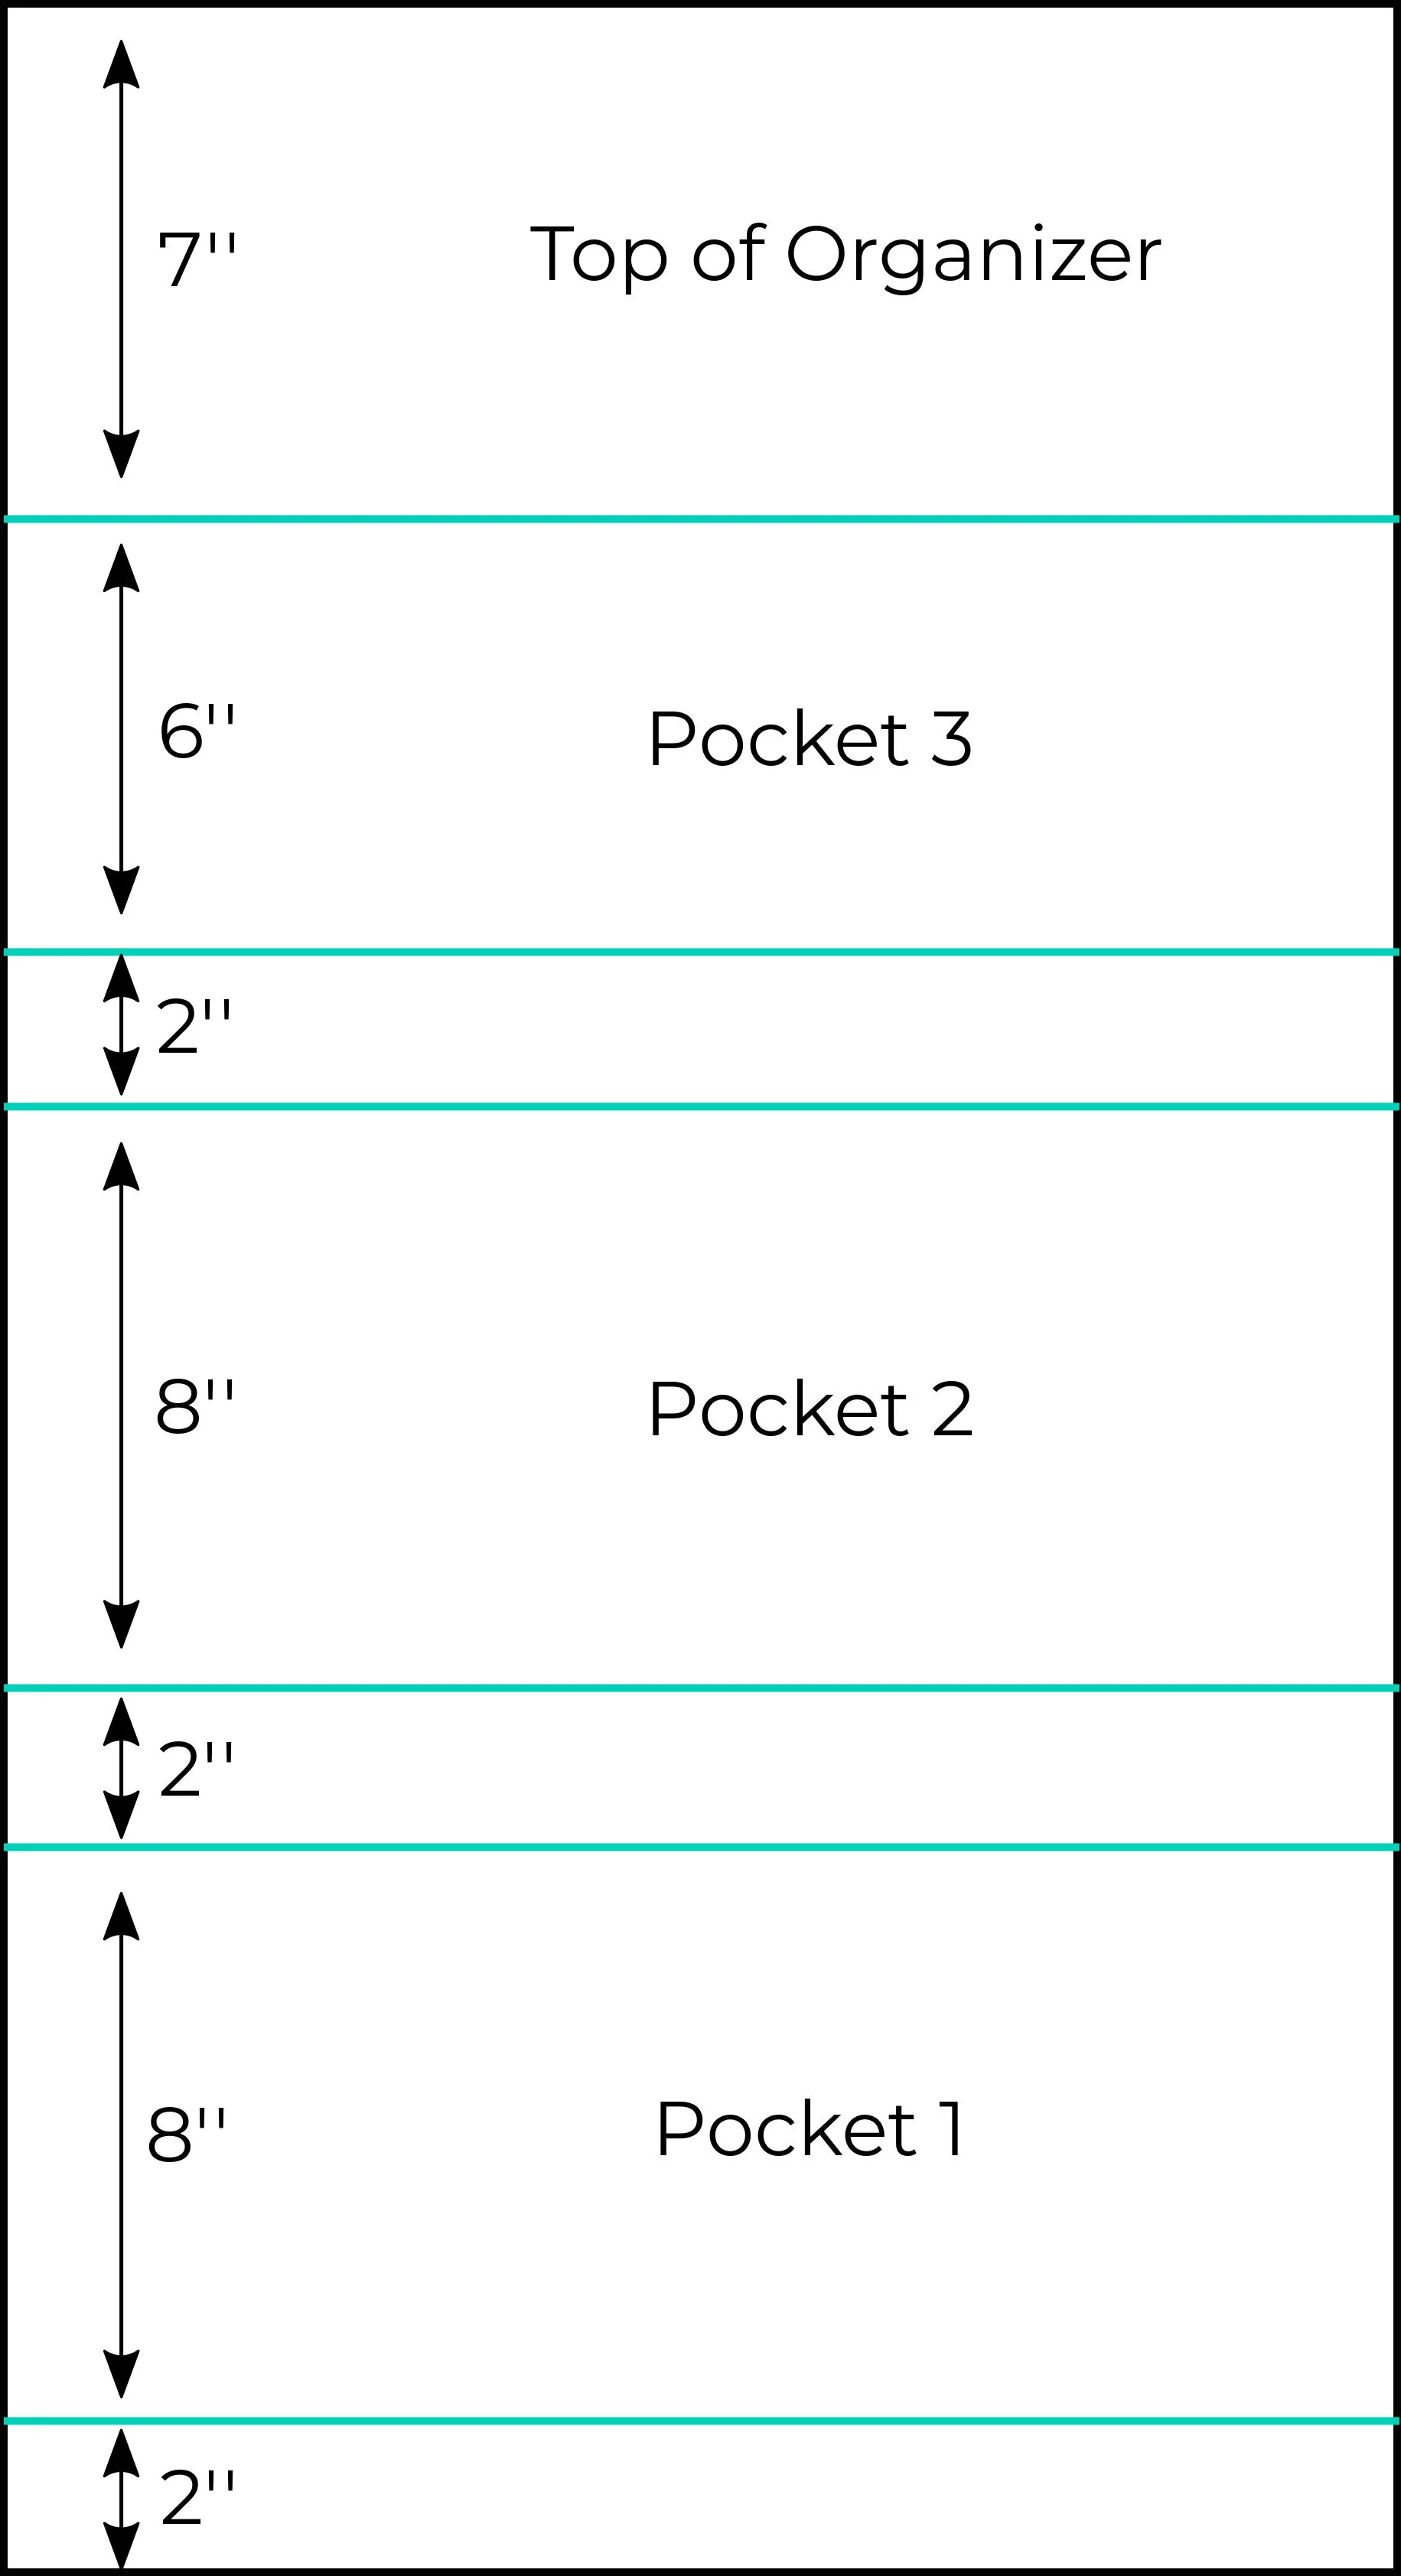
1. Use a fabric marker and the diagram above to draw 6 horizontal lines on the right side of one of the 35’’ x 19’’ rectangles of fabric that will be the organizer exterior.
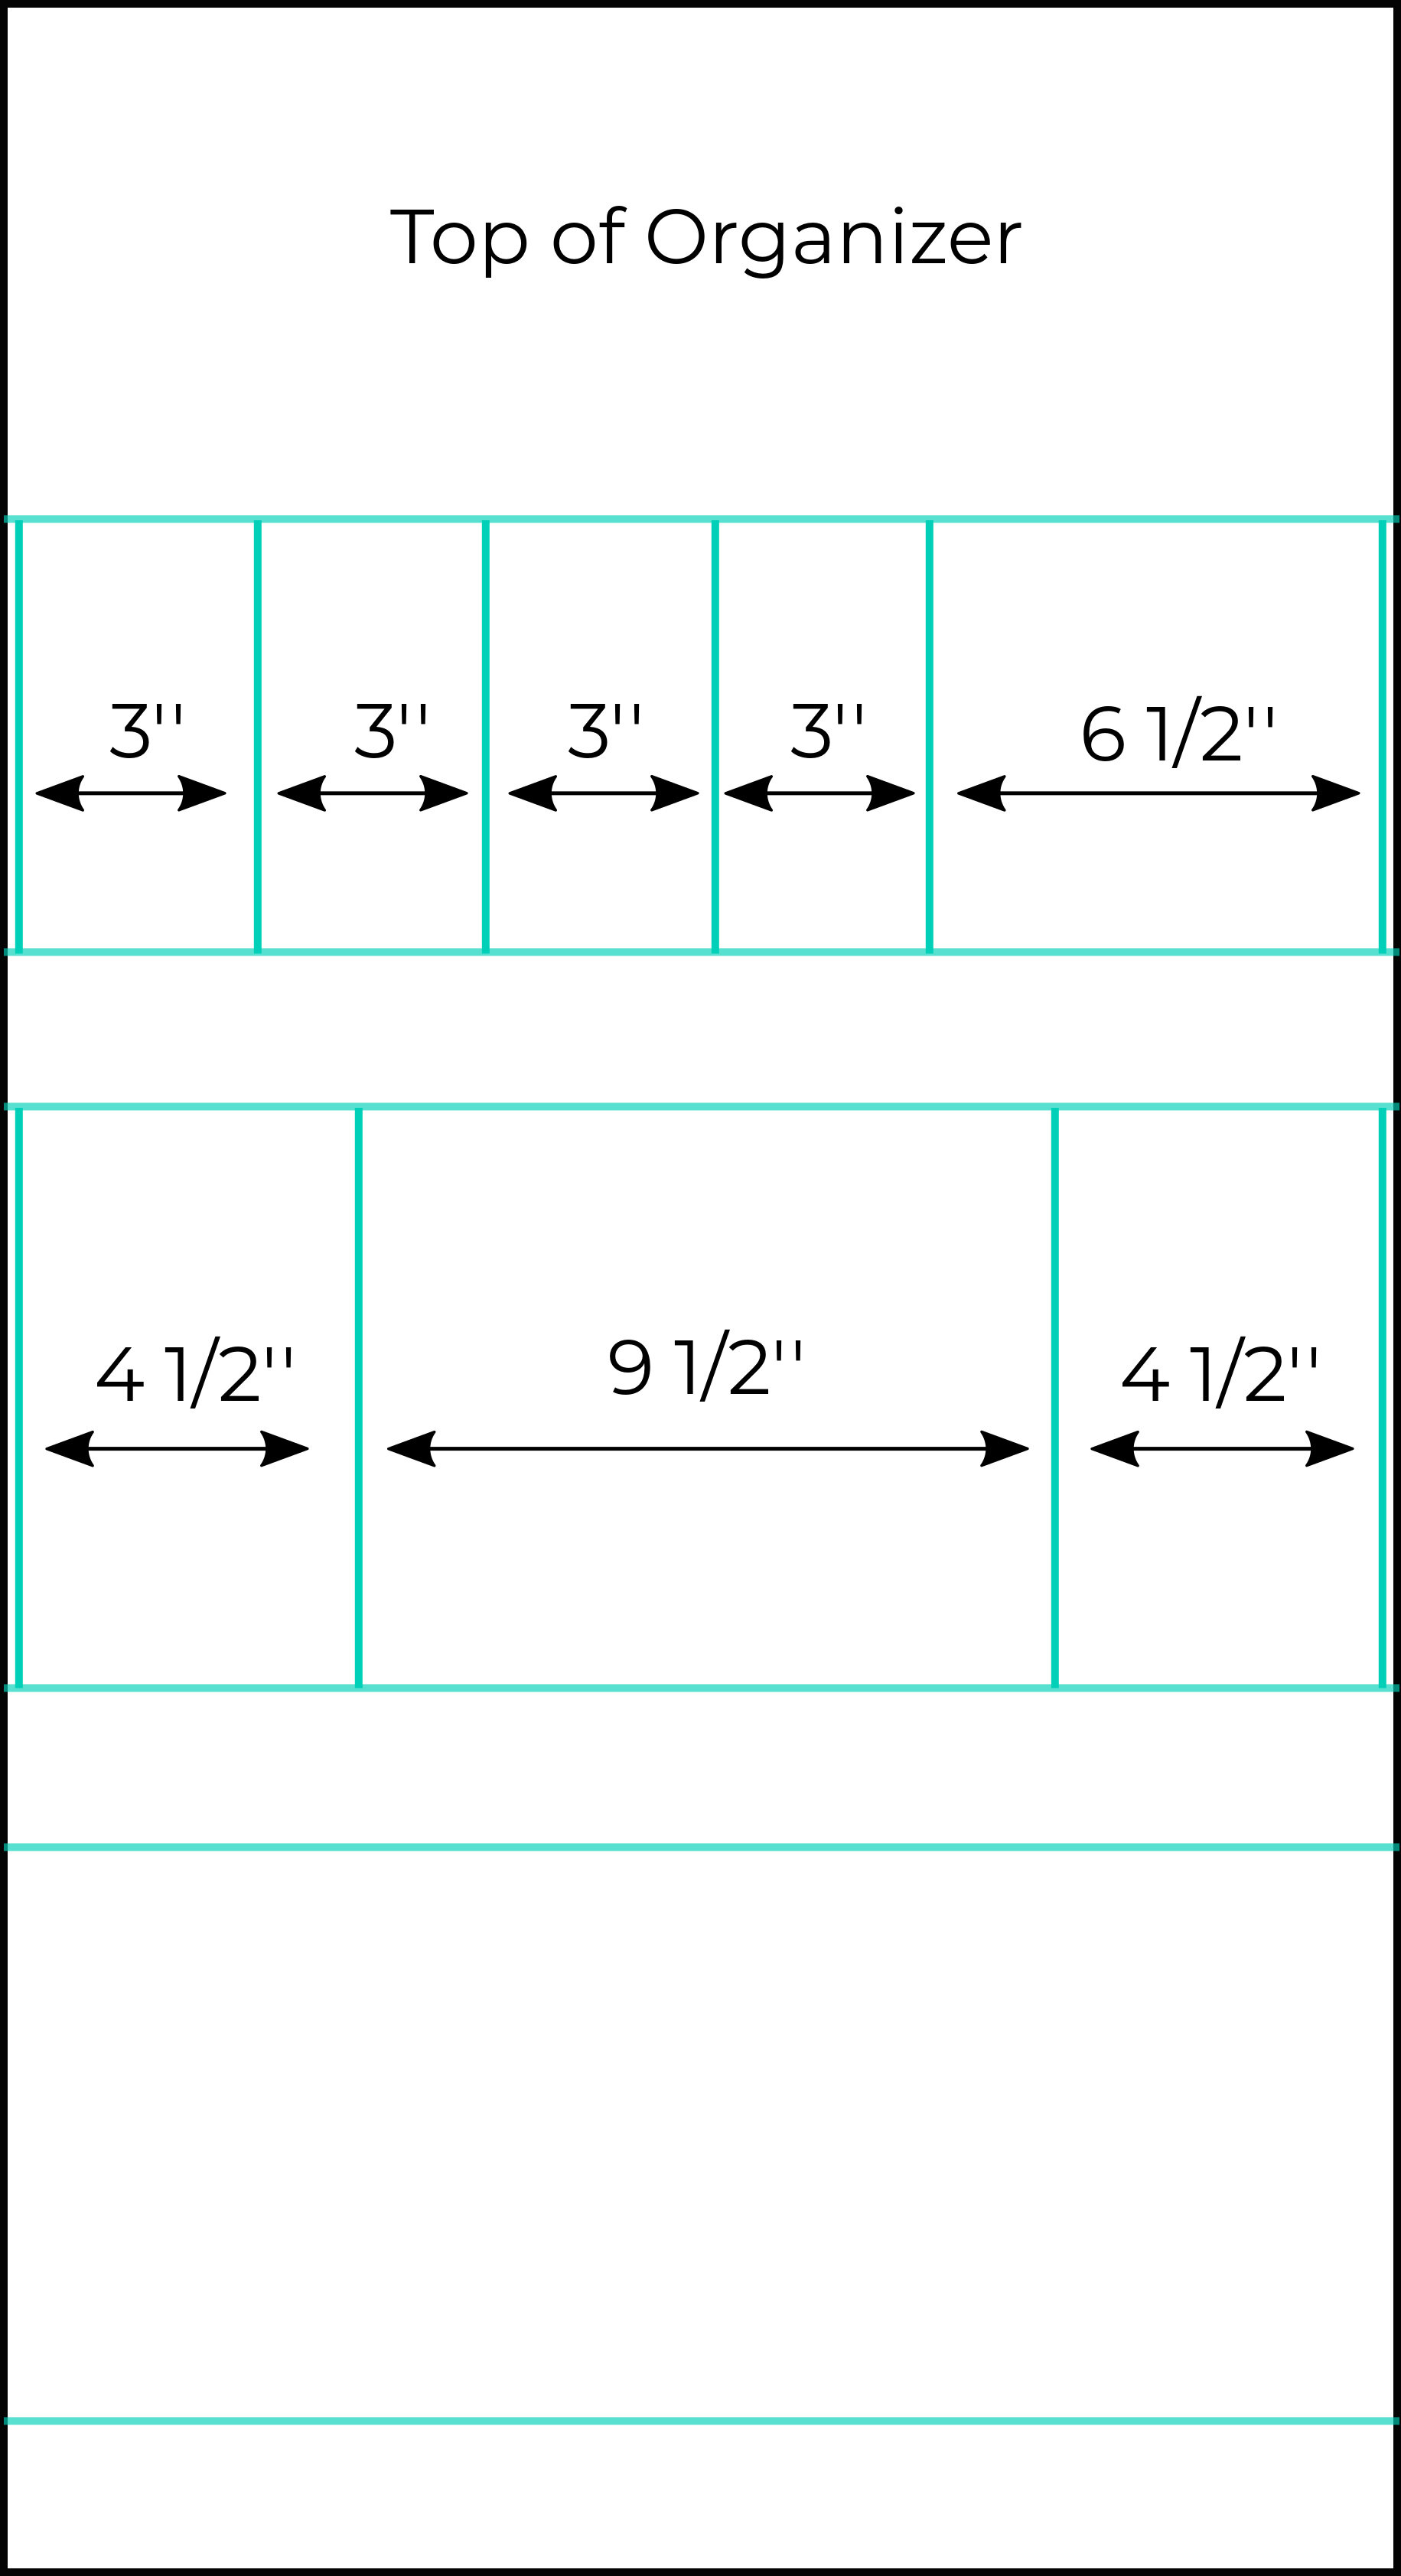
2. Pocket 1 does not have any dividing lines, but Pockets 2 and 3 do.
In the space for Pocket 2, draw vertical lines 1/4’’ away from the side edges of the fabric. Then draw 2 more vertical lines to divide the pocket into 3 sections as seen above.
In the space for Pocket 3, draw vertical lines 1/4’’ away from the side edges of the fabric. Then draw 4 more vertical lines to divide the pocket into 5 sections as seen above.

Mark the Back of the Organizer
Use a fabric marker and the diagram above to draw 3 pocket placement rectangles on the right side of the remaining 35’’ x 19’’ rectangle of fabric that will be the organizer exterior:
-
Pocket 4 is 20’’ tall and 7’’ wide and is placed on the bottom edge of the fabric, 1 1/2’’ away from the right edge.
-
Pocket 5 is 10’’ tall and 7’’ wide and is on the bottom edge of the fabric and 1 1/2’’ away from the left edge
-
Pockets 4 and 5 should be 3’’ apart.
-
Pocket 6 is 9’’ tall and 7’’ wide and 4’’ above Pocket 5. It is also 1 1/2’’ away from the left edge of the fabric.
Sew a Welt Zipper on the Back of the Organizer
See my Welt Zipper Pocket Tutorial for more information.
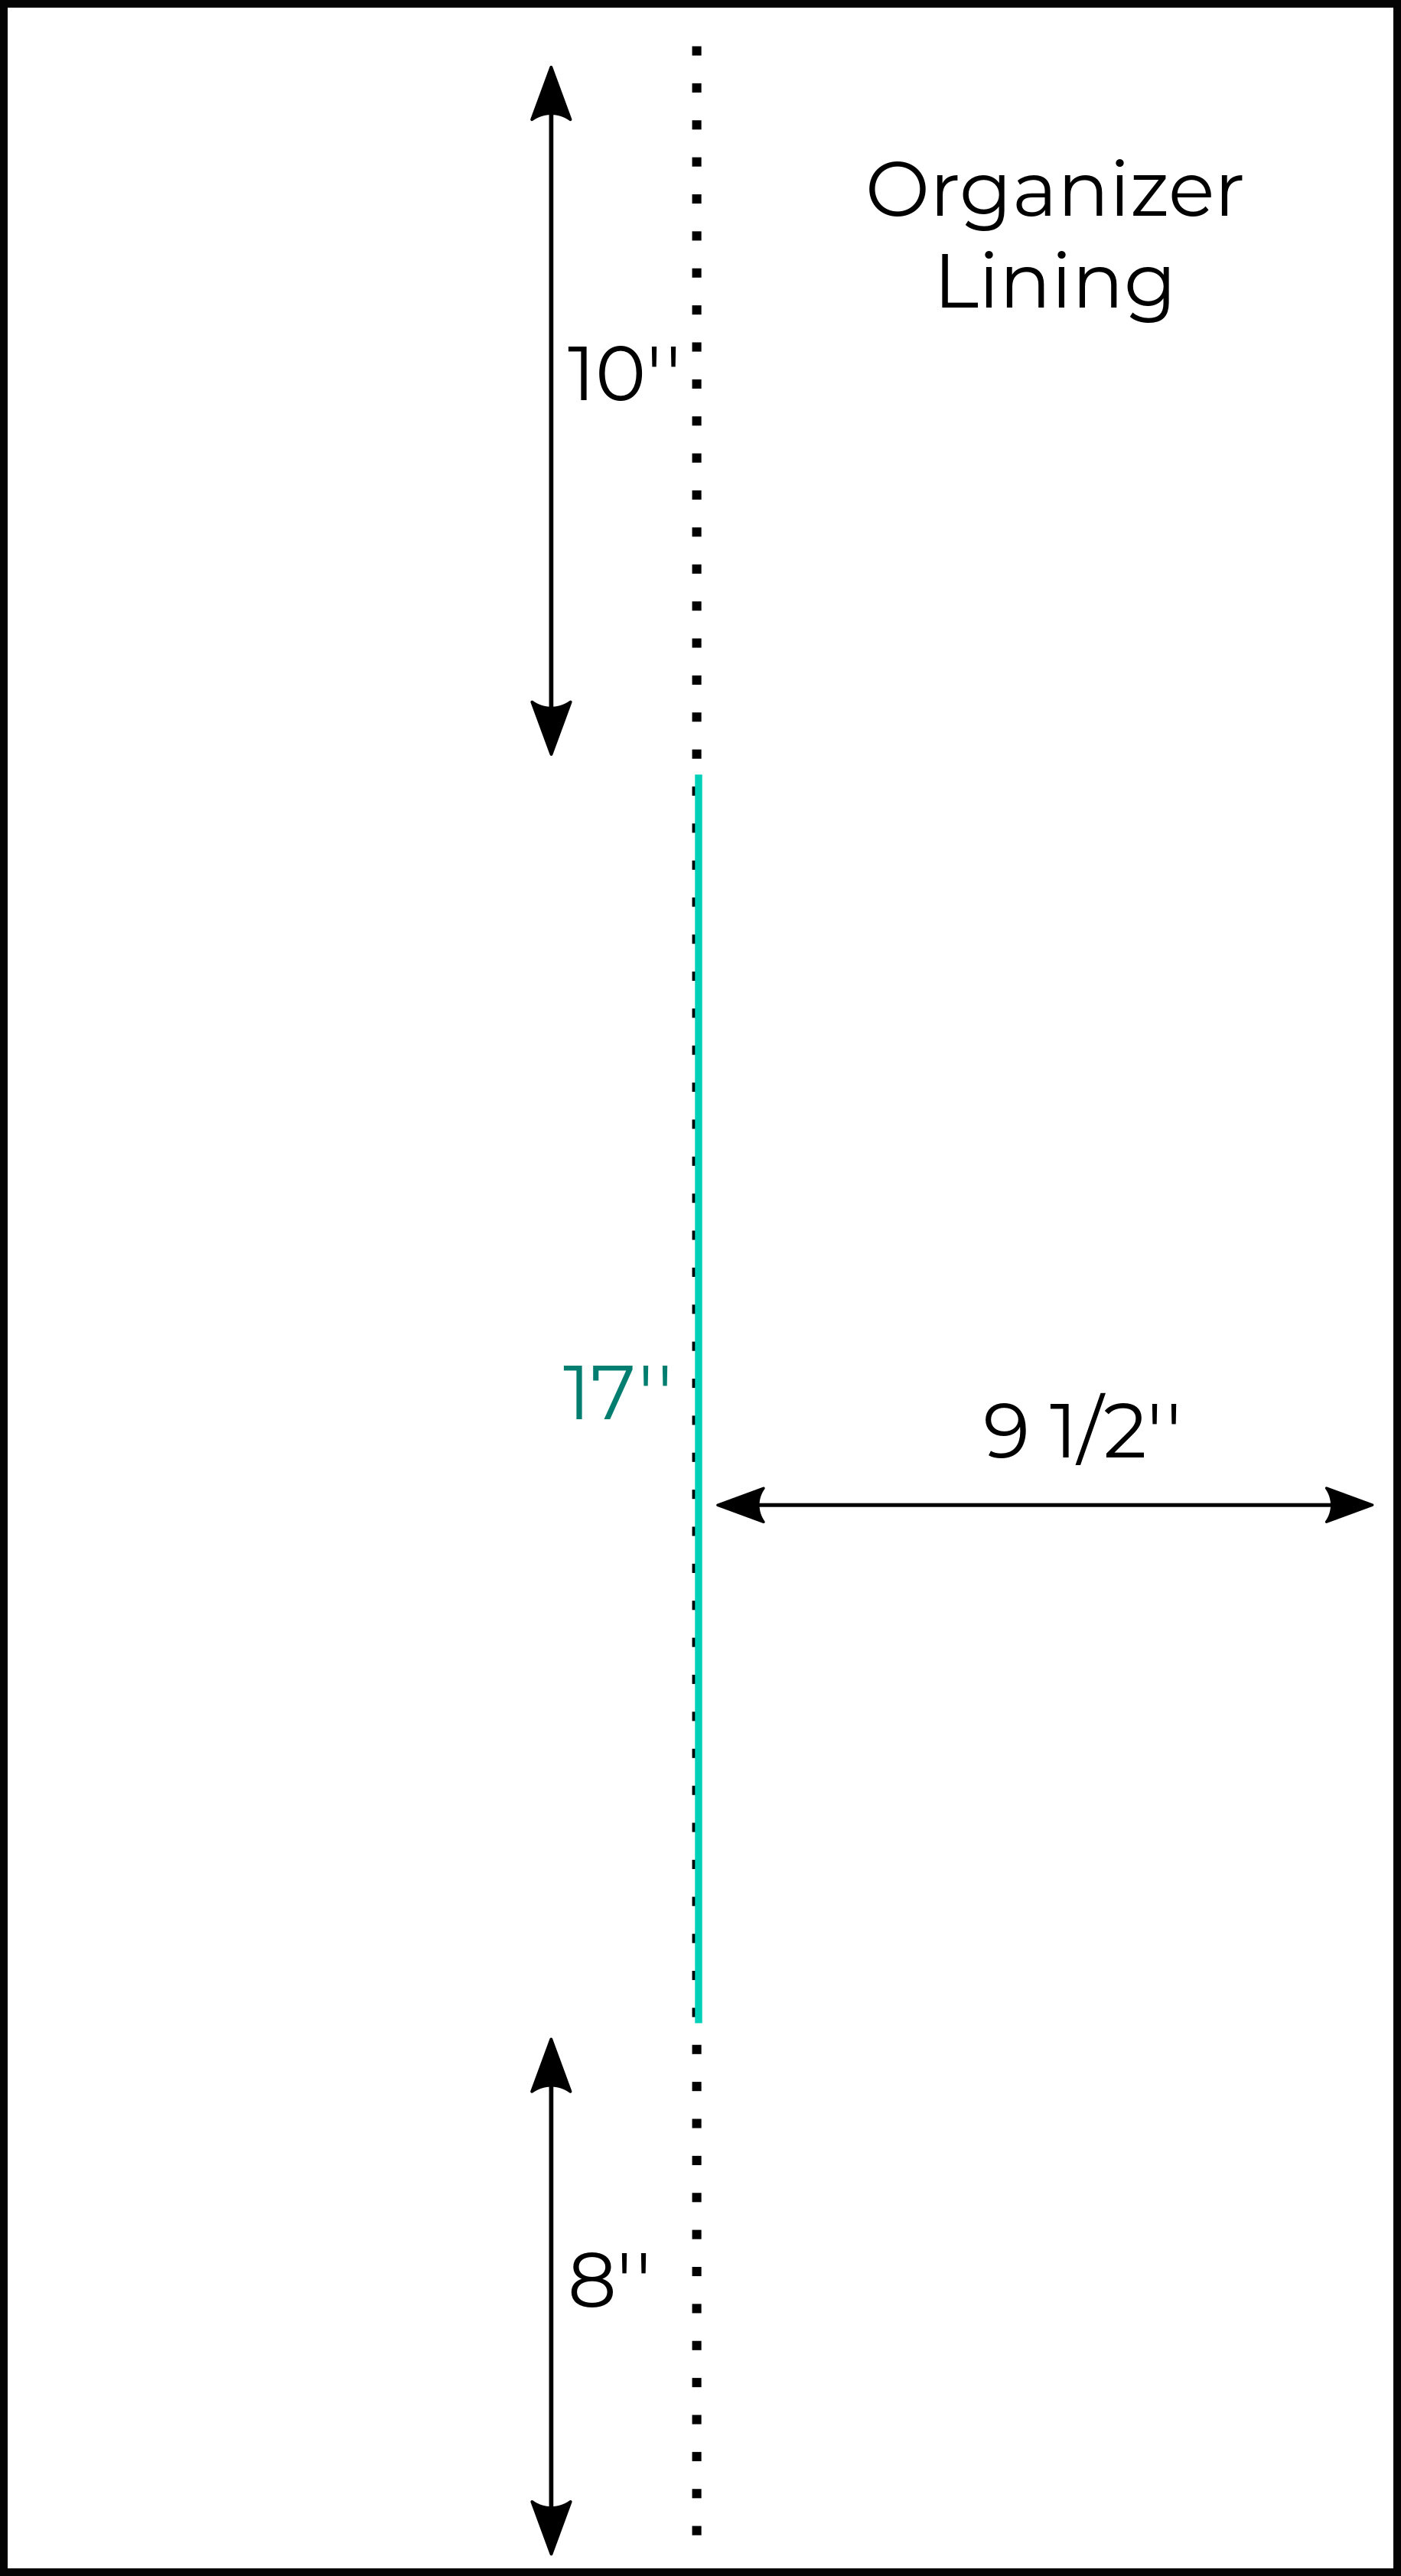
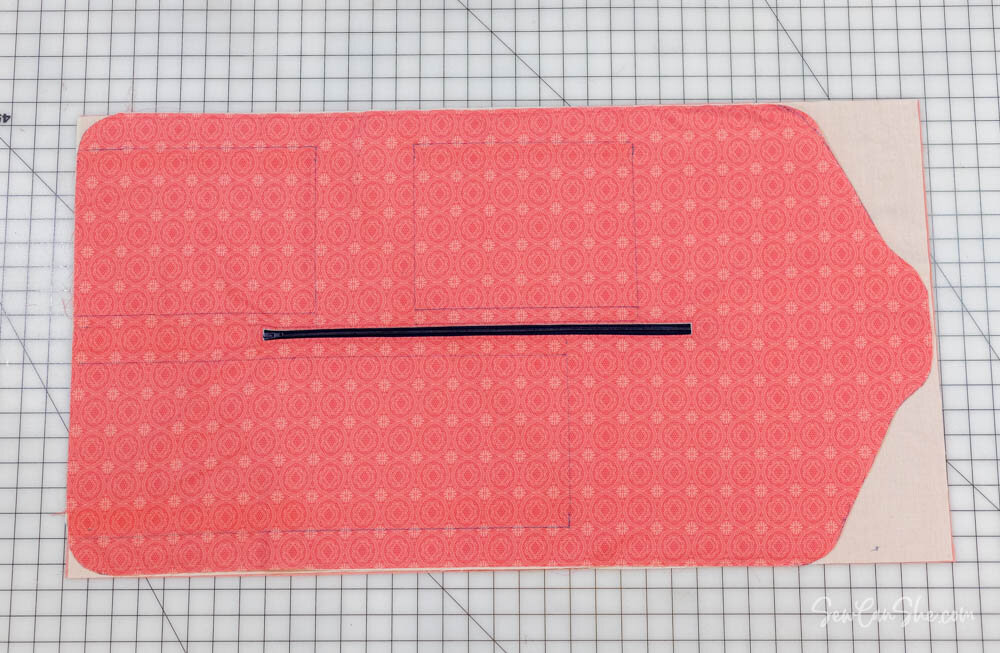
1. Fold one of the 35’’ x 19’’ lining pieces in half lengthwise and press a long vertical crease down the middle of the fabric (indicated by the dotted line in the diagram).
Use a fabric marker to draw a 17’’ vertical line along the center crease on the wrong side of the fabric. The line should be 8’’ above the bottom edge of the fabric and 10’’ below the top edge of the fabric.

2. Draw a 1/2’’ wide by 17 1/2’’ tall rectangle around the vertical line (this rectangle should be 1/4’’ away from the line on all sides).
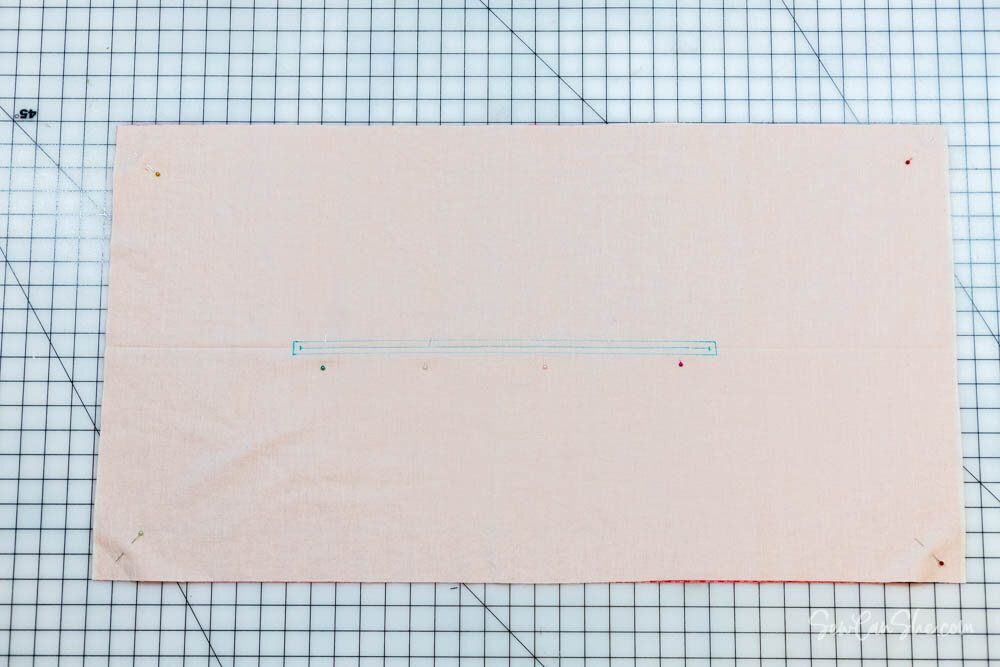
3. Pin the lining piece that you just marked right sides together with the exterior back piece that has 3 pocket markings. Make sure that the pieces are lined up properly (especially that the lining piece is not upside down against the exterior).
Place pins all along the rectangle and line that you drew and in the corners of the fabric pieces.
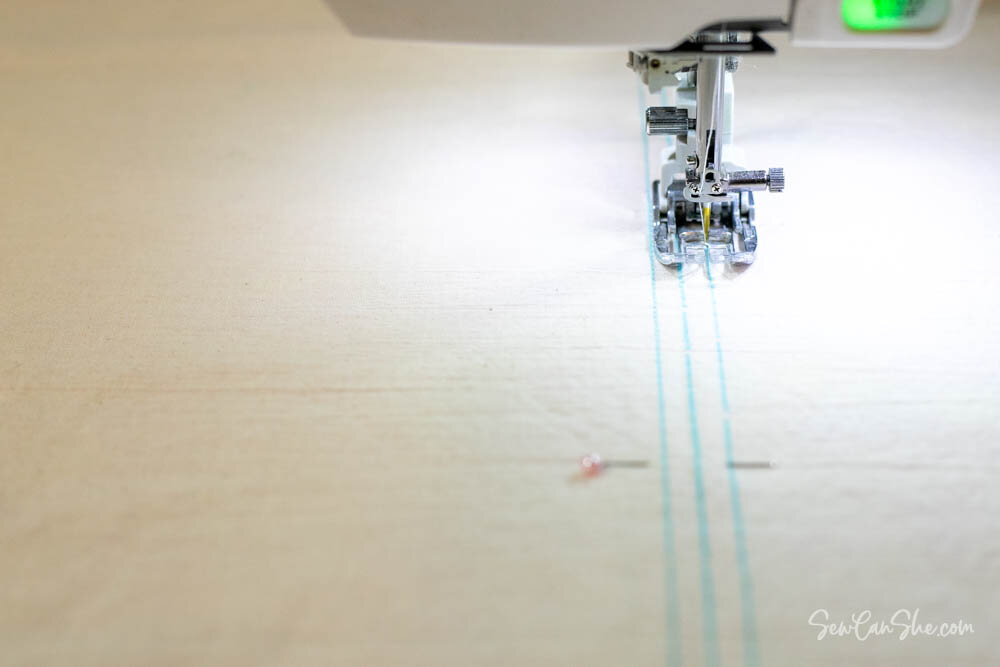
4. Sew along the 1/2’’ x 17 1/2’’ rectangle, right on top of the lines that you drew, all the way around..
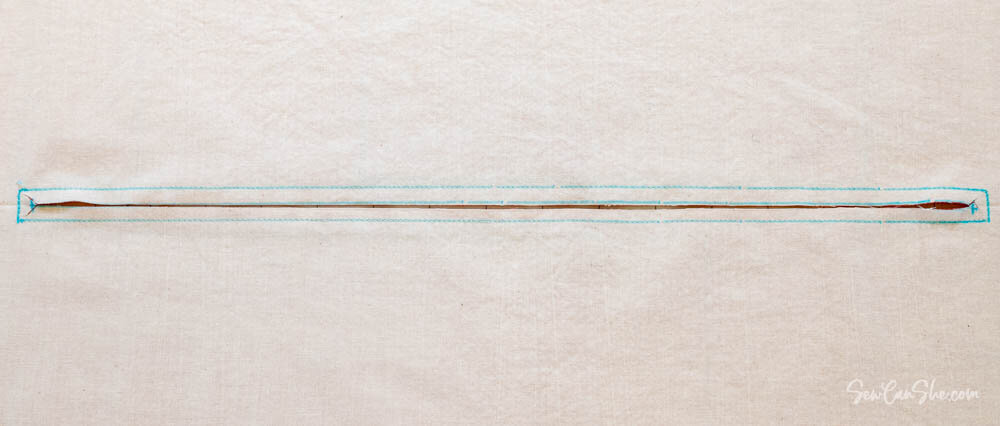
5. Using scissors or a rotary cutter, cut along the entire length of the 17’’ line. Then cut short clips to the corners of the rectangle.
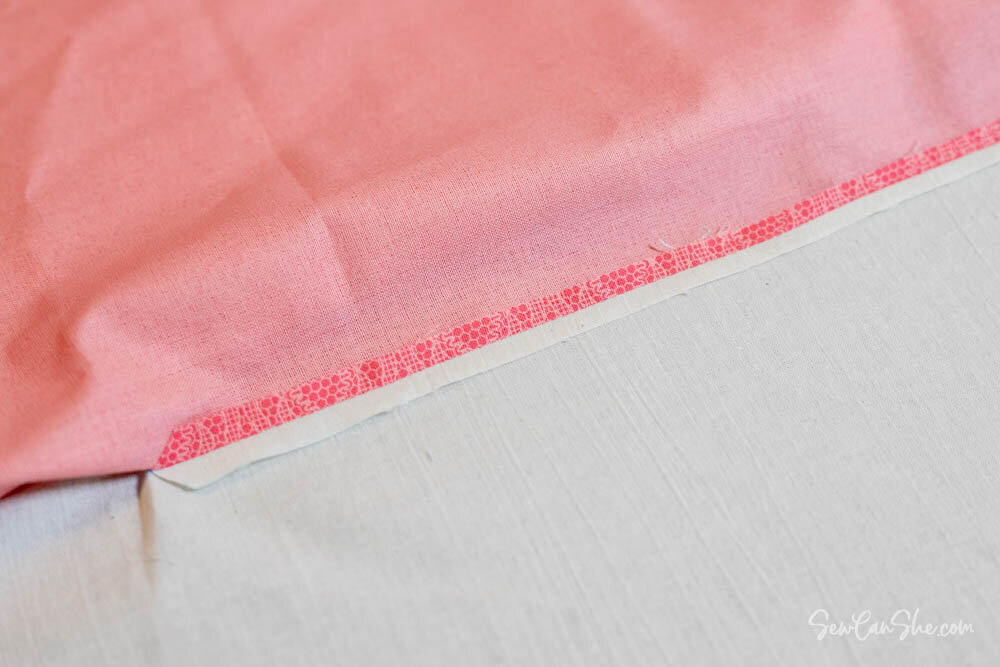
6. Turn the back piece right side out by pushing the lining through the cut opening to the other side.
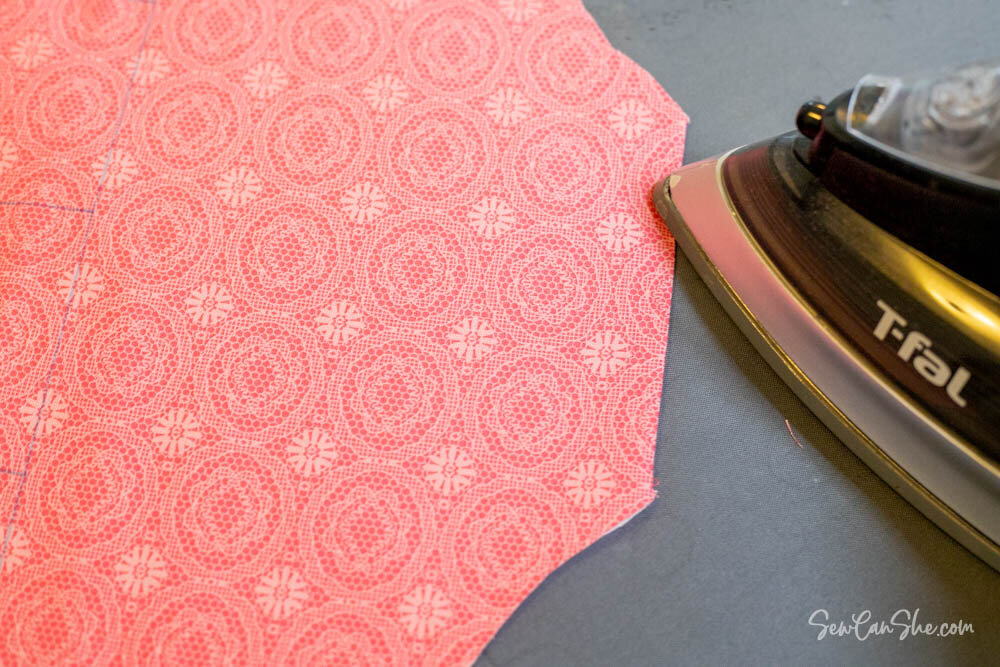
Tip: To make nice straight edges at the opening, press the long seams open.

Then carefully press the opening flat.

7. Center the zipper under the opening, with the top of the zipper and the exterior piece facing up. Make sure that the zipper slider is showing through the opening.
Use pins all the way around the opening to hold the zipper in place.
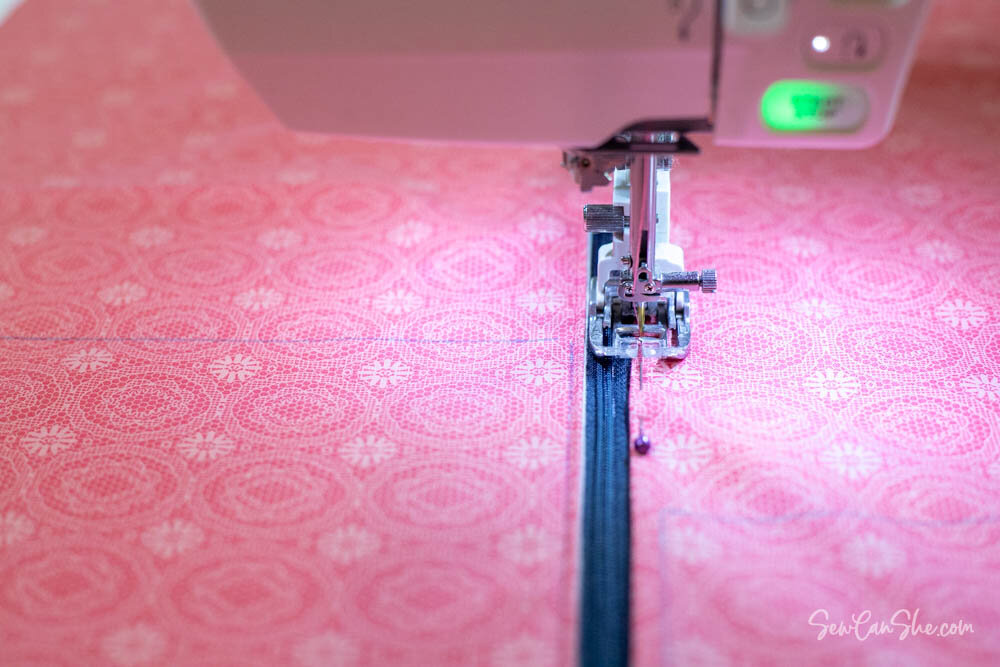
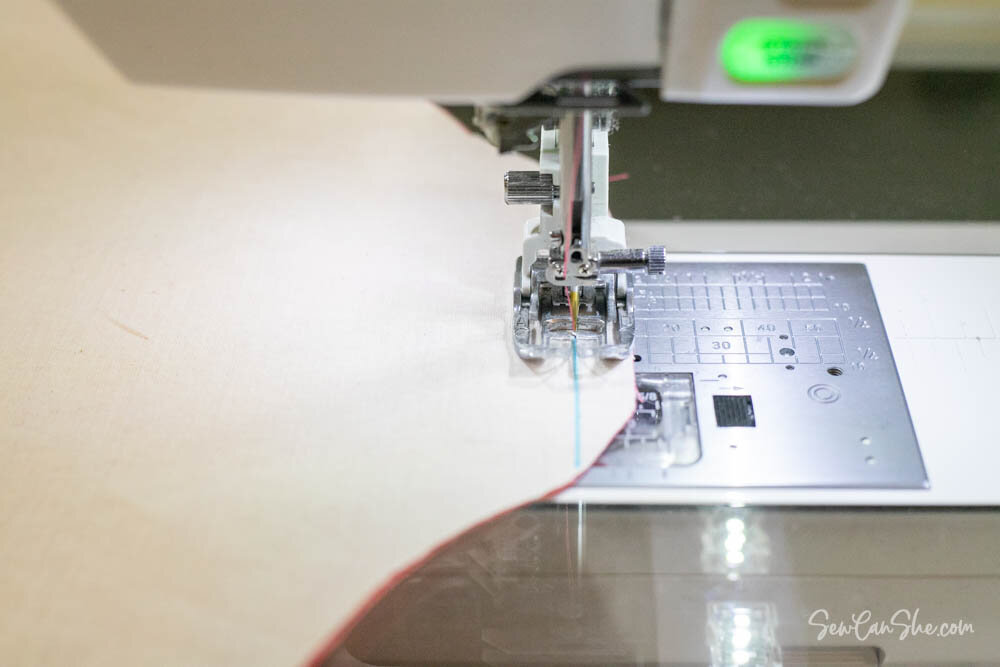
8. Topstitch around the zipper 1/8’’ away from the edges of the opening.

9. Pin the edges of the exterior and lining pieces together. Baste around the edge with a 1/4’’ seam allowance to secure.

Cut the Large Pieces to the Right Shape
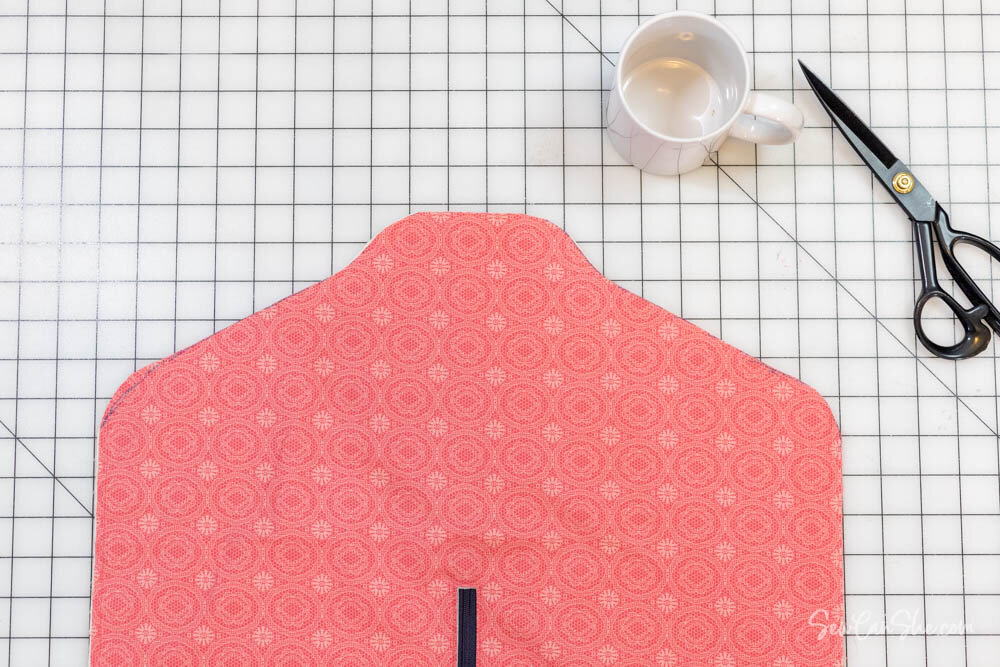
1. On the back piece (the one with a zipper) Use a coffee mug (or the Creative grids curved corner ruler – 1 1/2’’ radius corner) to mark and then cut curves at the bottom corners.
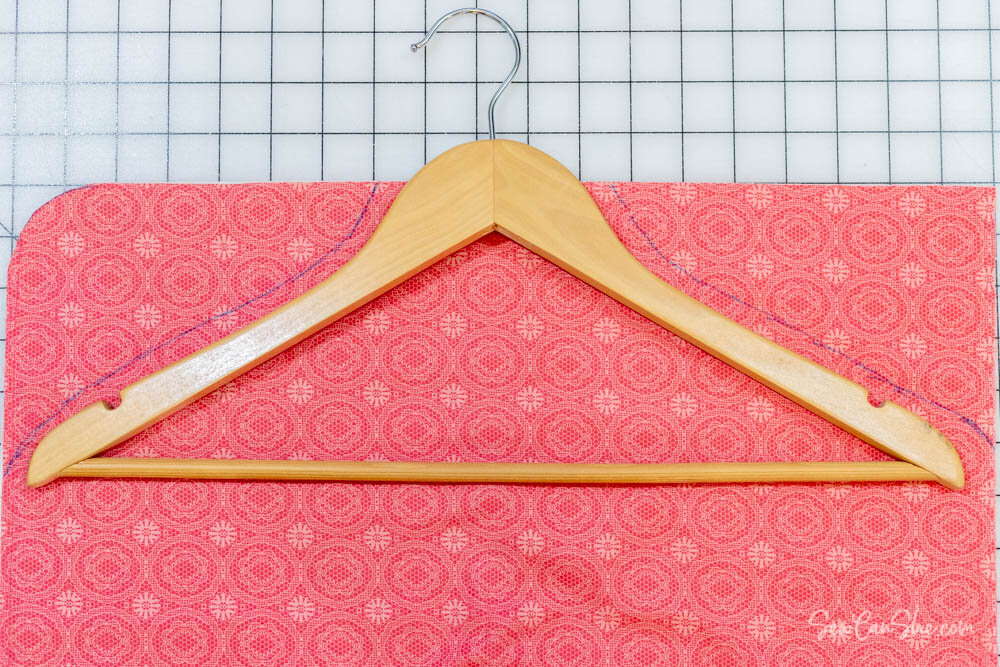
2. Lay a sturdy coat hanger at the top of the back piece with the top (wooden) part of the hanger sticking up about 1/2’’ past the top edge of the fabric.
Use the fabric marker to trace about 1/2’’ above the top edge of the hanger. At the sides, extend the lines to the side edges of the fabric.
Note: I accidentally curved the top left edge above using the coffee mug method. Your piece hopefully doesn’t look like that – but if you made the same mistake, no big deal!

3. Cut the top edge along the lines that you drew.
Tip: To make both sides symmetrical, fold the rectangle in half lengthwise and cut along the line that looks best.
Use the coffee cup method to make all of the corners smooth curves. Baste the layers together again everywhere that you cut.

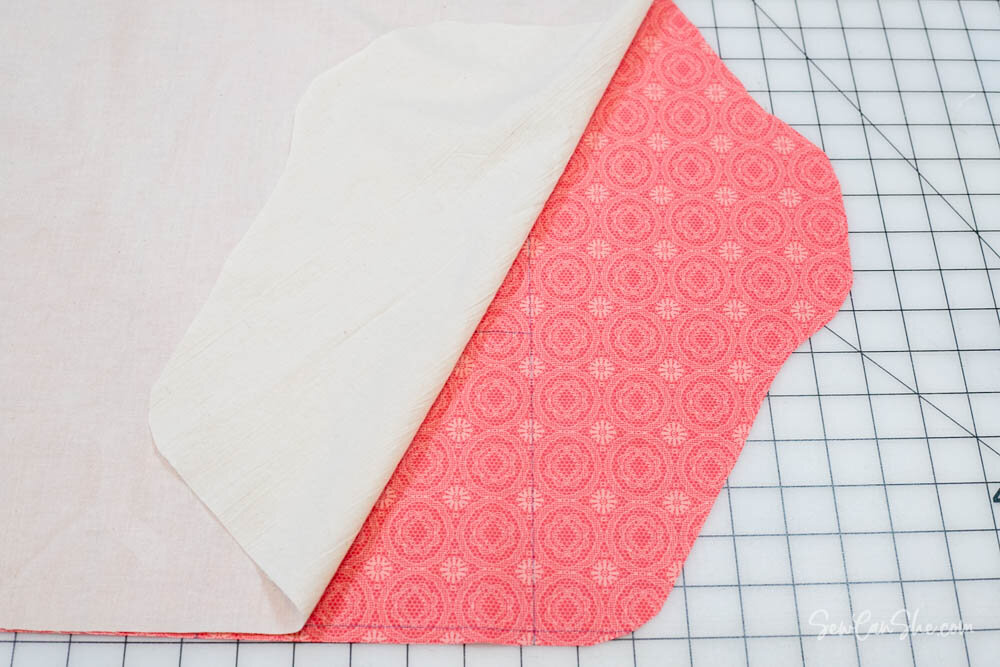
4. Place the remaining lining piece and front exterior piece wrong sides together. Pin at the corners if needed. Lay the pieces together on your workspace with the lining side up.
5. Place the back of the organizer on top, lining side down so that the lining pieces are right sides together.
Make sure that the pieces are lined up properly – that the top ends of each one are right sides together and the bottom ends are right sides together.

6. Cut around the back pieces so that the front and back are the same shape. Be sure to trim at the top and bottom so they match exactly.
Sew the Top of the Closet Organizer Front
1. Separate the layers and then place the organizer front and its matching lining piece right sides together.
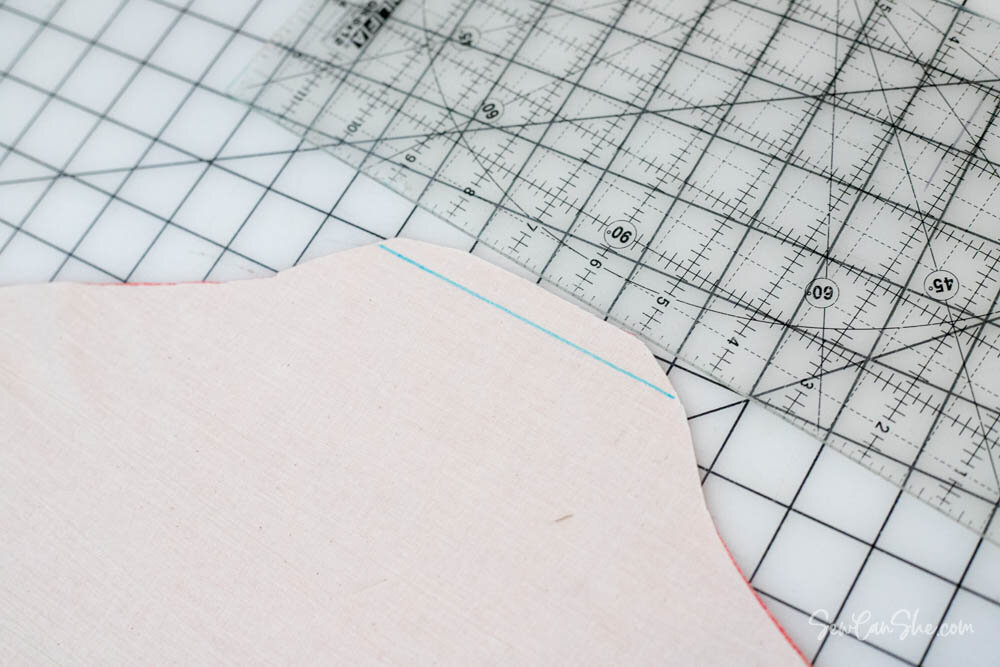
2. Use a ruler to draw a straight line 1/2’’ below the top edge.
3. Sew across the line that you drew.
4. Press the seam open. Turn the lining and front exterior pieces with wrong sides facing. Press the seam flat.
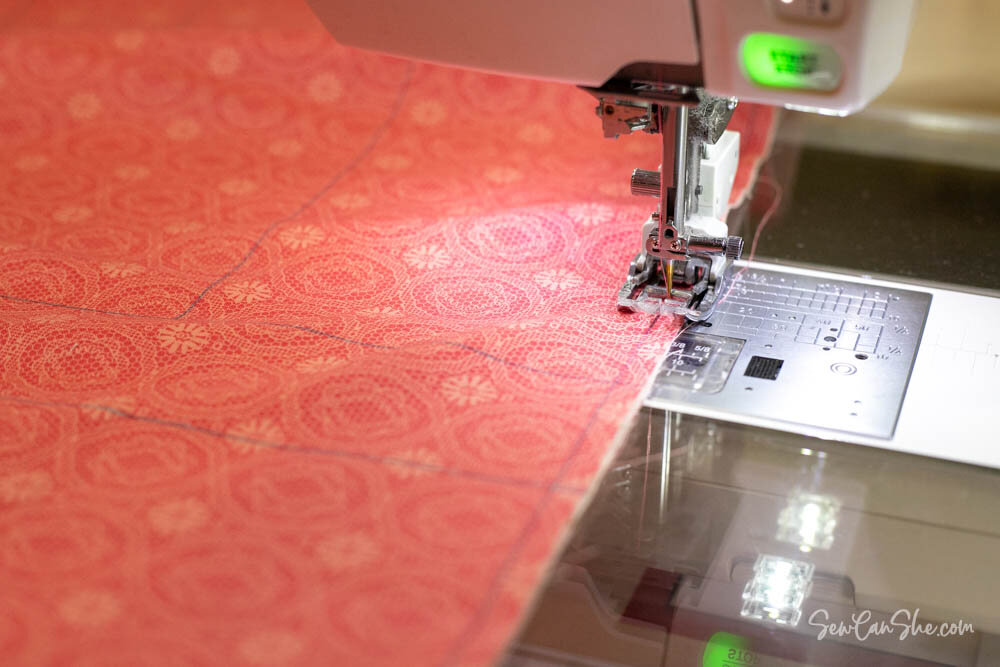
On the front, topstitch across the seam, 1/8’’ from the edge.
5. Pin the edges together. Baste around the front piece with a 1/4’’ seam allowance to secure.

This is a really long sewing tutorial! The blog post might take too long to load on some computers, so I have split it into two parts.
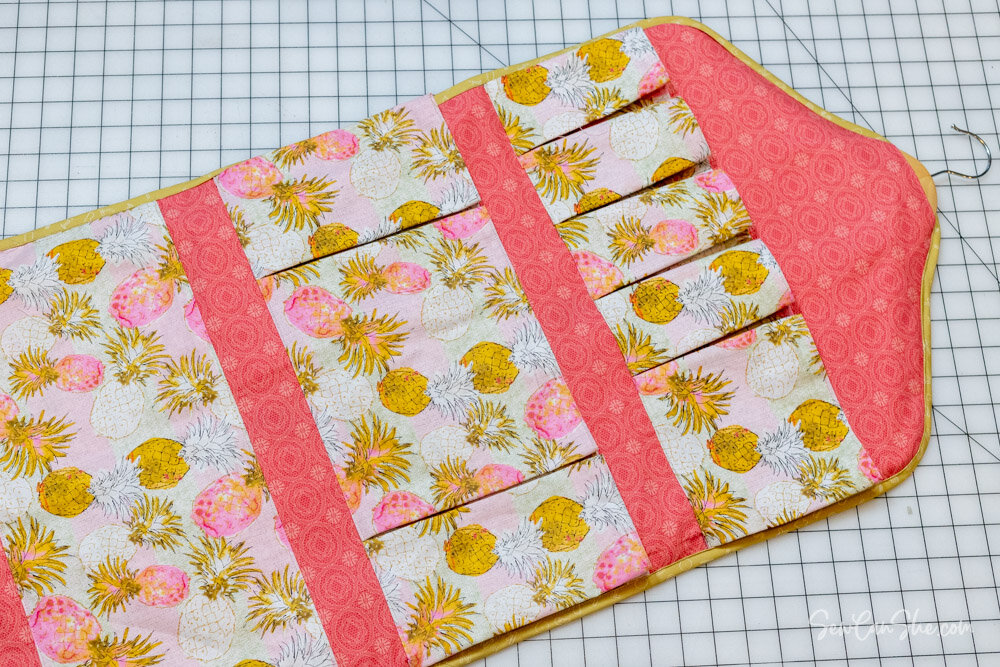
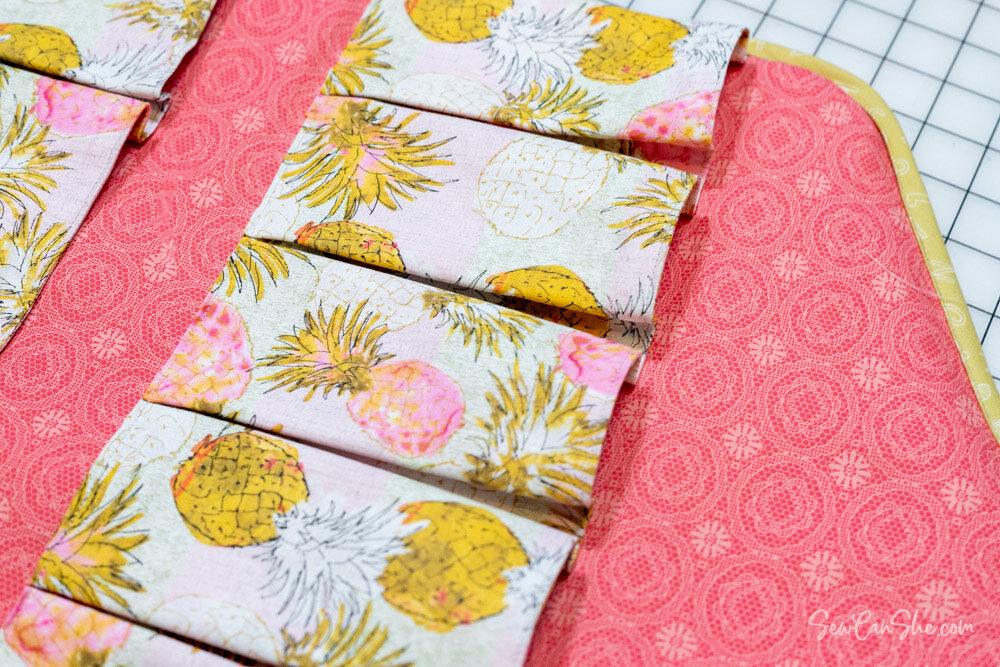
Here is Part 2 of our Closet Organizer Sewing Pattern. It’s where I show you how to sew the pockets!
Don’t forget that I also prepared the entire closet organizer sewing pattern in one PDF document that has been optimized for printing.
See you over at Part 2!
xoxo,

The post Closet Organizer Sewing Pattern with lots of pockets – Free appeared first on SewCanShe Free Sewing Patterns for Beginners.