
This adorable lemon & magnolia DIY spring wreath is easy to make and will look beautiful on your front door!
Can you believe that this is the third home we’ve owned and it’s the very first time we’ve ever had a front porch large enough to actually decorate?!
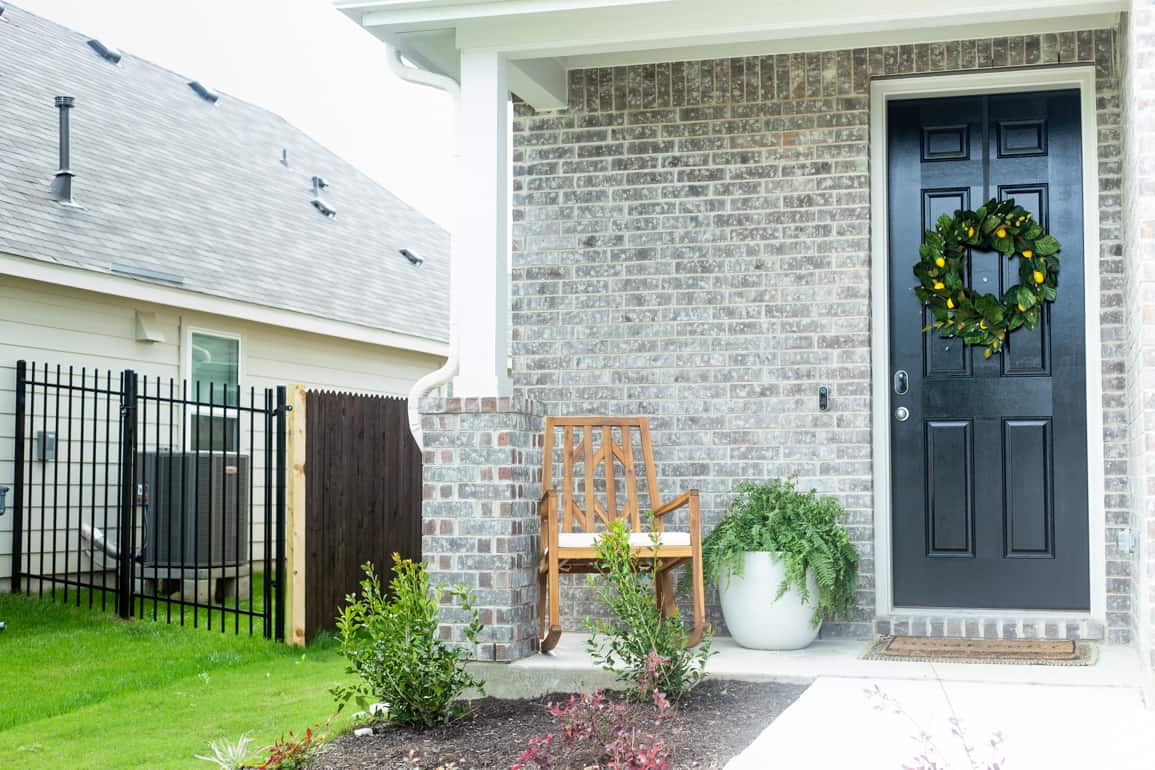
Our porch is still pretty small (no big, sprawling porch swing for me!), but it’s honestly just so so exciting to have anything I can decorate for the season and now that the weather is warming up I’ve been itching to get out there and spruce ours up a bit!
There’s just something about coming home to a really cozy and welcoming view on our front porch that makes this house feel even more like home.
Let’s start all the way at the beginning. Here’s a view of what our front porch looked like a few weeks ago before I got started:

It wasn’t awful, but it was boring.
On my to-do list was adding some seating, a bit plant, a cute wreath for the door, and painting the front door (because the brown was not working for me).
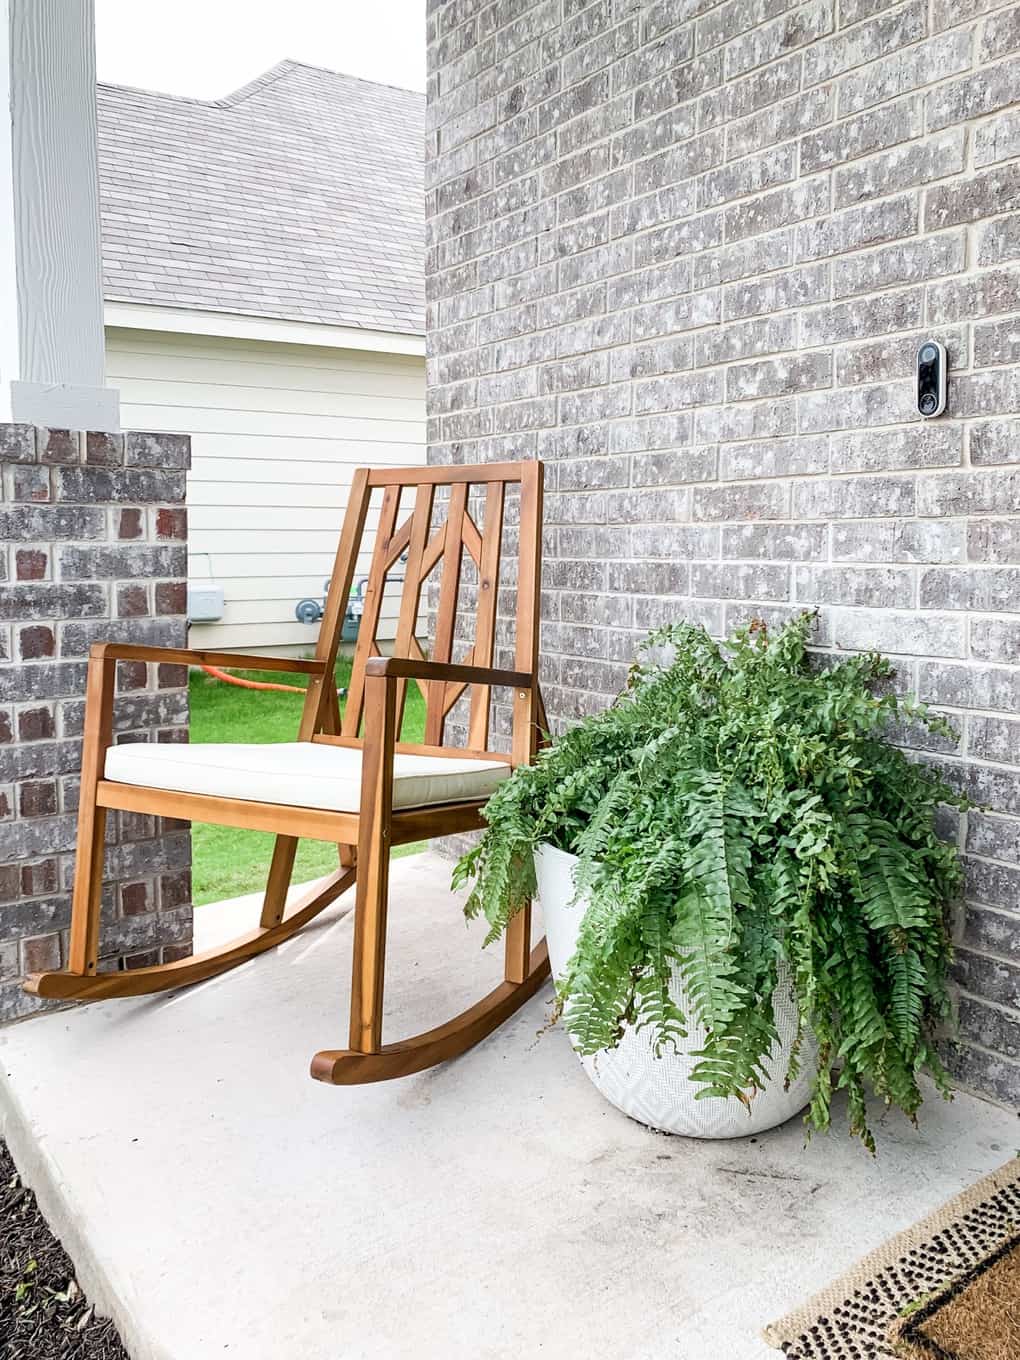
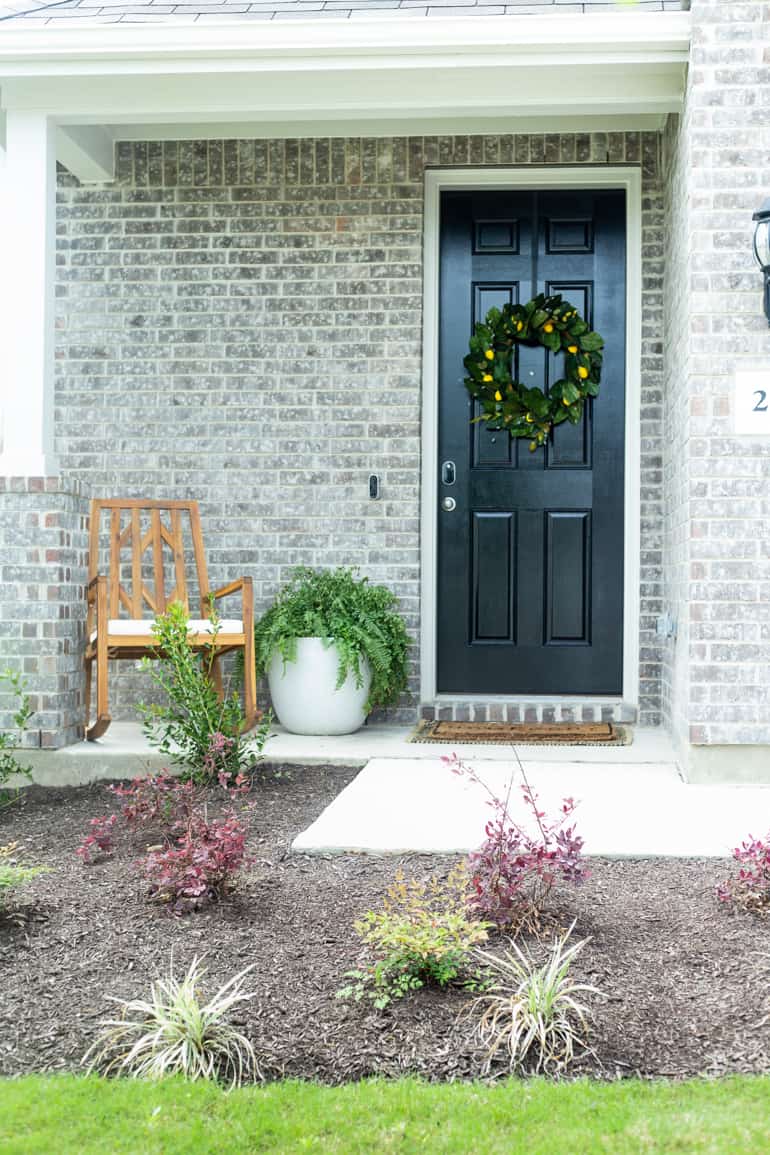
front porch rocker + our big fern
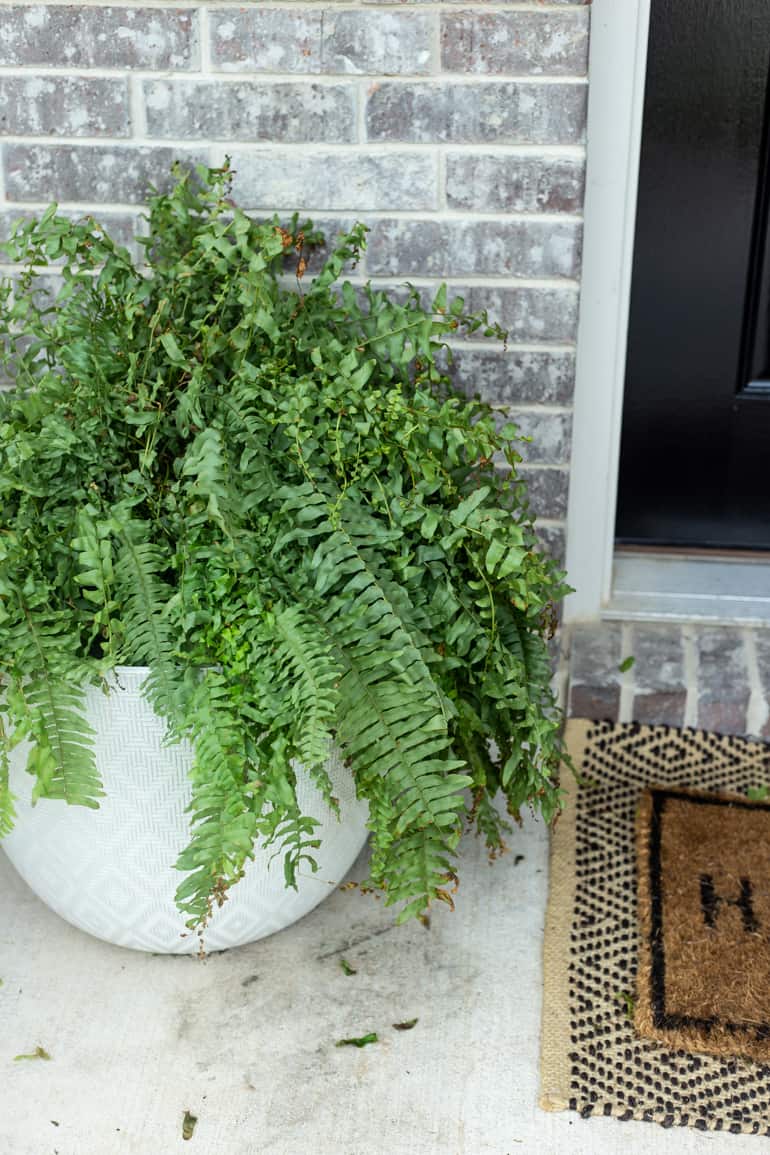
I’m not sure why, but probably the most important part of our front porch refresh for me was adding the biggest plant I could possibly fit. A giant fern on a front porch just feels cozy, right?!
I found this planter and immediately snatched it up because it’s almost impossible to find a planter this big for that cheap. Rather than filling the entire thing with dirt (which felt like a huge waste and would make it so heavy!), I grabbed a large planter that I wasn’t using and placed it upside down in the bottom of the planter. Then, I filled the space around it with some packing materials to pad the bottom a bit more – now, the new “bottom” of the planter was much higher and I wouldn’t need to use nearly as much dirt!
I really wanted to add a hanging swing of some sort on the porch, but there just isn’t much room so I compromised and got this little rocking chair. It’s really cute and comfortable, and Grant shouts “rock, rock!” every time he sees it, which feels like a win. The boys love hanging out in it and it’s the perfect place for me to sit while they’re playing in the front yard.
Which, if I’m being honest, doesn’t happen all that often. But maybe it’s just because we’ve never had a rocking chair up there before?!
Regardless of how often it gets used, it looks pretty dang cute and that’s enough for me.
I also added this adorable (and super thick) welcome mat that I found at Magnolia last time I was there, and I layered it on top of this cute rug. I love the look of a layered mat, and this combo legitimately makes me smile every time I come home.
painting the front door
Next up, I painted the front door. It started off dark brown and I painted it black, so it wasn’t a huge difference but oh my goodness does it ever make me happy.
For painting our door, I decided to go with a product I’ve never used before – Rust-Oleum’s Front Door Paint. I spotted it when I was browsing online for paint and I figured it had to be worth a shot. I was seriously impressed with how smooth the finish was and how great it covered – it only took one coat and I was able to paint both my front and back doors with one can.
When you’re painting a front door, you generally want to start by painting the recessed part of the panels, then the raised panels, then paint across the middle, and finish with the vertical parts. It’s the easiest order to work in and is the most likely order to help you avoid obnoxious brush strokes or streaks!

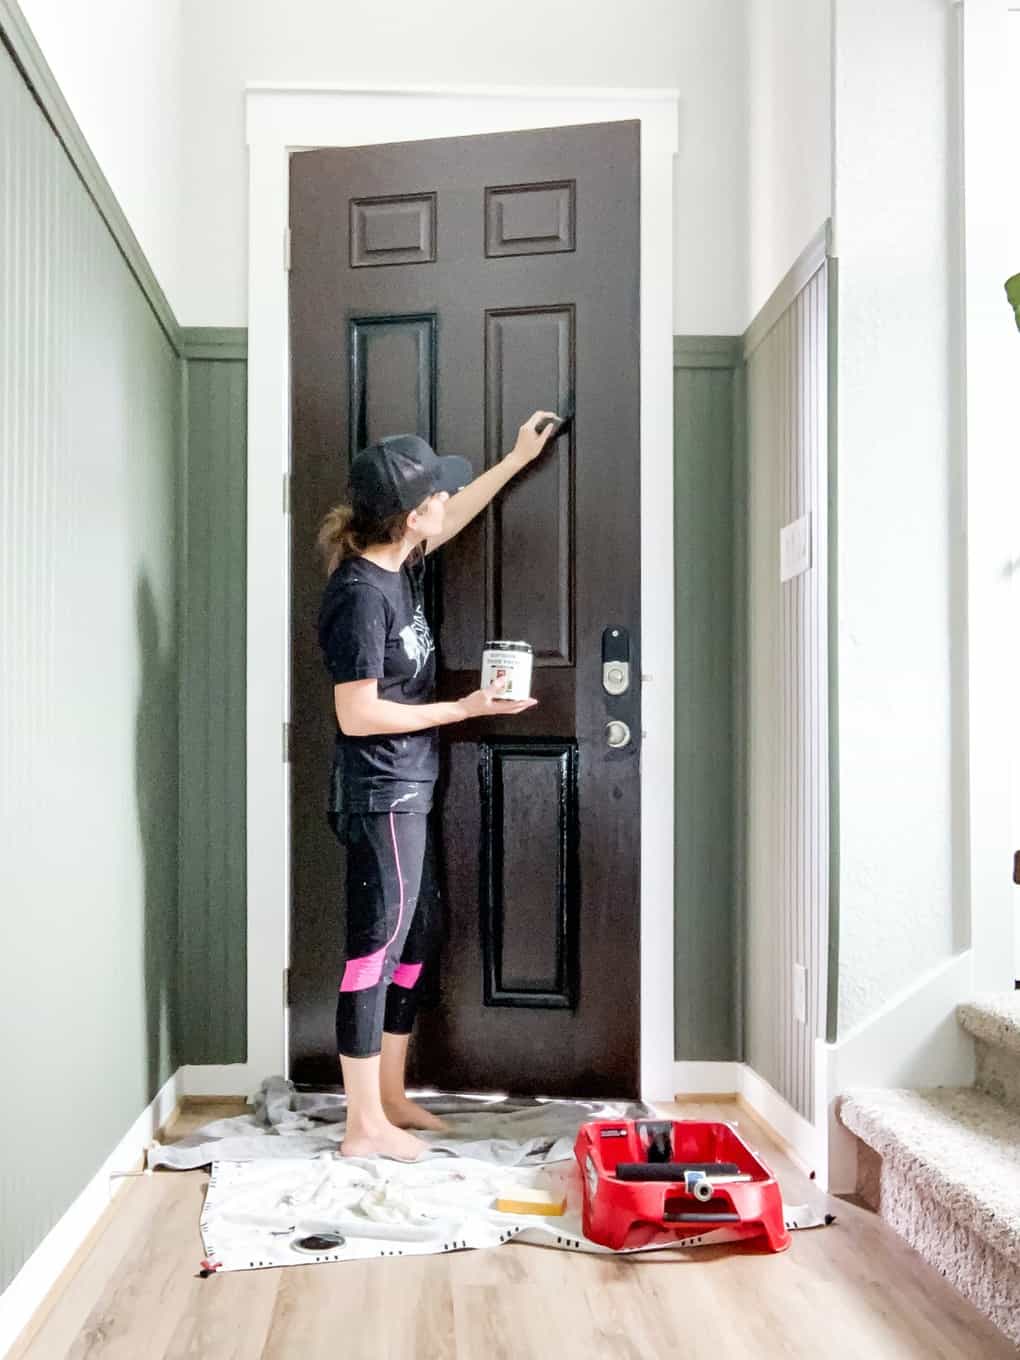
As far as materials, I like to use a high-quality 2″ angled paint brush for all of the recessed panels and around the door handles, and then a foam roller for the rest of the door. With this combo of tools, there are no visible brush strokes at all on our doors!
You can (should?) tape off the door knob and the lock before you paint – I’m lazy and I didn’t, so there are a couple spots I had to scrape stray paint off. It’s no big deal, but you’ll safe yourself the annoyance if you aren’t lazy and just tape it off before you start.
Sometimes I just get a little antsy to get to work and forget to, you know, prep.
After I painted the front door, I left it cracked for about an hour (I would have preferred to do 2-3 hours, but Grant woke up from his nap so I had to close it). That seemed to be enough to allow the paint to dry fully, and we didn’t have any sticking issues.
I’ve painted a lot of doors in my time, and I can tell you with confidence that this paint was the best paint I’ve used for a door before. It’s definitely stinkier than regular paint (it smells exactly like spray paint!), so keep that in mind and maybe open a window or two.
Once my door was black (as it should be!), there was only one more piece left in the puzzle…
DIY Spring wreath
…a wreath, of course!
I ordered this 30″ magnolia wreath from Amazon as my base – it’s really beautiful and the leaves look so realistic! When it arrives, the leaves are all facing the back of the wreath and need to be fluffed – I found that just flipping them around was enough to get the wreath looking really nice and full.
I also ordered these cute little faux lemons to add to it. My original plan was to just add the lemons, but once I got to work I quickly realized that wasn’t going to be enough. So, I shopped my house for some floral stems and found a few that I wasn’t using anywhere else – honestly, any kind of stems will work but I love some flowy, organic-feeling stems for a front door wreath to help it feel a little less perfect and a little more wild.
You’ll also need a hot glue gun. I love this one, but watch out – it gets REALLY HOT.


There’s not much of an official tutorial here – the best part about making your own wreath is that there’s no wrong way to do it! I layered in one thing at a time and just moved it around a bit until I landed on an arrangement I liked.
I started by tucking in the leafy stems and arranging them out so that they were sticking out from the wreath (versus just laying on top of the magnolia leaves). Then, I took the other stem and layered it on top – I kept them next to the leaves for the most part, but a few were on their own. Once I had them laid out, I grabbed the lemons and spaced them out around the wreath too.
Once I was done arranging, it looked like this:

Again, there isn’t any specific method or technique I used for this – I just placed them and re-arranged them until I was happy with it.
Once I had an arrangement I liked, I grabbed my hot glue gun and glued them all into place! Whenever possible, try to glue to the base of the wreath and not to leaves (though, all of the lemons had to be glued directly to the magnolia leaves in order to be seen.
I used this adjustable-length wreath hanger to get it up on the door, and…

Done!
Let’s take a moment to review the before and after, shall we?

So, so good.
I’m so happy with how our little spring front porch refresh turned out, and it feels so good to come home to this. I still have a few things I want to change in our front yard (like adding some stones around the flower bed, for starters), but I think we’re doing okay in the curb appeal department for now!
shop the post
See something you love? Here are all of the sources for our front porch! Some items are similar to what I have – but, I linked all of the exact items in the body of the post!

Psst – Need more ideas for your small front porch? I’ve got you covered with this roundup of tons of ideas, and this tutorial for adorable welcome signs!
The post DIY Spring Wreath + Our Front Porch Refresh appeared first on Love & Renovations.